A phone photo can open on your device while an upload form rejects it. When the form requires JPG, create a JPG copy and keep the HEIC original for your photo library.
- The tested example
- Step 1: Open HEIC to JPG and keep the original container
- Step 2: Choose the genuine HEIC sample and wait for decoding
- Step 3: Read the finished JPG dimensions and size
- Step 4: Download the converted copy and check the picture
- Check the result
- Troubleshooting
- Background and practical details
- Example sources
TESTED WORKED EXAMPLE
What this session produced
A genuine HEIC fixture encoded from the licensed 1,600 × 1,065 lake photo converted to JPG at the same dimensions. The resulting file was 256.9 KB. This is a controlled converter example, not a test of every phone’s HEIC variant or HDR workflow.
The screenshots were captured from our working tools on October 6, 2026. Focus workspace is used to give the controls and preview more room. Captures show either the full workspace or the relevant panel; they are not recreated interface illustrations. Sizes and outcomes describe this sample, not a promised result for every image.
Follow the worked example, step by step
Read the settings and the result together. Keep an untouched source when a file is edited, and check the finished output before using it in another application. Each numbered step below includes a real screenshot of the corresponding workspace state. Use the full-size link when a control label is too small on your screen.
Step 1: Open HEIC to JPG and keep the original container
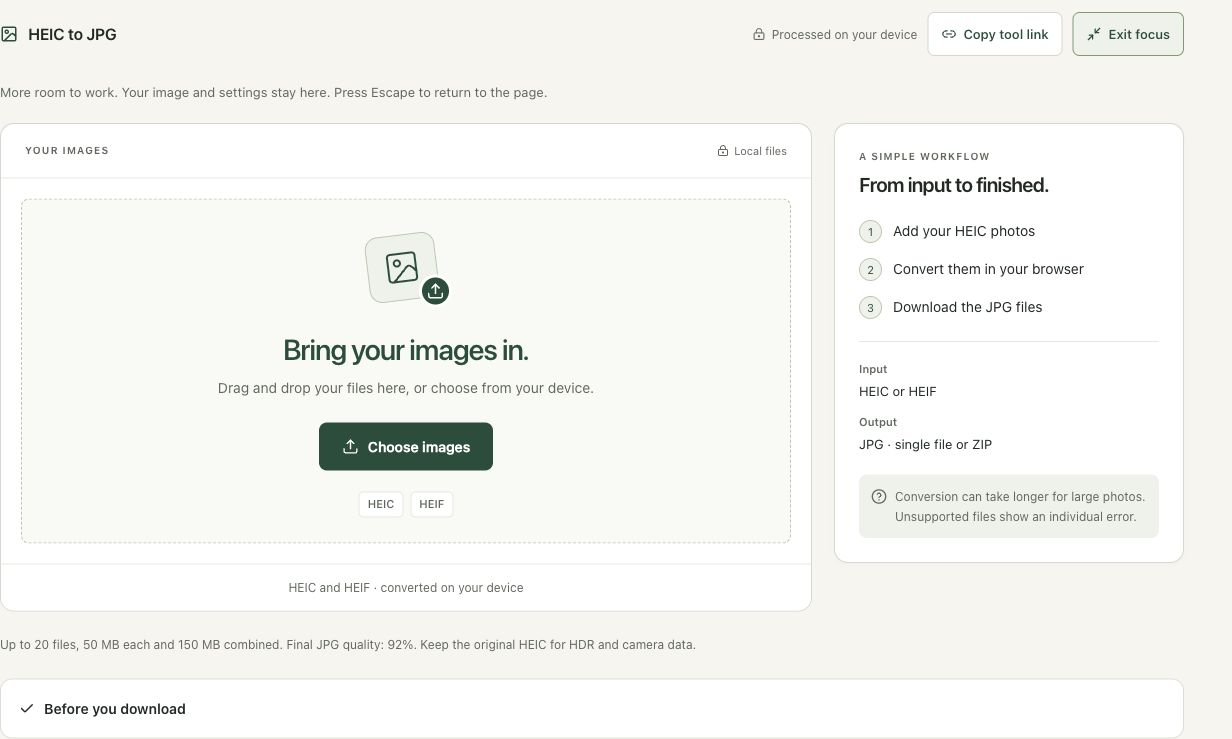
Open HEIC to JPG. Confirm that the source really is HEIC or HEIF rather than a JPG with a renamed extension. This workspace produces a compatible JPG copy at a fixed final quality of 92%. Keep the original file if you need its camera or HDR capabilities, and start with one photo before converting an important collection.
Step 2: Choose the genuine HEIC sample and wait for decoding
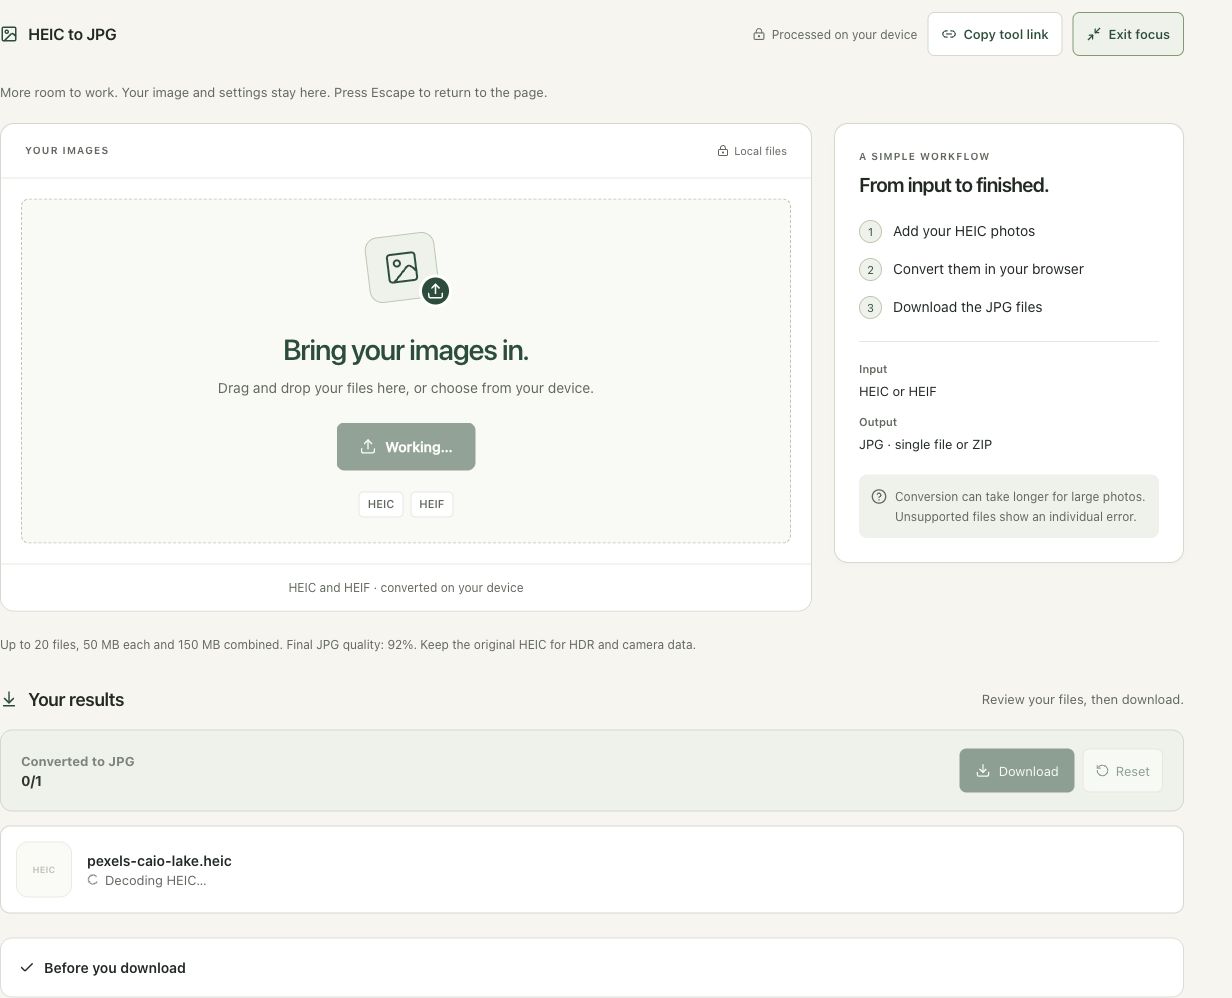
Choose the tutorial HEIC file. It was encoded from the licensed lake photograph specifically for this walkthrough. The screenshot shows Decoding HEIC, which is a real intermediate stage rather than a completed result. Keep the tab open. The browser must understand the container before it can encode an ordinary JPG copy.
Step 3: Read the finished JPG dimensions and size
Wait for Converted to JPG to show one completed file. The result reports 1,600 × 1,065 and 256.9 KB in this session. Read individual errors if using a batch. A success count less than the selected count means the collection needs attention before download; it should not be interpreted as all files having converted successfully.

Step 4: Download the converted copy and check the picture
Use the individual download control or the batch Download button. Open the JPG and inspect orientation, color and detail in the intended application. The screenshot focuses on the completed file row so the result remains readable. Keep the HEIC source beside the copy until you have verified the destination accepts the new format.

Check the result before using it
Open the downloaded JPG and confirm orientation, dimensions and accepted format. Keep the original HEIC when camera information, HDR or future editing matters. A compatible JPG sharing copy does not preserve every capability of the original container.
If the result is not what you expected
Renaming .heic to .jpg is not conversion. Large files can take time to decode, and unsupported variants can show a per-file error. Start with one file, then use a small batch and review errors rather than assuming every source was exported.
Background and practical details
Why the format matters
HEIF is an image container format; many phone photos use a .heic extension. Support varies by application and destination. A browser preview or an operating-system thumbnail does not prove that a web form can decode the file. Read the form’s accepted formats first. If it accepts only JPG or PNG, changing the extension of the HEIC file is not a conversion.
Apple’s HEIF and HEVC guidance explains compatibility and export options. A device can also share a compatible copy in some circumstances. If that route produces the file you need, verify the received file before using another converter.
The current workspace accepts up to 20 files, 50 MB per file and 150 MB combined. It processes the batch sequentially to limit memory use. These browser safeguards are separate from account access. A large or unusual HEIC file can still fail to decode; a batch count within the limit is not a guarantee that every file is compatible.
Understand the output
Smart Image Tools first decodes the source to PNG, then encodes the final JPG at 92% quality. The intermediate PNG avoids adding a lossy intermediate encoding. The final JPG is still lossy: 92% is an encoder setting, not a promise that 92% of the source’s detail is preserved.
Keep the HEIC original for HDR, camera information and any features tied to your photo library. This workflow exports a still JPG; it does not recreate a Live Photo, preserve a multi-image collection or promise an identical HDR appearance. If the decoder supplies several images, the current conversion uses the first decoded image.
Why a JPG can be larger
Compatibility and compressed size are different goals. An efficiently encoded HEIC can become a larger JPG even when both have the same width and height. The larger result does not automatically mean it contains more useful detail. Compare the reported sizes and judge the image itself.
If the resulting JPG is too large for a form, use Compress to Size on a separate copy. If the form also requires specific dimensions, follow the resizing guide. Avoid repeatedly recompressing the same JPG; return to the best source when preparing another version.
Troubleshoot a failed conversion
Confirm that you have downloaded the actual original rather than a cloud placeholder or a damaged transfer. Retry with a smaller batch and allow the page to finish. A filename ending in .heic is not proof of valid HEIC data. If the file opens in the phone’s native photo app but not in this decoder, use a supported native export to JPG rather than forcing a renamed file through the converter.
After downloading, open the JPG outside Smart Image Tools. Check portrait orientation, skin tones, highlights and image dimensions. Confirm that the destination accepts it. Review visible information and metadata before public sharing; the photo metadata guide explains that separate check.
Found a different result or an outdated instruction? Send the page URL and a description. Read our editorial policy for how we document methods and limitations.
Example sources and screenshot notes
The HEIC example was encoded from a resized copy of Lake surrounded by green mountains by Caio; it is a genuine HEIC test file rather than a renamed JPG.
These photographs are used under the Pexels license. They are licensed images, not claimed as public domain. The photographer links identify the original sources; resizing and example processing were performed for this tutorial.
The controls shown are from the version tested for this guide. A later interface update or a different source can change a result. Compare the displayed format, dimensions and status with the instructions, and report a mismatch with the article URL and the setting involved. Our editorial policy explains how examples and corrections are reviewed.
Find the right tool for your image.
Explore the free workspaces, read their methods and inspect your result before sharing.
Explore image tools