A PDF can make a set of images easier to submit or review, but it needs more than a download button. Check page order, readable content, margins and the final document size before sending it.
- The tested example
- Step 1: Open Image to PDF with a page plan
- Step 2: Add the lake and flower in the intended order
- Step 3: Choose A4, matching orientation and a 24-point margin
- Step 4: Create the document and review its two-page result
- Check the result
- Troubleshooting
- Background and practical details
- Example sources
TESTED WORKED EXAMPLE
What this session produced
The lake and flower photographs became a two-page A4 PDF with orientation matched to each image, a 24-point margin and JPG image encoding at 92%. The finished document was 389.6 KB in this session.
The screenshots were captured from our working tools on October 6, 2026. Focus workspace is used to give the controls and preview more room. Captures show either the full workspace or the relevant panel; they are not recreated interface illustrations. Sizes and outcomes describe this sample, not a promised result for every image.
Follow the worked example, step by step
Read the settings and the result together. Keep an untouched source when a file is edited, and check the finished output before using it in another application. Each numbered step below includes a real screenshot of the corresponding workspace state. Use the full-size link when a control label is too small on your screen.
Step 1: Open Image to PDF with a page plan
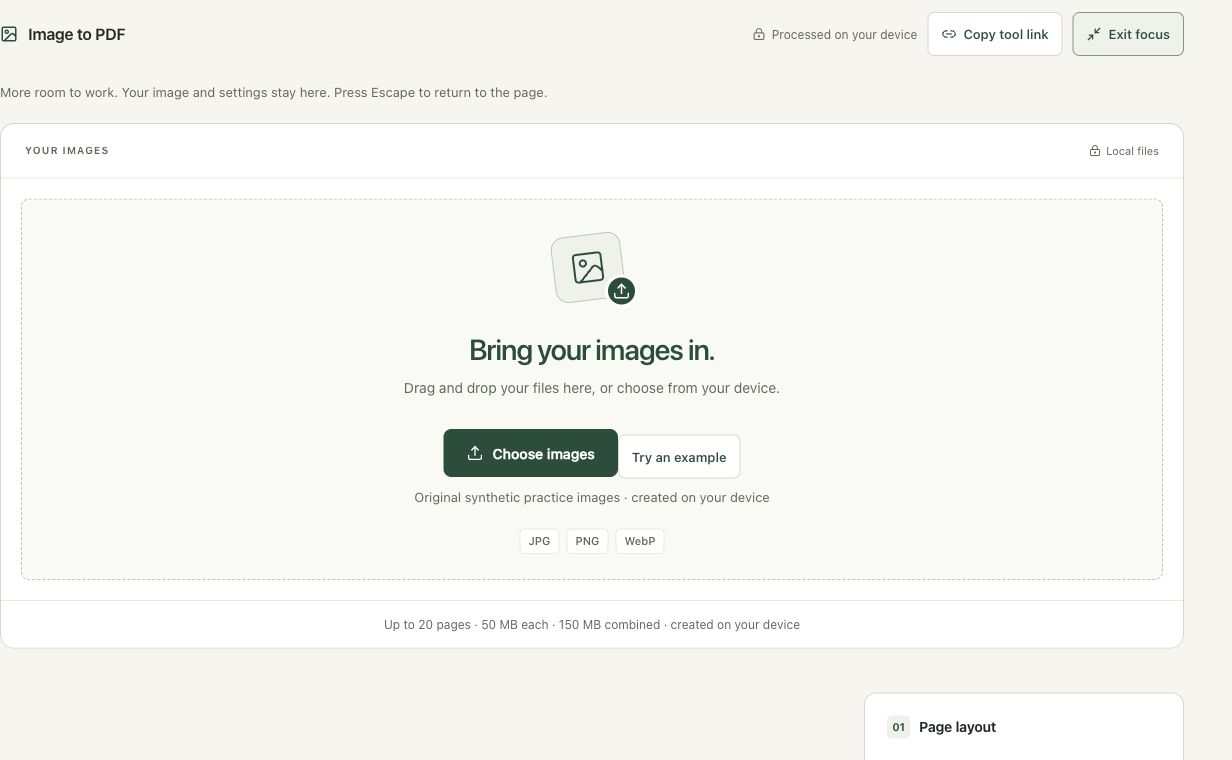
Open Image to PDF and decide which photographs belong on separate pages. This tool places one image per page while retaining its proportions. It is useful for combining scans or illustrations into a readable document, but it does not create a text layer. Keep source filenames understandable so the ordering controls are easier to review.
Step 2: Add the lake and flower in the intended order
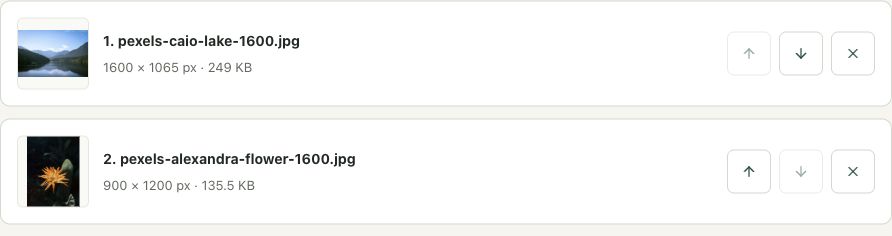
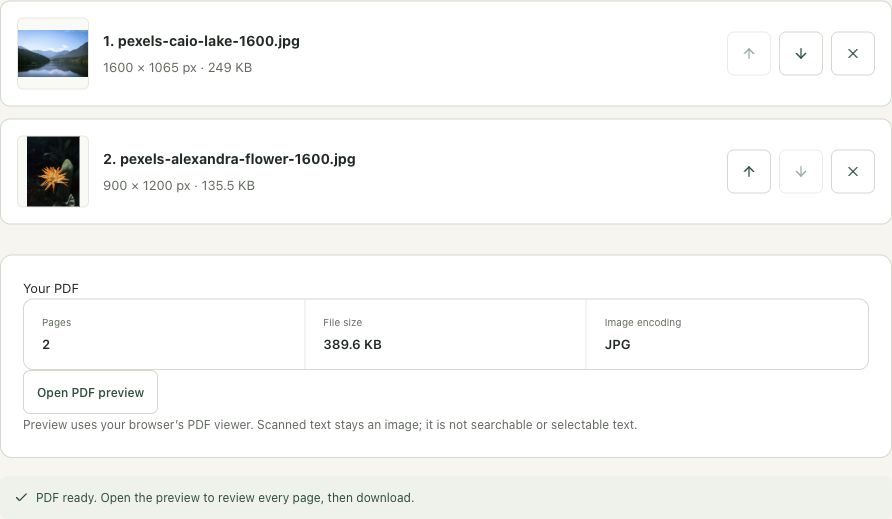
Choose the lake photo first and the portrait flower second. The numbered cards establish the page order before the PDF is built. Review the dimensions on both cards: the examples have different orientations. Move a card if the order is wrong rather than trying to rename the files and assuming that will automatically rearrange the document.
Step 3: Choose A4, matching orientation and a 24-point margin
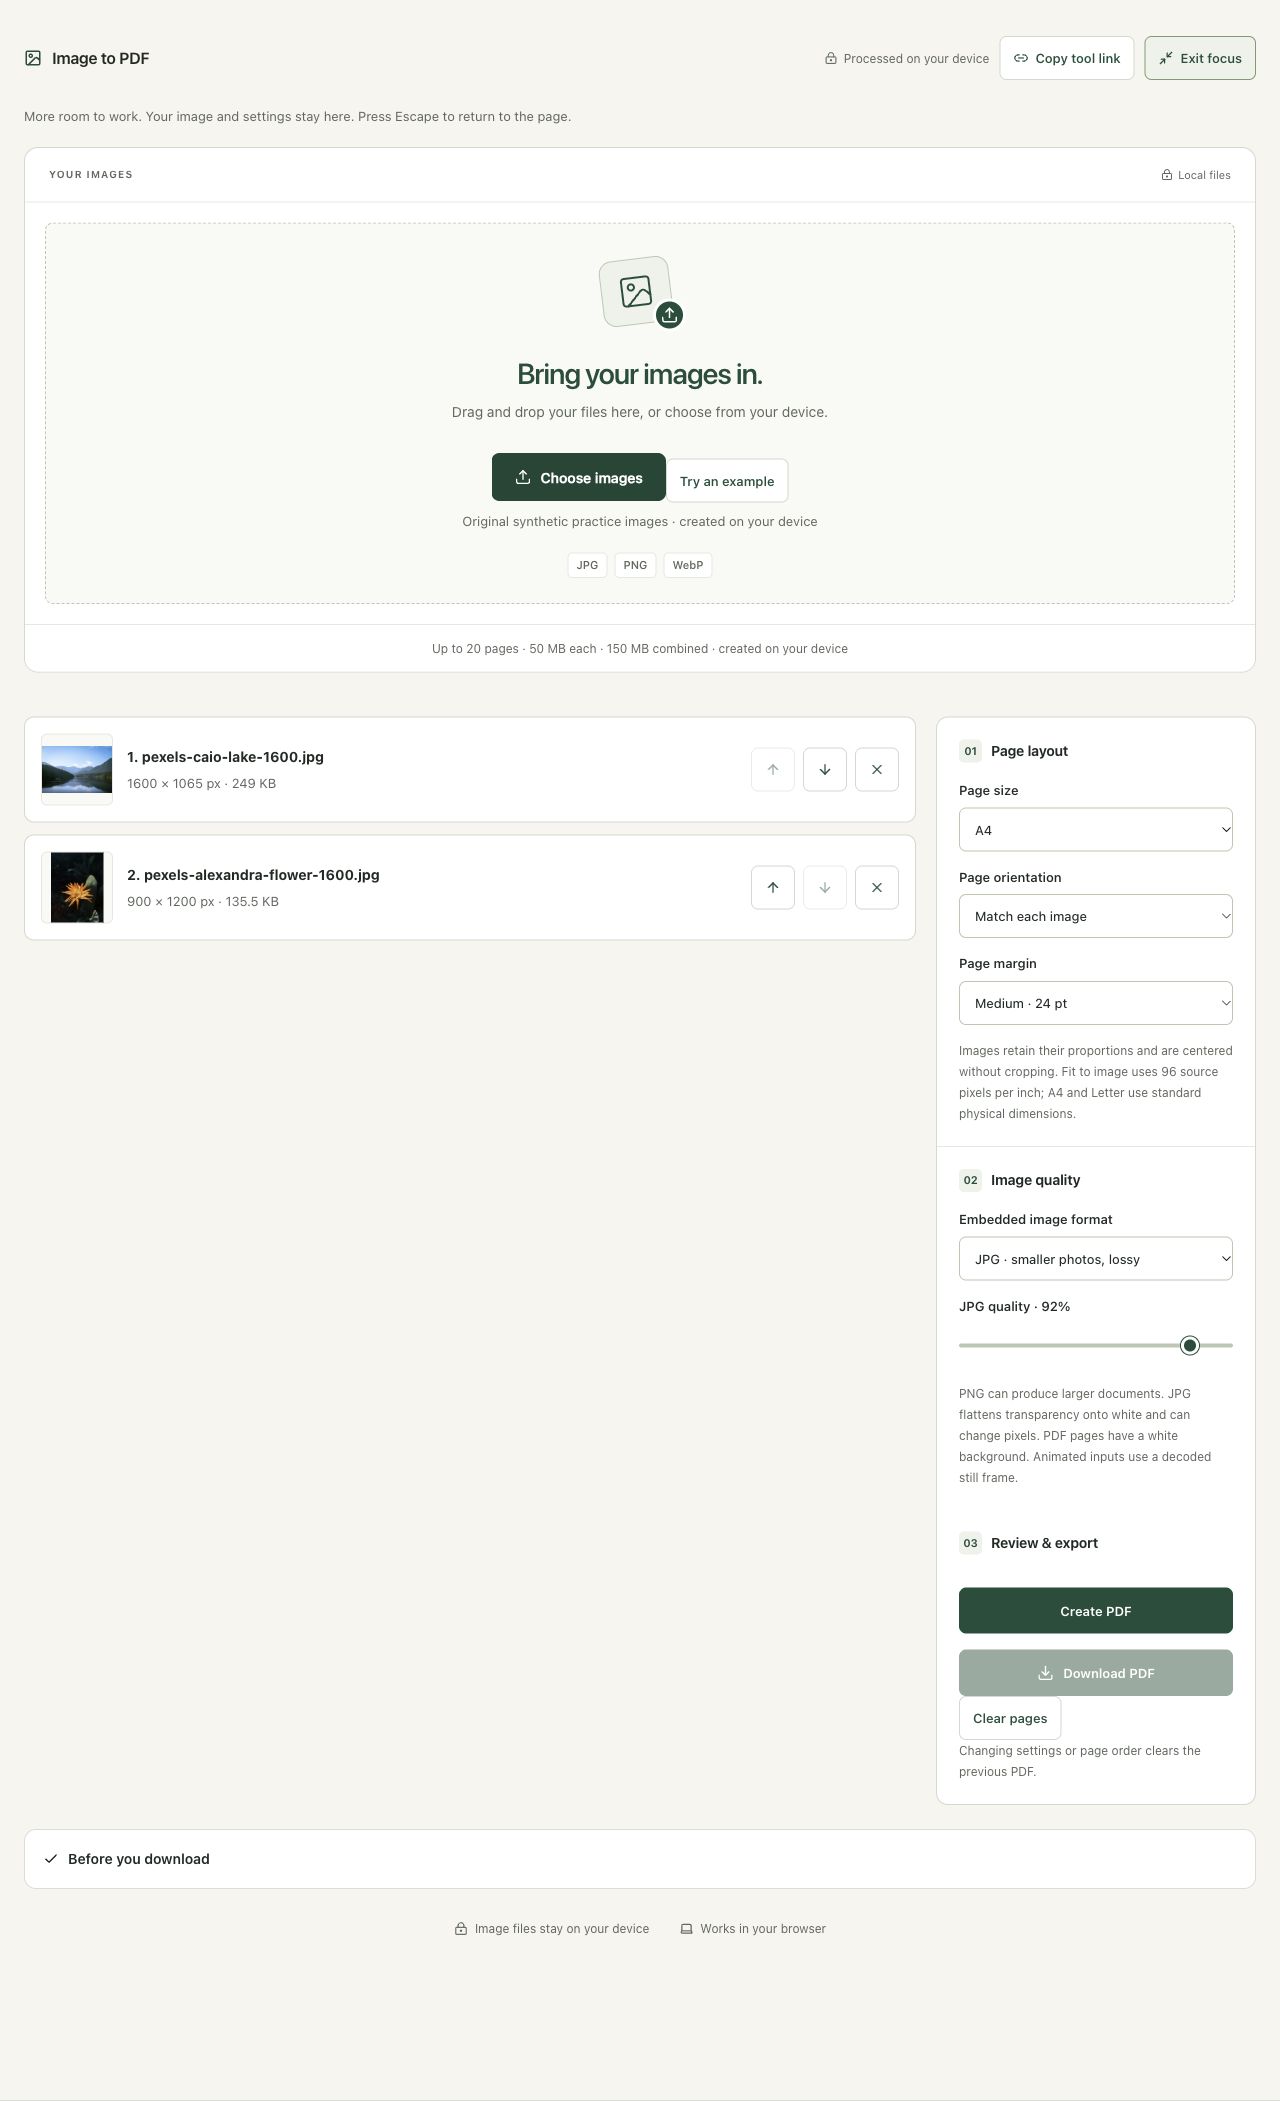
Select A4, Match each image and the medium 24-point margin. Use JPG embedding at 92% for this photographic example. The images remain proportional and centered without cropping. A margin is measured in PDF points, not source-image pixels. For a document that requires fixed portrait pages, select Portrait and review the resulting unused space.
Step 4: Create the document and review its two-page result
Choose Create PDF. The completed panel shows two pages, 389.6 KB and JPG encoding. Use Open PDF preview to inspect every page before Download PDF. The viewer opens in a new tab and may display differently across browsers. If you change the image order or any generation setting, create a fresh document and check it again.
Check the result before using it
Open the PDF preview and review every page, including orientation, margins and order. Image-only pages do not become searchable text merely because they are inside a PDF. Use OCR separately when editable text is needed.
If the result is not what you expected
Changing image order or settings clears the generated PDF. Create it again before downloading. PNG embedding can make photographic documents much larger. JPG embedding flattens transparency onto white and changes pixels.
Background and practical details
Prepare the source images
Use images that are correctly oriented and contain the whole content you need. A photograph of a page should show all its corners and enough detail for the smallest text. A PDF container cannot restore words that were blurred or cropped out of the source. Keep the original images and create a separate submission document.
The Image to PDF workspace accepts JPG, PNG and WebP, with up to 20 pages, 50 MB per file and 150 MB combined. Convert HEIC with the dedicated HEIC tool before adding it. Prepare only the pages needed; a mixed folder can accidentally include an unrelated private image.
Do not rely on the file chooser’s selection order or on filenames alone. Check that the first page is actually first in the displayed list. Changing settings or order clears the old PDF, so create it again before downloading. That prevents a previous document from being mistaken for the new arrangement.
Fit, A4 and Letter have different meanings
Fit to image creates a page proportional to each image using 96 source pixels per inch. A4 and Letter use standard physical page dimensions, with the image centered and fitted inside the available area without cropping. Portrait and landscape pages can therefore have unused space around an image whose proportions differ from the paper.
Match each image lets the page orientation follow that image. If a receiving organization requires all pages to use the same orientation or paper size, select those settings explicitly. Smart Image Tools’s pages have a white background, so transparent source pixels show white rather than the checkerboard you might have seen in an image editor.
Choose PNG or JPG for embedded images
PNG preserves the browser-decoded image pixels, which is useful for diagrams and small text. It can make photographic documents larger. JPG is a lossy alternative for smaller photo-based documents; the quality setting affects encoding and must be judged by the result. It flattens source transparency onto white.
Try PNG first when exact-looking text or fine lines are important. If the PDF is too large, compare a JPG version from the same source images. Inspect small punctuation, light text and signatures in the browser PDF viewer at a useful zoom. There is no promise that embedding a JPG makes every document smaller, or that a fixed quality number is right for every page.
An image PDF is not an OCR document
This tool embeds pictures. It does not add a searchable or selectable text layer, even if the pictures show printed words. Use Image to Text if you need extracted text, and proofread it carefully. That separate tool does not automatically turn this PDF into an accessible, tagged document. Check the receiving service’s requirements for searchable text or accessibility.
Check the actual download
Open the downloaded PDF in another viewer if possible. Verify page count, order, orientation, margins and readable detail. Confirm the final byte size against the submission limit. A PDF requirement and an image-size requirement are not identical; the document contains page structures as well as image data.
The project uses jsPDF to assemble the pages locally. Browser memory can still limit large jobs. If creation fails, try fewer pages or appropriately resized source copies. For physical sizing, see the pixels-to-print guide; for image encoding choices, see the format guide.
Found a different result or an outdated instruction? Send the page URL and a description. Read our editorial policy for how we document methods and limitations.
Example sources and screenshot notes
The example uses resized copies of Lake surrounded by green mountains by Caio and Close-up shot of orange flower by Alexandra Diniz.
These photographs are used under the Pexels license. They are licensed images, not claimed as public domain. The photographer links identify the original sources; resizing and example processing were performed for this tutorial.
The controls shown are from the version tested for this guide. A later interface update or a different source can change a result. Compare the displayed format, dimensions and status with the instructions, and report a mismatch with the article URL and the setting involved. Our editorial policy explains how examples and corrections are reviewed.
Find the right tool for your image.
Explore the free workspaces, read their methods and inspect your result before sharing.
Explore image tools