The best image format depends on the picture and where it will be used. Start with what must survive: fine detail, transparency, compatibility or a strict upload limit.
- The tested example
- Step 1: Open the converter and compare the available formats
- Step 2: Load one source and read the first export
- Step 3: Choose WebP and keep the quality choice explicit
- Step 4: Inspect the original and converted image together
- Check the result
- Troubleshooting
- Background and practical details
- Example sources
TESTED WORKED EXAMPLE
What this session produced
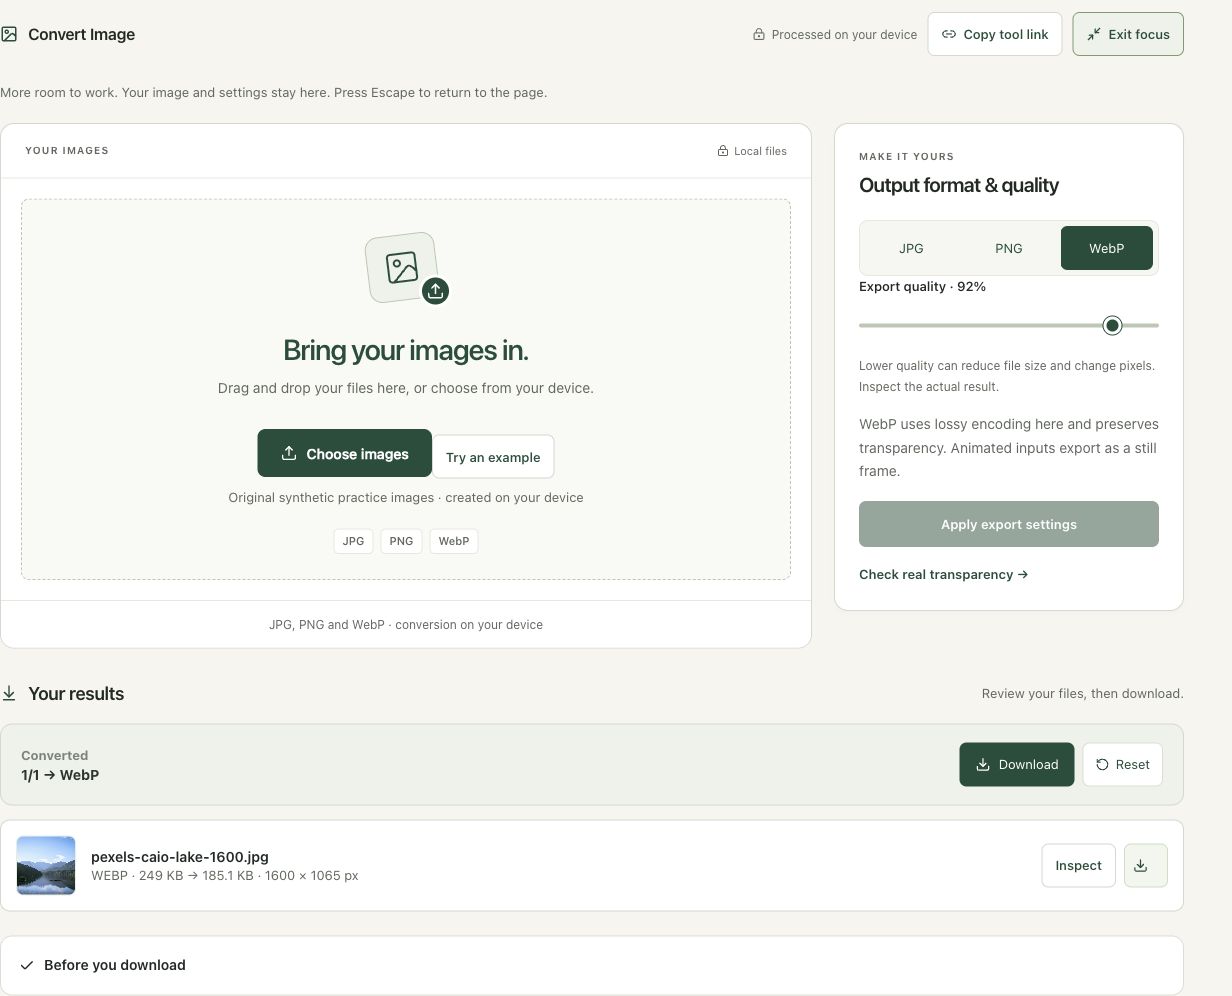
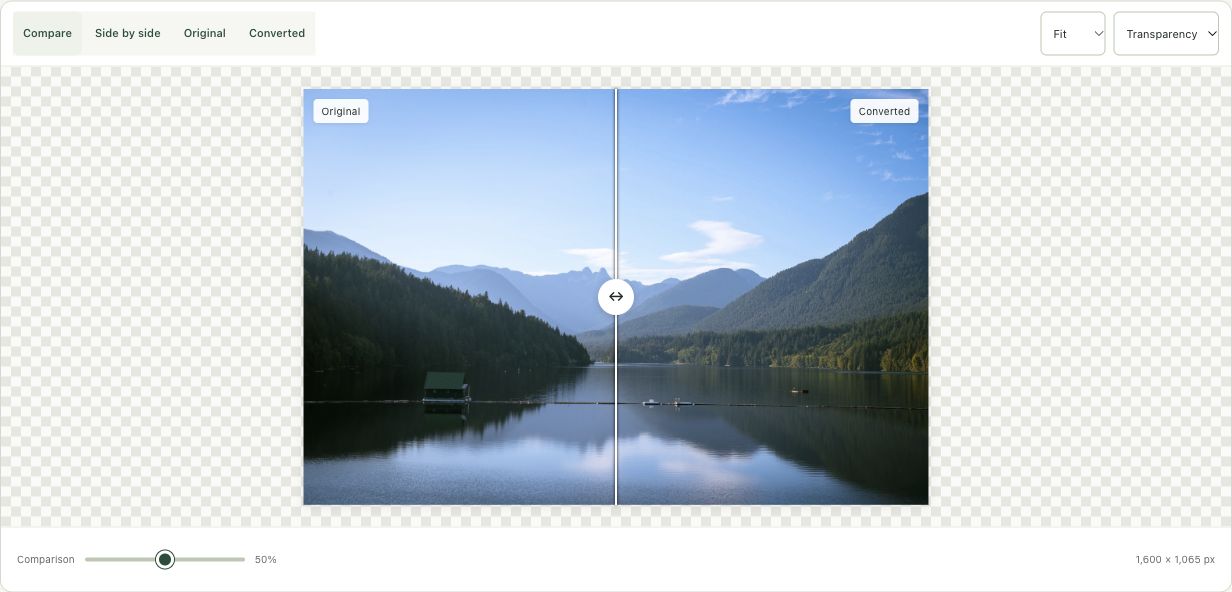
At the converter’s 92% quality setting, the lake JPG became a 185.1 KB WebP while retaining 1,600 × 1,065 pixels. The source was 249.0 KB. This is a lossy WebP export, not a lossless-conversion benchmark.
The screenshots were captured from our working tools on October 6, 2026. Focus workspace is used to give the controls and preview more room. Captures show either the full workspace or the relevant panel; they are not recreated interface illustrations. Sizes and outcomes describe this sample, not a promised result for every image.
Follow the worked example, step by step
Read the settings and the result together. Keep an untouched source when a file is edited, and check the finished output before using it in another application. Each numbered step below includes a real screenshot of the corresponding workspace state. Use the full-size link when a control label is too small on your screen.
Step 1: Open the converter and compare the available formats
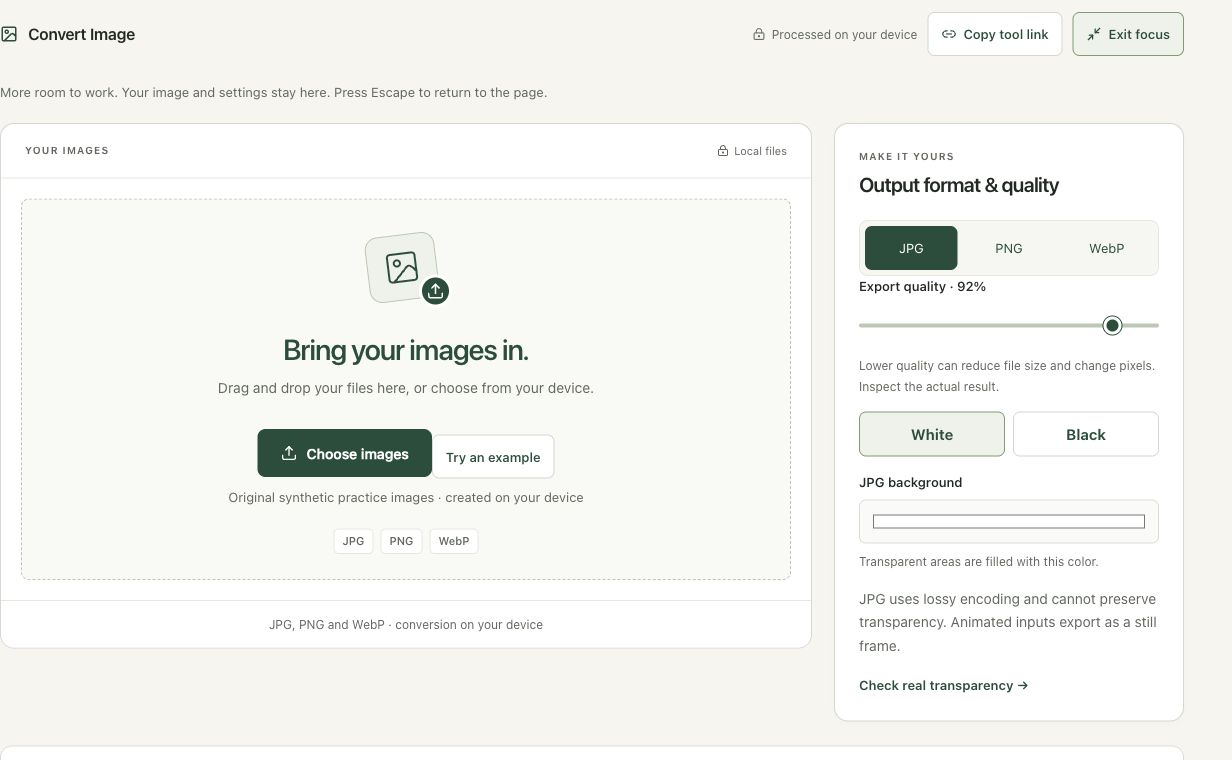
Open Convert Image. The workspace offers JPG, PNG and WebP, with format-specific notes beneath the controls. Select a format based on the destination and the need for transparency, rather than choosing whichever extension looks newest. Changing the filename outside the tool does not convert the stored image. Keep the original while testing a delivery copy.
Step 2: Load one source and read the first export
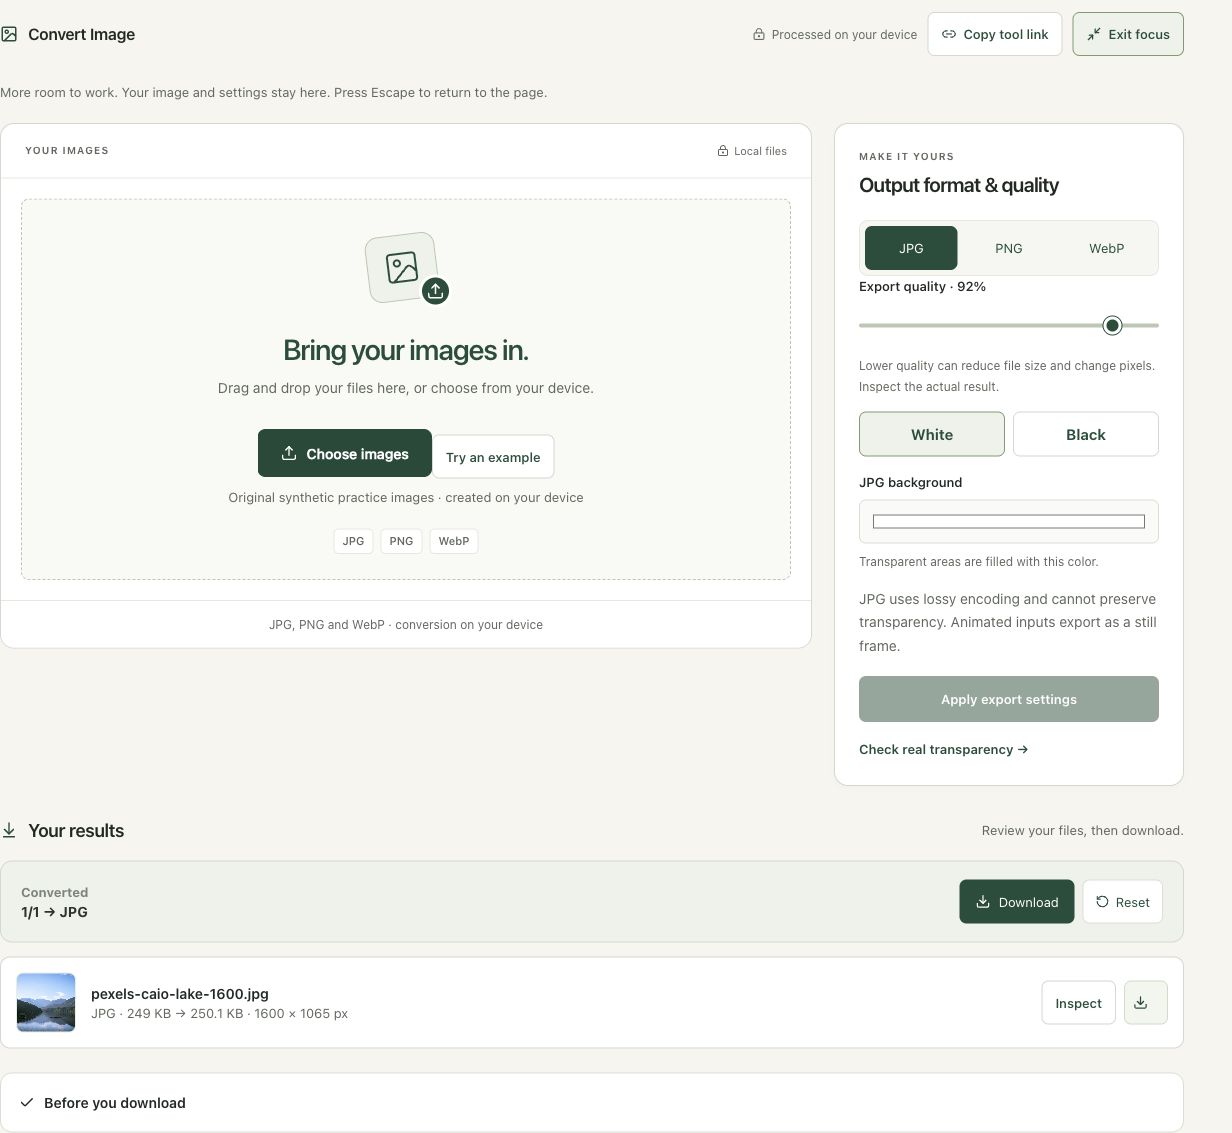
Choose the lake JPG. The tool processes the selected format automatically and lists the resulting dimensions and file size. Start with one photograph so it is clear which result belongs to the source. The same workflow can process a batch, but each file still needs its own visual and compatibility check, particularly when photos and transparent graphics are mixed.
Step 3: Choose WebP and keep the quality choice explicit
Select WebP and keep the displayed export quality at 92% for this example. Selecting a different format triggers conversion. A later quality change may require Apply export settings. Read the note stating that this WebP path is lossy and preserves transparency. A quality number is an encoder setting; it is not a universal percentage of visible detail retained.
Step 4: Inspect the original and converted image together
Use Inspect to open the original-versus-converted comparison. Review the shoreline, foliage and sky, then read the result row: 249 KB became 185.1 KB at 1,600 × 1,065. Download only after confirming the format works where you plan to use it. A smaller file can still be unsuitable if an upload form accepts only JPG or PNG.
Check the result before using it
Check that the receiving application accepts WebP and that the downloaded extension matches the encoded format. Compare fine edges and smooth gradients. Retained dimensions do not mean every decoded pixel is identical.
If the result is not what you expected
PNG ignores a lossy quality slider and may be much larger for photos. JPG fills transparent areas with the selected backing color. Animated inputs export a decoded still frame here. Keep the original animation when movement is required.
Background and practical details
Match the format to the job
JPG is a practical choice for an opaque photograph when the destination accepts it and some encoding loss is acceptable. PNG is useful for crisp screenshots, diagrams and transparent graphics when preserving the decoded pixels matters. WebP can be useful for web delivery, including transparency, provided the destination supports it. A format’s capabilities and a particular tool’s export settings are separate things.
The MDN image format guide describes JPEG’s lossy encoding, PNG’s lossless encoding and their different transparency capabilities. JPEG has no alpha channel. Turning a transparent graphic into JPG therefore requires choosing a visible background; it cannot retain the original transparent areas.
Three everyday examples
- A product photo on a white background: compare JPG and WebP at dimensions suitable for the page. Choose the smaller acceptable result after inspecting the product edges and colors.
- A screenshot of a software dialog: begin with PNG. Look closely at small labels before choosing a lossy alternative. Saving bytes is not useful if the instructions become hard to read.
- A transparent logo: keep PNG for a workflow that expects PNG, or test WebP if the destination accepts it. Avoid JPG unless a flattened background is intentional.
These are starting points, not rules that every image must follow. A flat-color PNG can be smaller than a highly compressed JPG, while a detailed photo stored as PNG can be much larger. Measure the actual output and consider how the file will be viewed.
PNG export preserves browser-decoded pixels; it does not restore information already discarded in a JPG. Similarly, converting JPG to PNG is not an image-quality upgrade. It can produce a larger file with the same visible compression damage. Keep your highest-quality source for future editing.
WebP can be lossless or lossy
Google’s WebP documentation describes both encoding modes and support for transparency. Do not assume that every WebP exporter uses lossless mode. Smart Image Tools’s ordinary canvas converter offers a quality-controlled, lossy WebP export. The lossless compression workflows have a different purpose and identify their results accordingly.
Browser compatibility does not prove upload compatibility. A content system, email attachment filter or marketplace may accept only certain extensions or file types. Follow its specification even when your browser displays another format successfully. Renaming a PNG to end in .jpg changes the name, not the encoded data.
Avoid misleading quality comparisons
The same quality number is not a universal standard across encoders or formats. A 90% JPG and a 90% WebP are not guaranteed to have equal detail or equal size. Compare important areas at actual size and test on the intended background. For transparent graphics, use both light and dark preview backgrounds to reveal pale edges.
Animated files need special care. Smart Image Tools’s canvas-based conversion creates a still image from a decoded frame rather than preserving an animation. Keep the original animation if movement matters. If you need a particular byte limit, finish with Compress to Size and verify the resulting dimensions as well.
For background handling, see why a transparent PNG can appear white. For a phone image that the converter cannot open, follow the HEIC guide first.
Found a different result or an outdated instruction? Send the page URL and a description. Read our editorial policy for how we document methods and limitations.
Example sources and screenshot notes
The example uses a resized 1,600 × 1,065 copy of Lake surrounded by green mountains by Caio.
These photographs are used under the Pexels license. They are licensed images, not claimed as public domain. The photographer links identify the original sources; resizing and example processing were performed for this tutorial.
The controls shown are from the version tested for this guide. A later interface update or a different source can change a result. Compare the displayed format, dimensions and status with the instructions, and report a mismatch with the article URL and the setting involved. Our editorial policy explains how examples and corrections are reviewed.
Find the right tool for your image.
Explore the free workspaces, read their methods and inspect your result before sharing.
Explore image tools