A lossless compressor can make an image easier to store without degrading its pixels. The possible saving depends on the original encoding, so an unchanged result can be the correct outcome.
- The tested example
- Step 1: Choose the lossless compression workspace
- Step 2: Process the two original practice PNGs
- Step 3: Read the download checklist before exporting
- Step 4: Export the optimized files and check individual results
- Check the result
- Troubleshooting
- Background and practical details
- Example sources
TESTED WORKED EXAMPLE
What this session produced
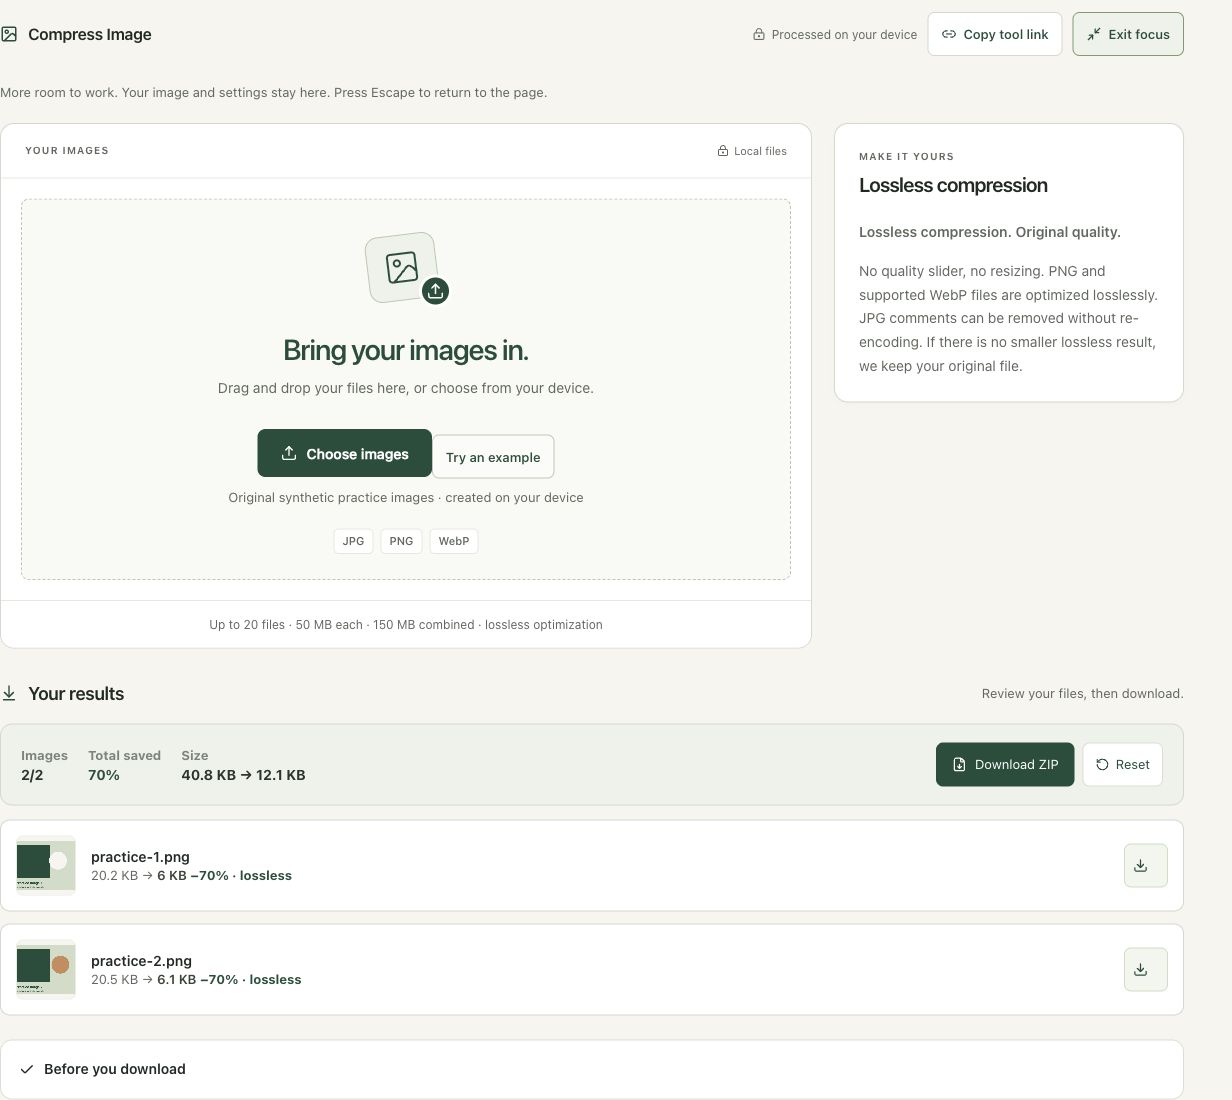
The two original synthetic PNG examples totaled 40.8 KB. Lossless optimization produced a 12.1 KB combined result, approximately 70% less storage in this session. The first output was about 6 KB and the second about 6.1 KB.
The screenshots were captured from our working tools on October 6, 2026. Focus workspace is used to give the controls and preview more room. Captures show either the full workspace or the relevant panel; they are not recreated interface illustrations. Sizes and outcomes describe this sample, not a promised result for every image.
Follow the worked example, step by step
Read the settings and the result together. Keep an untouched source when a file is edited, and check the finished output before using it in another application. Each numbered step below includes a real screenshot of the corresponding workspace state. Use the full-size link when a control label is too small on your screen.
Step 1: Choose the lossless compression workspace
Open Compress Image when preserving pixels is the main requirement. This workflow differs from a quality-controlled export and from resizing. Read the method note before assuming it will meet an arbitrary upload limit. Keep your source files so you can verify the outputs and so an unchanged result does not lead to repeated processing without a clear goal.
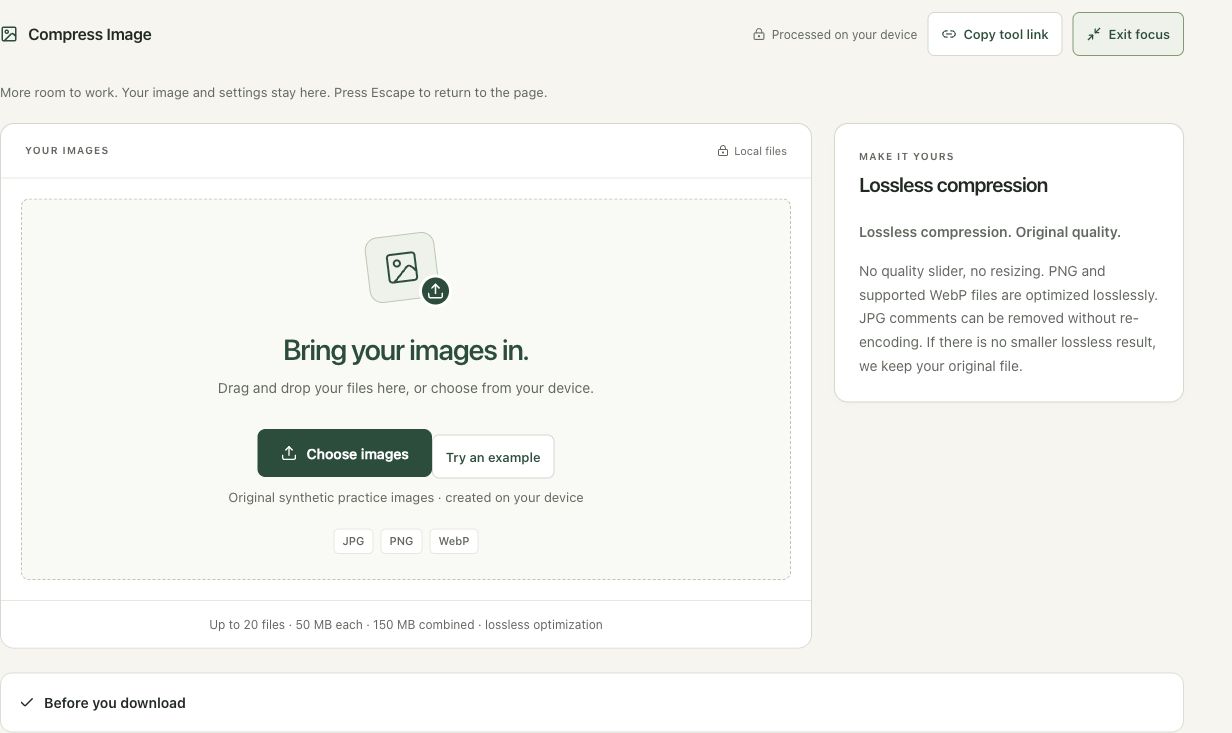
Step 2: Process the two original practice PNGs
Choose Try an example to load the two synthetic PNGs created by the site. They are controlled graphics, not stock photographs. Processing begins automatically, and the completed list shows the combined saving and each file’s result. Use your own image afterward: content and existing encoding have a large effect on how much storage can be removed.
Step 3: Read the download checklist before exporting
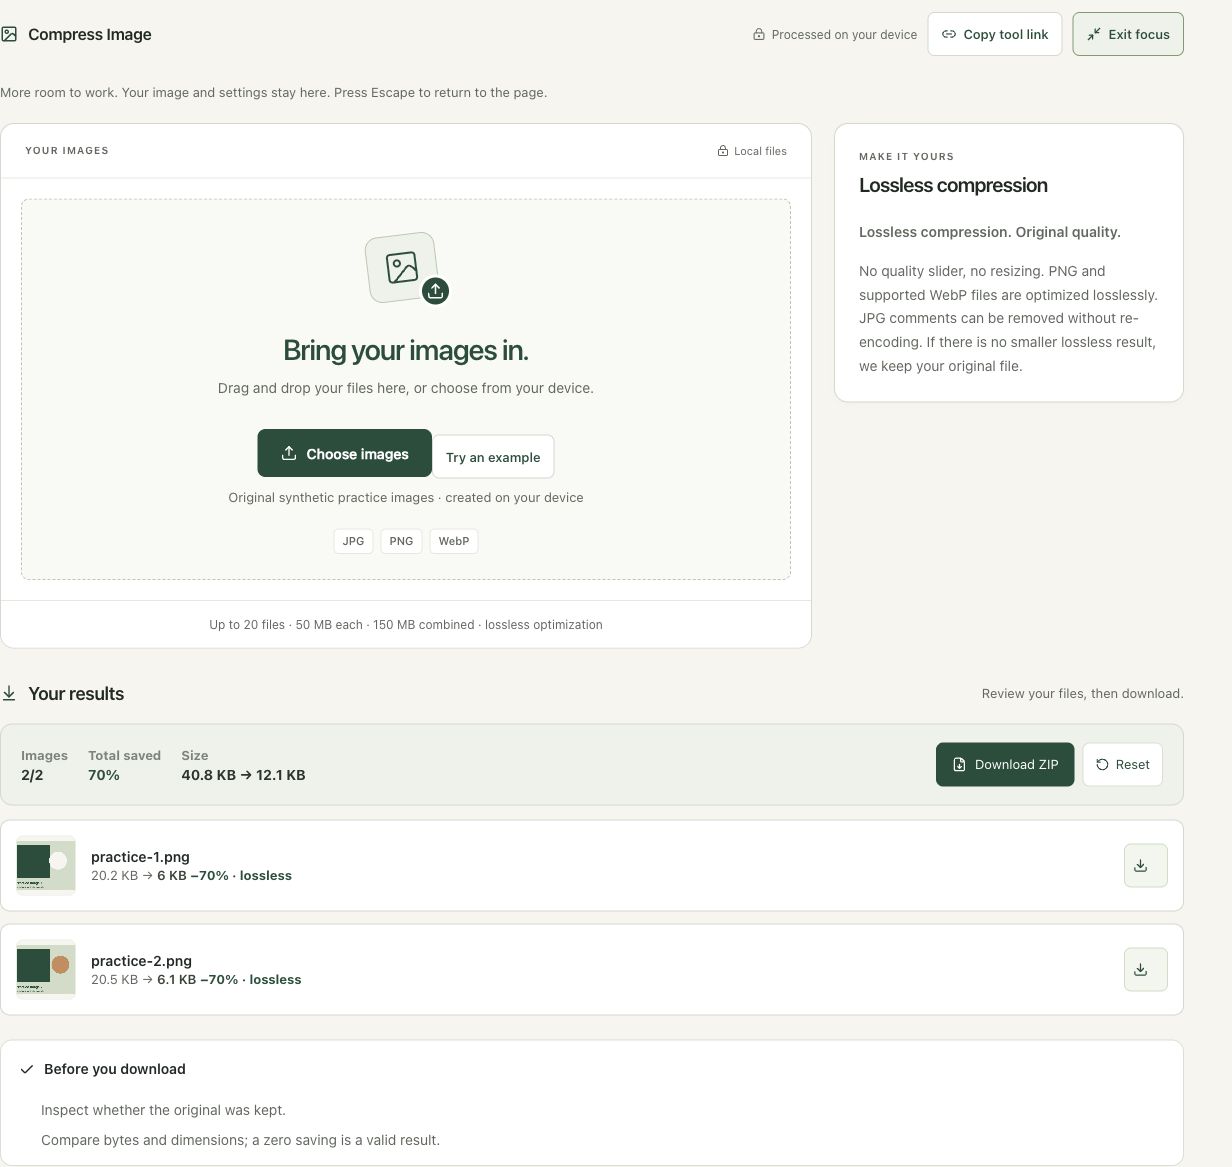
Expand Before you download and read the checks. Lossless optimization does not automatically remove private information or establish that an image is licensed for publication. Inspect dimensions, transparency and important content separately. If the result is unchanged, review the stated format handling before deciding to try a different tool or permit a lossy export.
Step 4: Export the optimized files and check individual results
Download the batch ZIP or an individual result. The screenshot focuses on the first result row so its filename and achieved size remain readable. Keep the outputs in a separate folder, open them in the destination, and compare them with the originals. Use the actual combined byte totals when calculating savings instead of averaging percentages from differently sized files.

Check the result before using it
Compare representative output pixels or a difference map when preservation is important. Keep dimensions, transparency and file identity in the review. A saving on a simple practice graphic does not predict a saving on an already optimized camera photograph.
If the result is not what you expected
An optimized JPG may remain unchanged because this path does not recompress its pixels. Repeating lossless optimization cannot guarantee continual savings. For a hard upload limit, switch to Compress to Size and make any quality or dimension tradeoff explicit.
Background and practical details
Separate compression from a new export
A format stores an image using a particular encoding. Lossless optimization tries to represent the image more efficiently while preserving the relevant image data. A lossy export makes different tradeoffs and can discard detail. A quality setting of 100 does not by itself establish that an exporter is using a lossless method.
Open Compress Image when keeping quality and dimensions is your first priority. Use Compress to Size when the receiving form imposes a hard byte limit. The second workspace makes quality loss and resizing explicit choices; these are different requirements from ordinary lossless optimization.
Know the format-specific handling
The PNG path optimizes supported static PNG encoding. The WebP path uses lossless encoding for supported static files. JPEG handling removes comment segments without decoding and recompressing the picture; EXIF and color profiles are retained. A JPG with no useful removable comments may therefore have no meaningful size reduction.
Animated images and WebP files with color or orientation metadata are retained when changing them would fall outside the supported preservation policy. Read the result rather than assuming that every accepted file follows the same transformation. The tool keeps the original when its candidate is not smaller.
These bounds protect browser resources. Splitting a large collection into batches can make review easier even when every file is technically within the limits. Start with one example of each type of content: a photograph, a diagram and a transparent graphic may behave very differently.
Measure savings without assuming a target
If an original is 200,000 bytes and a candidate is 160,000 bytes, the reduction is 40,000 bytes, or 20% of the original. This is an arithmetic example, not a benchmark for the tool. Use the actual displayed byte sizes for your own files. Do not infer compressed size from width and height alone.
A previously optimized file can leave little room for another improvement. Repeating a lossless operation does not create an unlimited sequence of smaller files. If a strict target remains unmet, decide whether smaller dimensions or a lossy encoding are acceptable for the destination rather than treating them as equivalent to lossless optimization.
Keep metadata and privacy decisions separate
A compressor that preserves image quality can also preserve camera metadata. Do not treat a smaller JPG as a privacy-cleaned copy. Use Remove EXIF deliberately when that is the goal and review its re-encoding tradeoffs. Visible addresses or names in the photograph also remain visible after compression.
Google’s WebP documentation distinguishes lossless and lossy modes. The capability of a format does not prove which mode a particular exporter used. For choosing an accepted delivery format, see our format guide.
Keep an untouched source and inspect the downloaded result. If an instruction differs from the workspace, send the page URL and the setting involved. Our editorial policy explains how we review examples and limitations.
Example sources and screenshot notes
This example uses original synthetic practice graphics created by Smart Image Tools. They are controlled fixtures, not photographic performance benchmarks.
The controls shown are from the version tested for this guide. A later interface update or a different source can change a result. Compare the displayed format, dimensions and status with the instructions, and report a mismatch with the article URL and the setting involved. Our editorial policy explains how examples and corrections are reviewed.
Find the right tool for your image.
Explore the free workspaces, read their methods and inspect your result before sharing.
Explore image tools