A white preview does not prove that an image has a white background. The viewer may be displaying transparent pixels over white. Inspect the alpha channel before trying to remove anything.
- The tested example
- Step 1: Open the checker without assuming the PNG is transparent
- Step 2: Load the deliberately opaque practice example
- Step 3: Change the preview background to Dark
- Step 4: Analyze the alpha channel and save a diagnostic report
- Check the result
- Troubleshooting
- Background and practical details
- Example sources
TESTED WORKED EXAMPLE
What this session produced
The 640 × 480 practice PNG contains an opaque painted checkerboard. Analysis found 0 transparent pixels, 0 partially transparent pixels and 307,200 opaque pixels: 100% opaque.
The screenshots were captured from our working tools on October 6, 2026. Focus workspace is used to give the controls and preview more room. Captures show either the full workspace or the relevant panel; they are not recreated interface illustrations. Sizes and outcomes describe this sample, not a promised result for every image.
Follow the worked example, step by step
Read the settings and the result together. Keep an untouched source when a file is edited, and check the finished output before using it in another application. Each numbered step below includes a real screenshot of the corresponding workspace state. Use the full-size link when a control label is too small on your screen.
Step 1: Open the checker without assuming the PNG is transparent
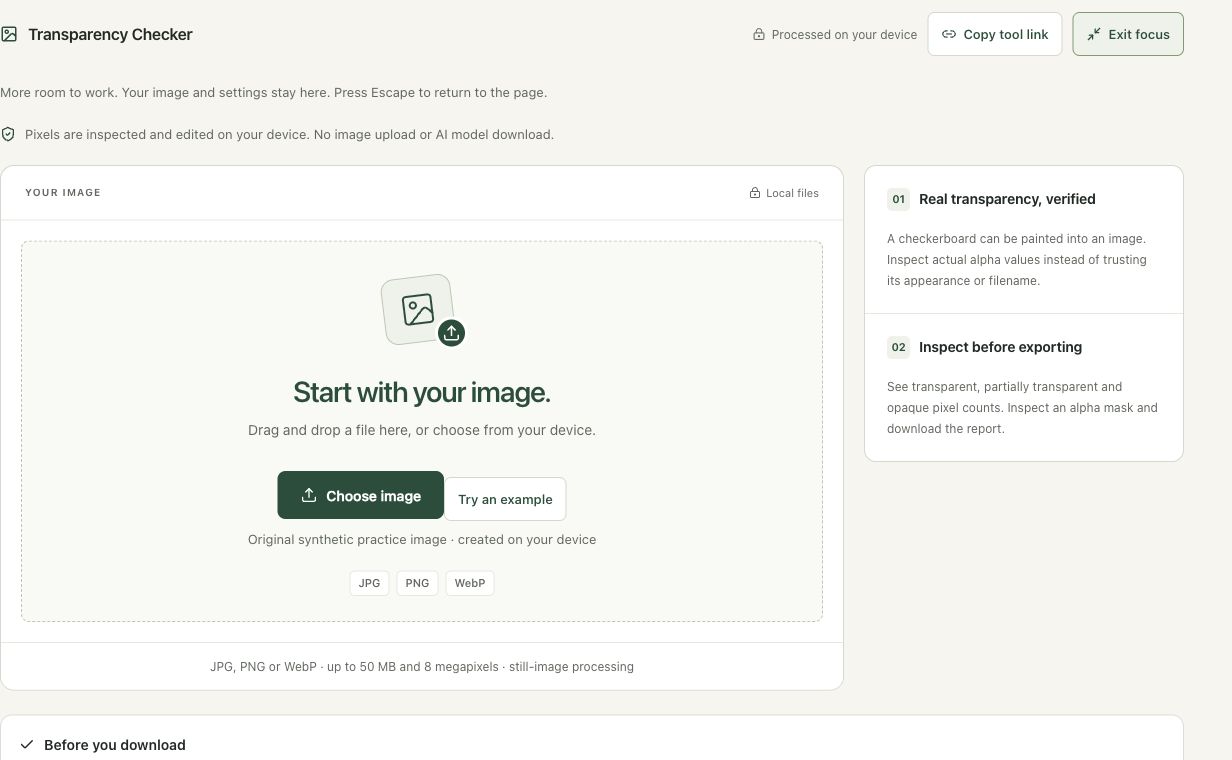
Open Transparency Checker. PNG supports an alpha channel, but a PNG filename does not prove that any pixel uses it. This workflow measures decoded pixel opacity directly. Choose it when a downloaded logo or cutout shows an unexpected white or checked background. Keep the source unchanged while investigating so you can compare another export later.
Step 2: Load the deliberately opaque practice example
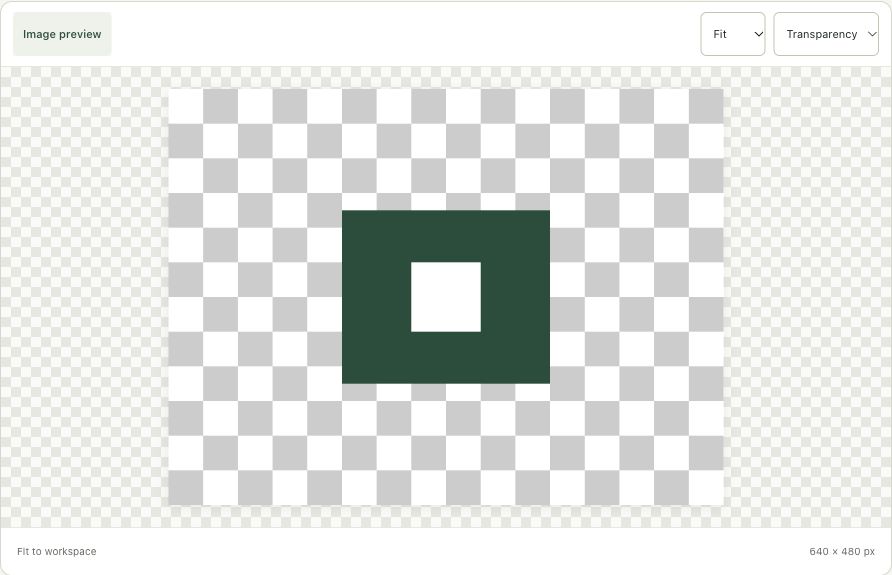
Use Try an example to load the 640 × 480 graphic. Its checkerboard is intentionally painted into an opaque image. Look at the visible artwork before analyzing it. The example demonstrates why appearance alone is insufficient: a viewer-generated transparency grid and a photographed or painted grid can look similar in an ordinary screenshot.
Step 3: Change the preview background to Dark
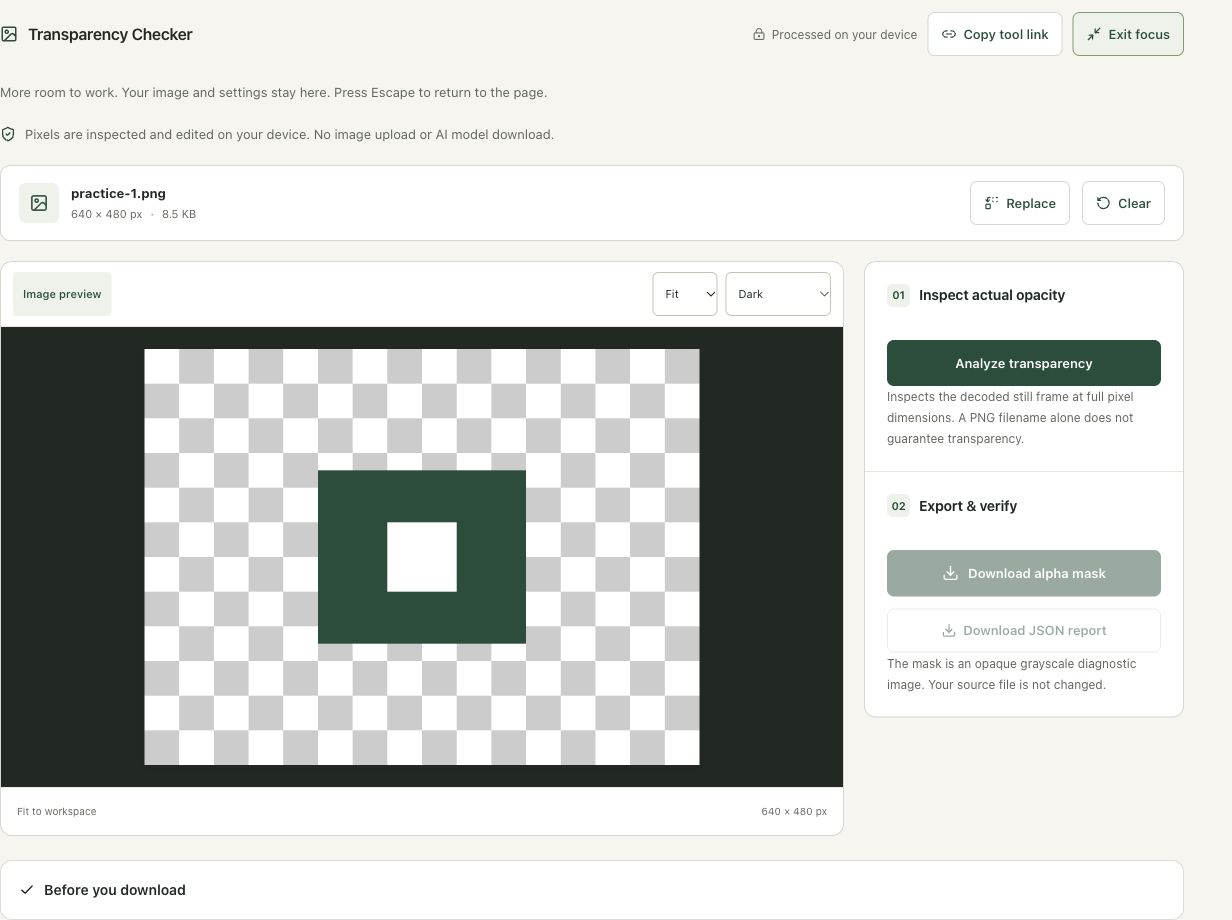
Choose Dark in Preview background. This changes the viewing surface, not the stored source pixels. Genuine transparent areas would reveal the selected surface. In this example, the painted pattern stays visible. Use the same test with Light on a real cutout to reveal pale fringes, but use numerical analysis to confirm the alpha values.
Step 4: Analyze the alpha channel and save a diagnostic report
Choose Analyze transparency. The result states No transparent pixels and reports all 307,200 pixels as opaque. The alpha mask uses white for opaque pixels, black for transparent pixels and gray for partial alpha. Download the JSON report or mask if you need a record. The mask itself is an opaque grayscale diagnostic, not a repaired cutout.
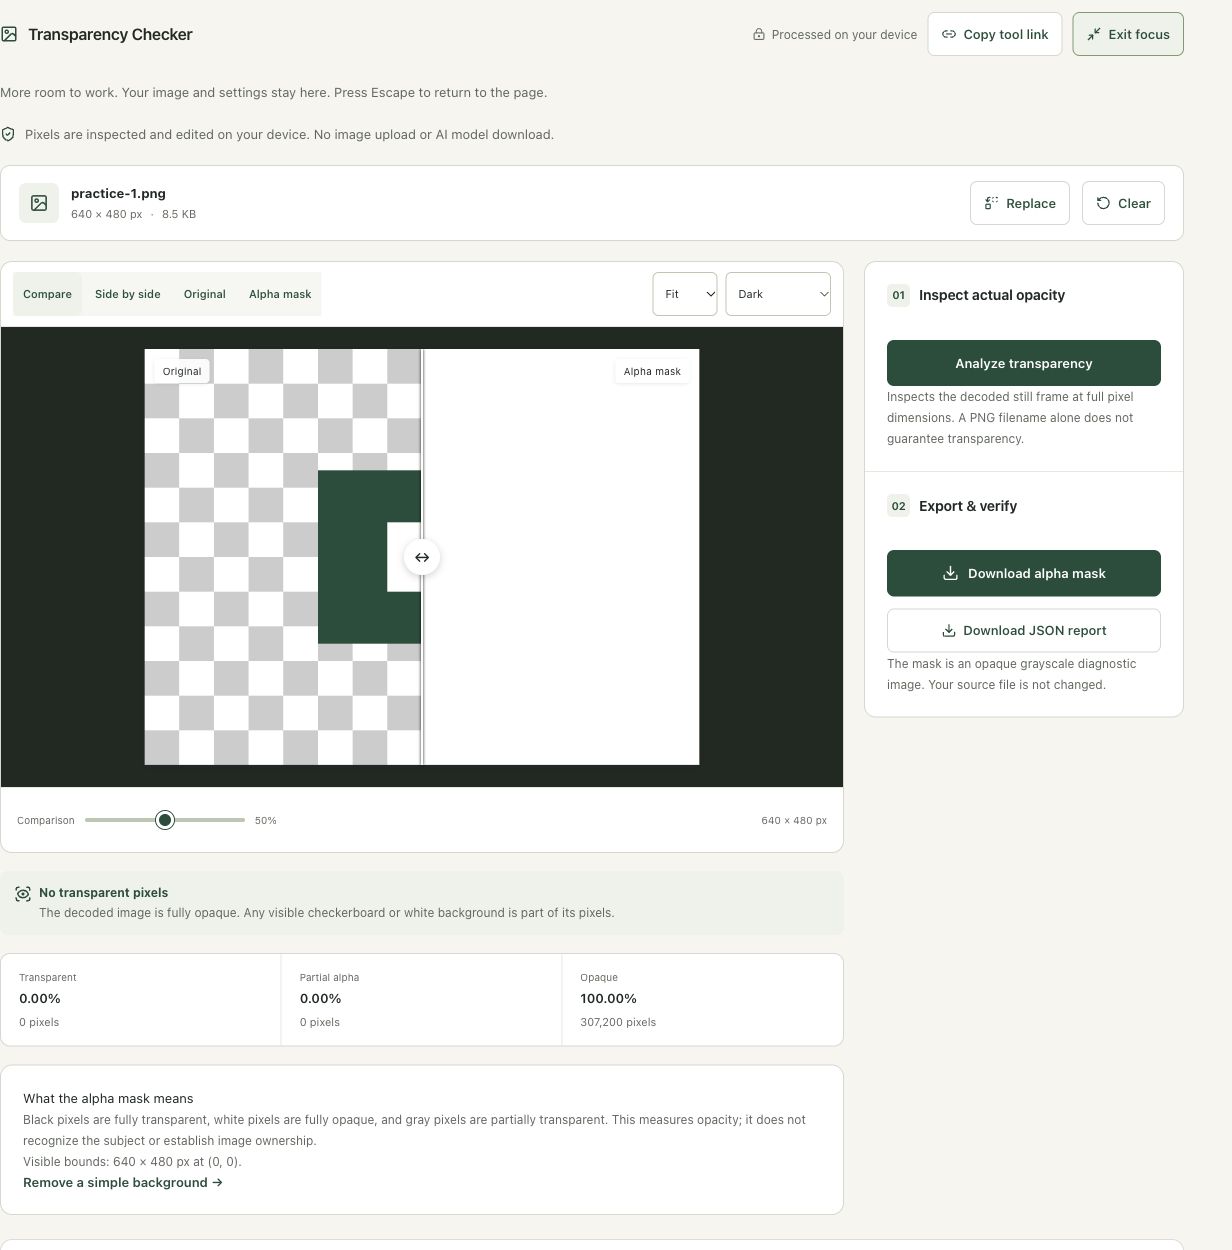
Check the result before using it
Use the alpha statistics and diagnostic mask to establish whether transparency exists. A gray checkerboard visible in a picture can be baked into the color pixels. The JSON report describes decoded opacity; it does not identify subjects or camera metadata.
If the result is not what you expected
If the checkerboard remains visible on both light and dark preview backgrounds and the opaque count is 100%, it is part of the image. Use color-background removal for a simple painted backdrop or AI background removal for a complex scene.
Background and practical details
A preview background is not an image background
Transparent image pixels let the surface behind the image show through. A browser, document editor or gallery can place them on white, black or a checkerboard. If the image looks different when the preview background changes, it may already contain the transparency you need. Re-editing it can damage clean edges without solving a real problem.
A checkerboard can also be part of the image itself. A downloaded screenshot of a transparent-image preview may contain only opaque gray squares. The pattern is then ordinary picture content. Renaming it to PNG or placing it on another background will not turn those squares into transparent pixels.
Partial transparency is normal for smooth edges and soft shadows. A graphic with some opaque pixels can still be a valid transparent image. Conversely, a PNG with only opaque pixels is not transparent merely because its extension is .png. The checker examines decoded alpha values, not the filename.
Choose an export that can keep alpha
PNG supports transparency. WebP also supports it in its lossless and lossy modes, as described in Google’s WebP container documentation. JPEG has no alpha channel. Smart Image Tools’s JPG export flattens transparent pixels onto white. Use PNG if the destination specifically requires it; do not assume that a website accepting JPG also accepts transparent WebP.
If the image contains good transparency but shows a white rectangle in your design, inspect the destination’s styling or import behavior first. A white document page will remain white behind the transparent pixels. The editor might also have flattened the graphic during export. Reopen the final exported file in the checker to distinguish the source from the destination result.
When the background really is opaque
Use Remove Color Background for a fairly uniform backdrop. Start with a modest tolerance and inspect which parts disappear. A white product on a white background can contain the same colors as the background, so color removal may erase part of the product. Connected-background options can reduce some unwanted interior removals, but they do not solve every ambiguous image.
For complex photographs, Remove Background offers a model-based workflow. Its boundaries need review: glasses, fine hair, translucent objects and shadows can be difficult. Neither method knows every intended foreground detail. Keep the source so you can try different settings without accumulating edits.
A useful edge test
Place the result on both a light and a dark background. An edge that looks clean on white may reveal a pale fringe on green or black. Look for missing details, dark halos and unexpectedly solid pixels. A partly transparent shadow should blend into the background rather than look like an opaque patch.
The checker and color-removal workspace process still images up to 8 megapixels and 50 MB. They do not preserve an animation through editing. If an image is too large, make a working copy with Resize Image, but keep the original for any later high-resolution work.
For format selection, read JPG, PNG or WebP. The PNG specification documents alpha as image data; the visible checkerboard is only a display convention.
Found a different result or an outdated instruction? Send the page URL and a description. Read our editorial policy for how we document methods and limitations.
Example sources and screenshot notes
This example uses original synthetic practice graphics created by Smart Image Tools. They are controlled fixtures, not photographic performance benchmarks.
The controls shown are from the version tested for this guide. A later interface update or a different source can change a result. Compare the displayed format, dimensions and status with the instructions, and report a mismatch with the article URL and the setting involved. Our editorial policy explains how examples and corrections are reviewed.
Find the right tool for your image.
Explore the free workspaces, read their methods and inspect your result before sharing.
Explore image tools