An image can occupy little disk space and still require a large working buffer. Read the file’s actual bytes when checking an upload limit, and use its pixel dimensions when planning an editing job.
- The tested example
- Step 1: Open Image Info to measure an actual file
- Step 2: Load the lake JPG and record its exact byte count
- Step 3: Calculate the same dimensions as 8-bit RGBA pixels
- Step 4: Save the calculation with its units and assumptions
- Check the result
- Troubleshooting
- Background and practical details
- Example sources
TESTED WORKED EXAMPLE
What this session produced
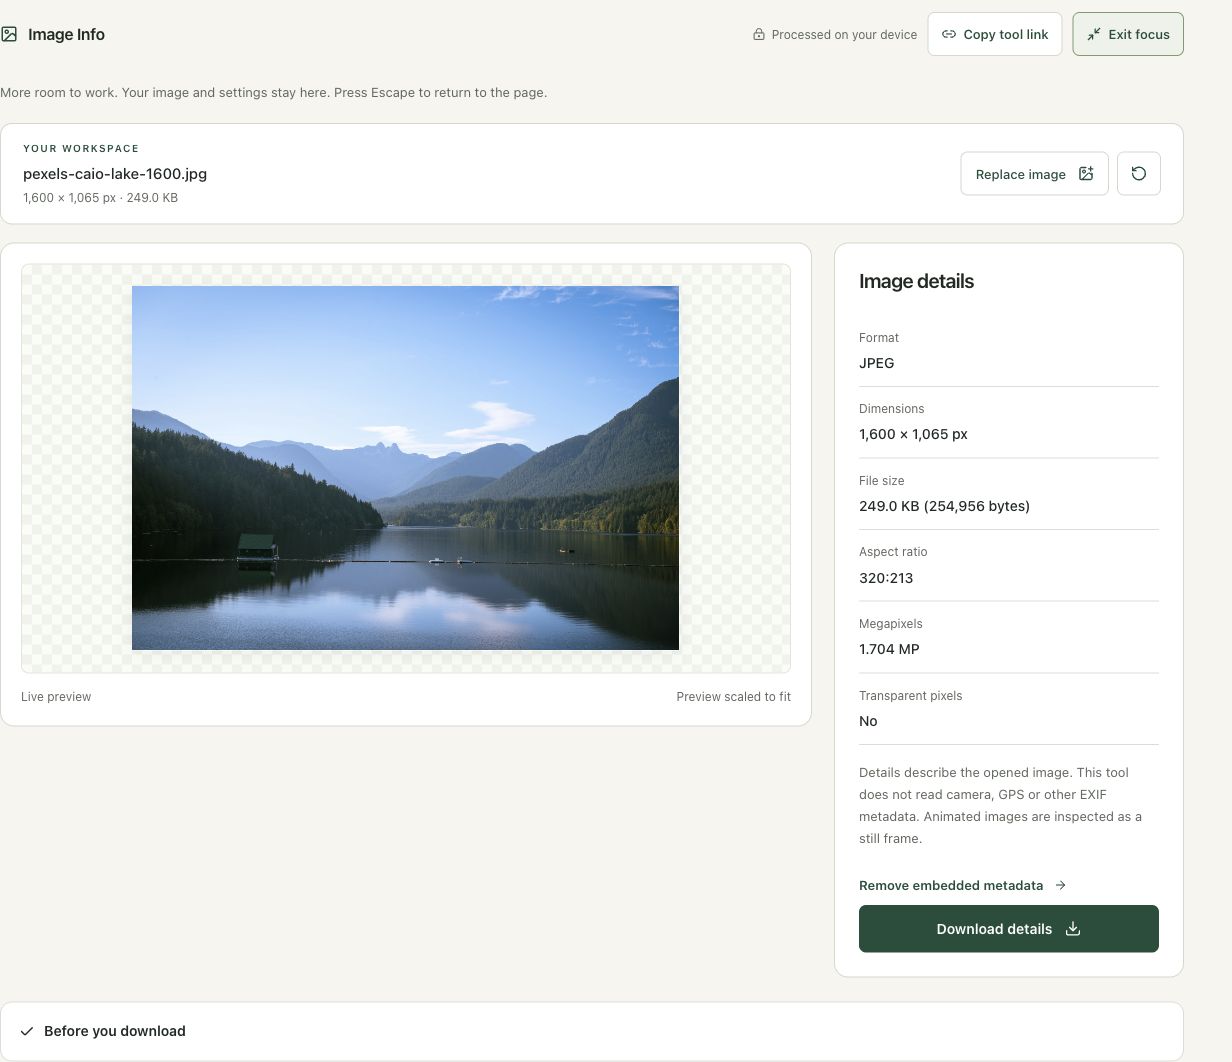
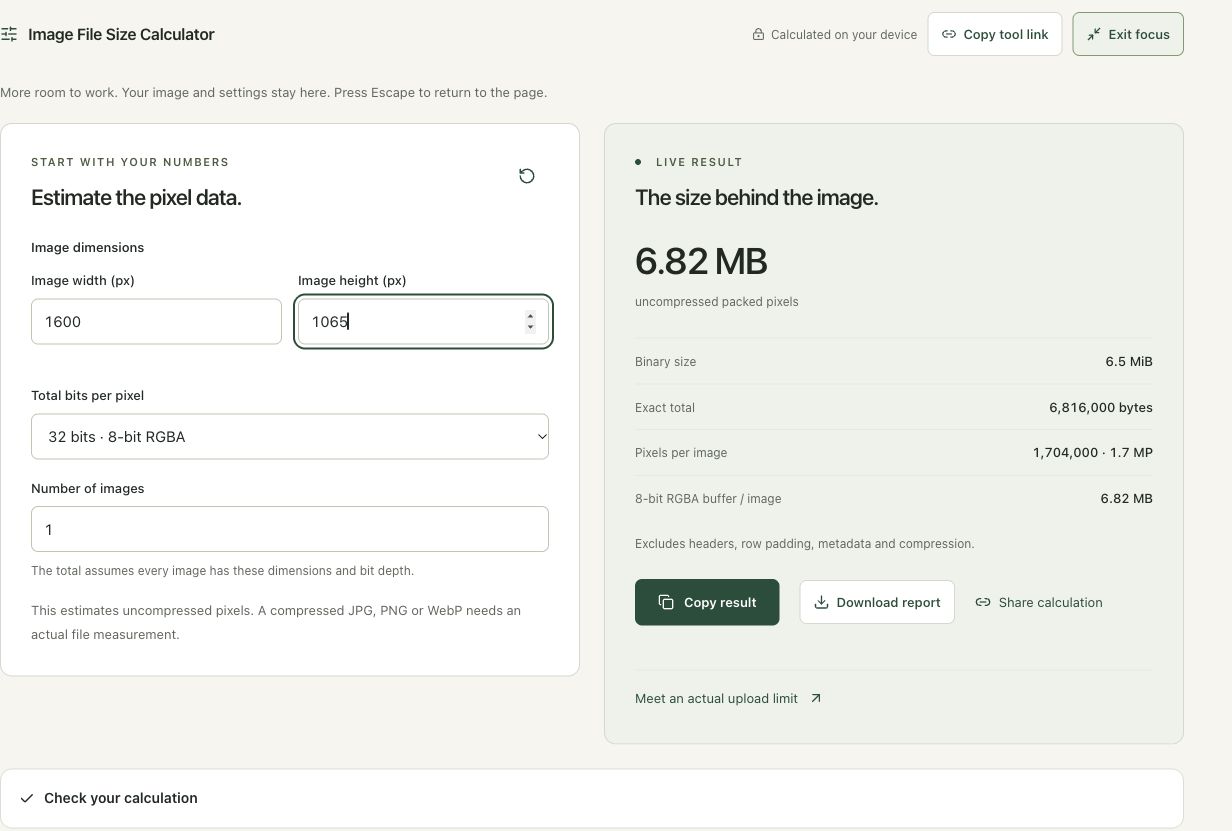
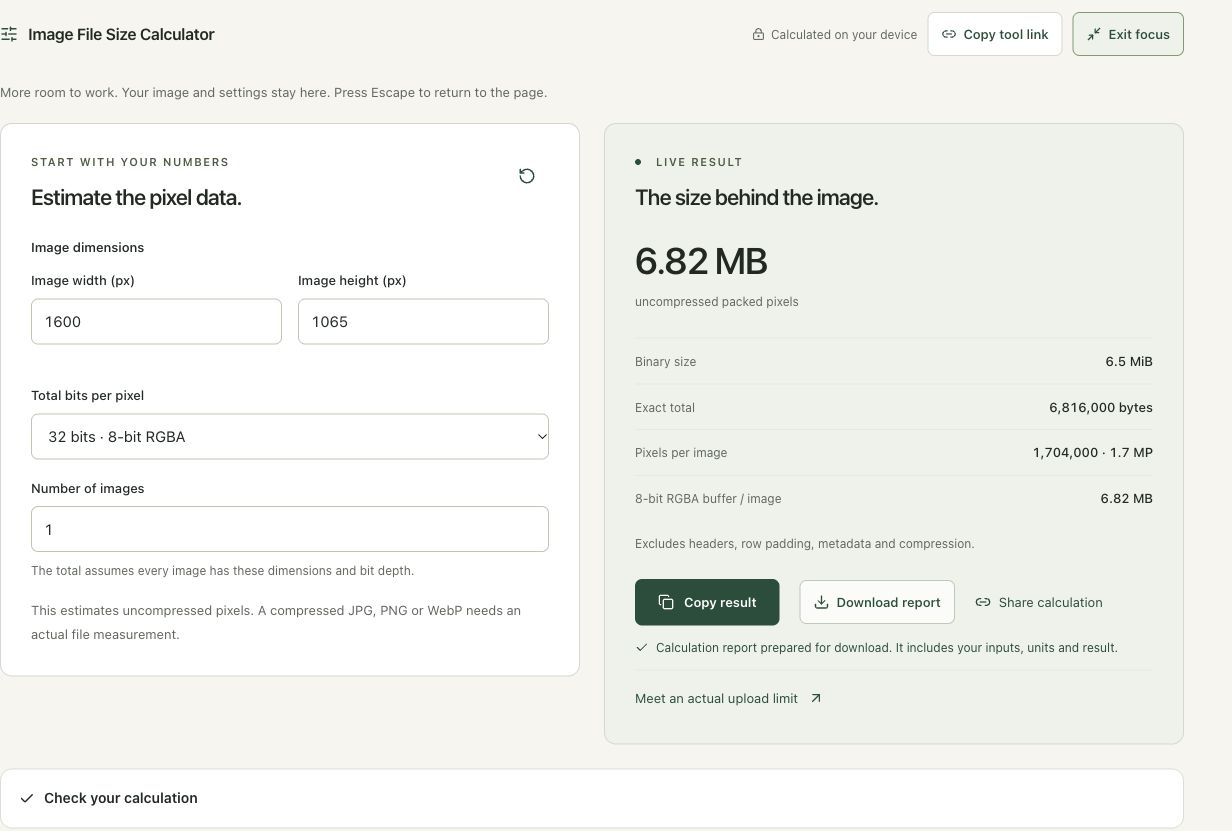
Image Info measured the lake JPG at 254,956 bytes, 1,600 × 1,065 pixels and 1.704 megapixels. An 8-bit RGBA pixel buffer at those dimensions requires 6,816,000 bytes before additional editing overhead.
The screenshots were captured from our working tools on October 6, 2026. Focus workspace is used to give the controls and preview more room. Captures show either the full workspace or the relevant panel; they are not recreated interface illustrations. Sizes and outcomes describe this sample, not a promised result for every image.
Follow the worked example, step by step
Read the settings and the result together. Keep an untouched source when a file is edited, and check the finished output before using it in another application. Each numbered step below includes a real screenshot of the corresponding workspace state. Use the full-size link when a control label is too small on your screen.
Step 1: Open Image Info to measure an actual file
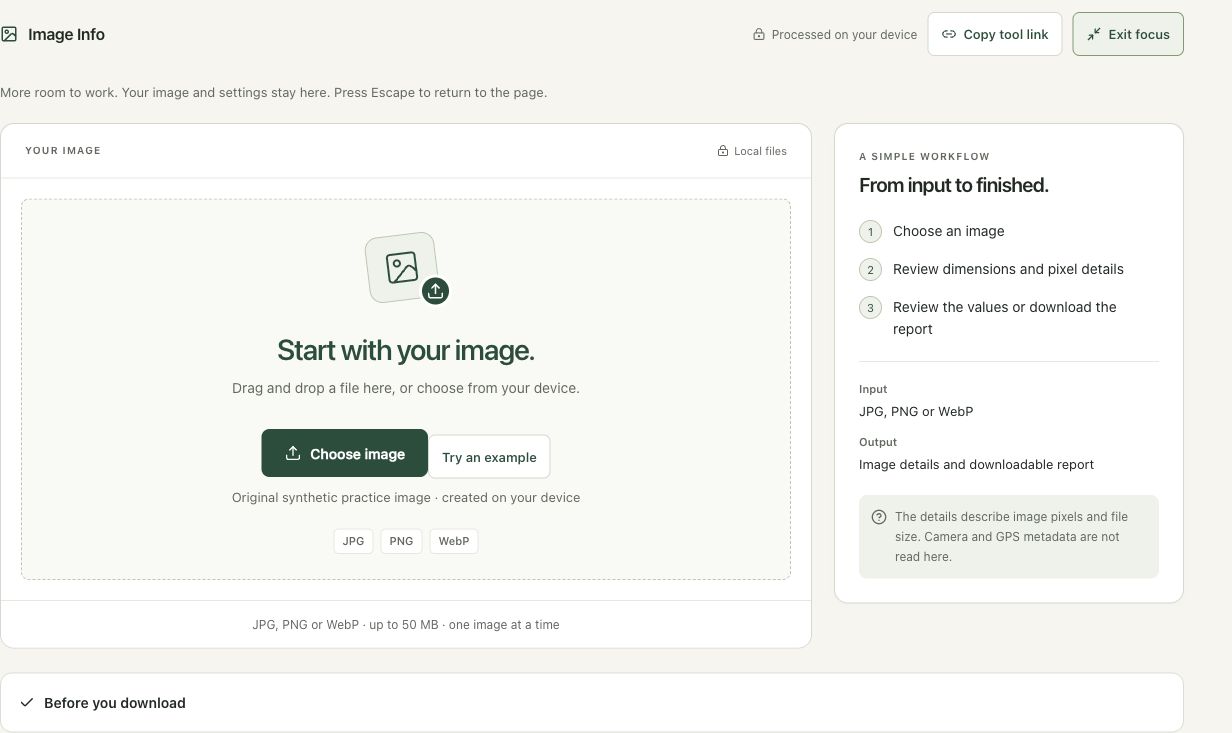
Open Image Info when you need dimensions and encoded file size. These values cannot be derived reliably from a thumbnail or filename. Keep the original file available while investigating an upload or memory problem. The information panel describes the opened image’s pixels and bytes, not a full camera-metadata or provenance report.
Step 2: Load the lake JPG and record its exact byte count
Choose the lake image. The details report JPEG, 1,600 × 1,065, 249.0 KB and 254,956 bytes. They also report aspect ratio 320:213, 1.704 MP and no transparent pixels. The exact byte count is useful when a receiving form has a strict limit. A rounded KB display is less precise near that boundary.
Step 3: Calculate the same dimensions as 8-bit RGBA pixels
Open Image File Size Calculator, enter width 1,600 and height 1,065, choose 32 bits for 8-bit RGBA, and leave the count at one. The result is 6,816,000 bytes, about 6.82 decimal MB or 6.5 MiB. That is one packed pixel buffer, not the compressed JPG. Headers, padding, models and duplicate working buffers are outside this estimate.
Step 4: Save the calculation with its units and assumptions
Choose Download report in the calculator. The ready message confirms a report containing the inputs, units and result. Keep it with the Image Info measurement when discussing resource usage. Do not submit this calculated MB value as proof of upload size: the file to upload still has its own measured byte count, and an export can change that count.
Check the result before using it
Keep the compressed-file measurement separate from the pixel-data calculation. The calculator estimates packed pixels, not a future JPG or PNG download. Real browser editing can allocate multiple buffers and additional resources.
If the result is not what you expected
Image Info does not read camera or GPS metadata. A small JPG can decode into a much larger pixel buffer. Use smaller working dimensions or smaller batches when editing strains browser memory; changing a filename does not change either measurement.
Background and practical details
Start with the question you need to answer
An upload form checks the bytes in the file you send. An editor must also decode that file into pixels so it can draw, crop or modify the picture. Compression can reduce the first number without reducing the second. Resizing reduces the number of pixels and can affect both, but changes the image dimensions.
Open Image Information to inspect a real JPG, PNG or WebP. The report includes dimensions, format, file size, aspect ratio and transparency information. It is an image summary, rather than a complete EXIF or GPS metadata inspection. Use Remove Image Metadata for a separate metadata-cleaning workflow.
Read the actual bytes before submitting
Compare the reported byte count with the receiving service’s written requirement. A label such as “200 KB” can have different unit conventions. Decimal kilobytes use 1,000 bytes; binary kibibytes use 1,024. If a destination provides its precise byte cap, use that number instead of guessing from a rounded size label.
The file format and dimensions are separate checks. A small PNG can still fail a form that accepts only JPG, and a correctly encoded JPG can still have the wrong width. Write down all three requirements and verify the actual exported copy after editing, rather than checking only your untouched source.
Calculate packed pixel storage
Open Image File Size Calculator, enter width and height, then select the total bits per pixel and image count. The formula is ceiling(width × height × bits per pixel ÷ 8) bytes per image. Multiply that per-image result by the number of images.
For 1920 × 1080 at 24 bits per pixel, the result is 6,220,800 bytes. That is 6.2208 decimal MB, or approximately 5.93 binary MiB. A common RGB layout uses three 8-bit channels; RGBA adds an alpha channel for a total of 32 bits per pixel. Selecting 24 means total bits across the pixel, rather than 24 for each channel.
Allow for decoded working buffers
One 8-bit RGBA buffer for those dimensions requires 8,294,400 bytes. MDN’s ImageData reference explains the RGBA channel arrangement used by the common browser pixel representation. An editor may hold the source, preview, output and temporary processing buffers at the same time.
The calculator’s RGBA figure represents one buffer. It does not predict total browser memory, model weights, graphics textures or every intermediate copy. Likewise, the packed estimate omits file headers, row padding and other storage overhead. Treat both figures as useful planning quantities, and pay attention to the tool’s own canvas and batch limits.
Choose the right way to reduce the job
If the problem is an upload cap, try Compress to Size and inspect the resulting file. If the problem is a very large decoded image, use Resize Image to prepare suitable dimensions or process fewer files together. Changing an extension or deleting a filename does neither.
Keep a high-resolution original for later work, and create a separate copy sized for the immediate destination. Inspect small text and important details after any reduction. Save the dimensions and actual byte count with your export notes so you can distinguish a quality decision from a storage estimate next time.
Keep an untouched source and inspect the downloaded result. If an instruction differs from the workspace, send the page URL and the setting involved. Our editorial policy explains how we review examples and limitations.
Example sources and screenshot notes
The example uses a resized 1,600 × 1,065 copy of Lake surrounded by green mountains by Caio.
These photographs are used under the Pexels license. They are licensed images, not claimed as public domain. The photographer links identify the original sources; resizing and example processing were performed for this tutorial.
The controls shown are from the version tested for this guide. A later interface update or a different source can change a result. Compare the displayed format, dimensions and status with the instructions, and report a mismatch with the article URL and the setting involved. Our editorial policy explains how examples and corrections are reviewed.
Find the right tool for your image.
Explore the free workspaces, read their methods and inspect your result before sharing.
Explore image tools