A folder is easier to use when filenames describe the collection and sort predictably. Rename a working copy with a clear prefix and padded numbers, then check the ZIP before replacing anything in your own workflow.
- The tested example
- Step 1: Open Batch Rename and choose a naming pattern
- Step 2: Load two photographs and inspect the initial preview
- Step 3: Set travel, start number 10 and three-digit numbering
- Step 4: Move the flower first and export the renamed ZIP
- Check the result
- Troubleshooting
- Background and practical details
- Example sources
TESTED WORKED EXAMPLE
What this session produced
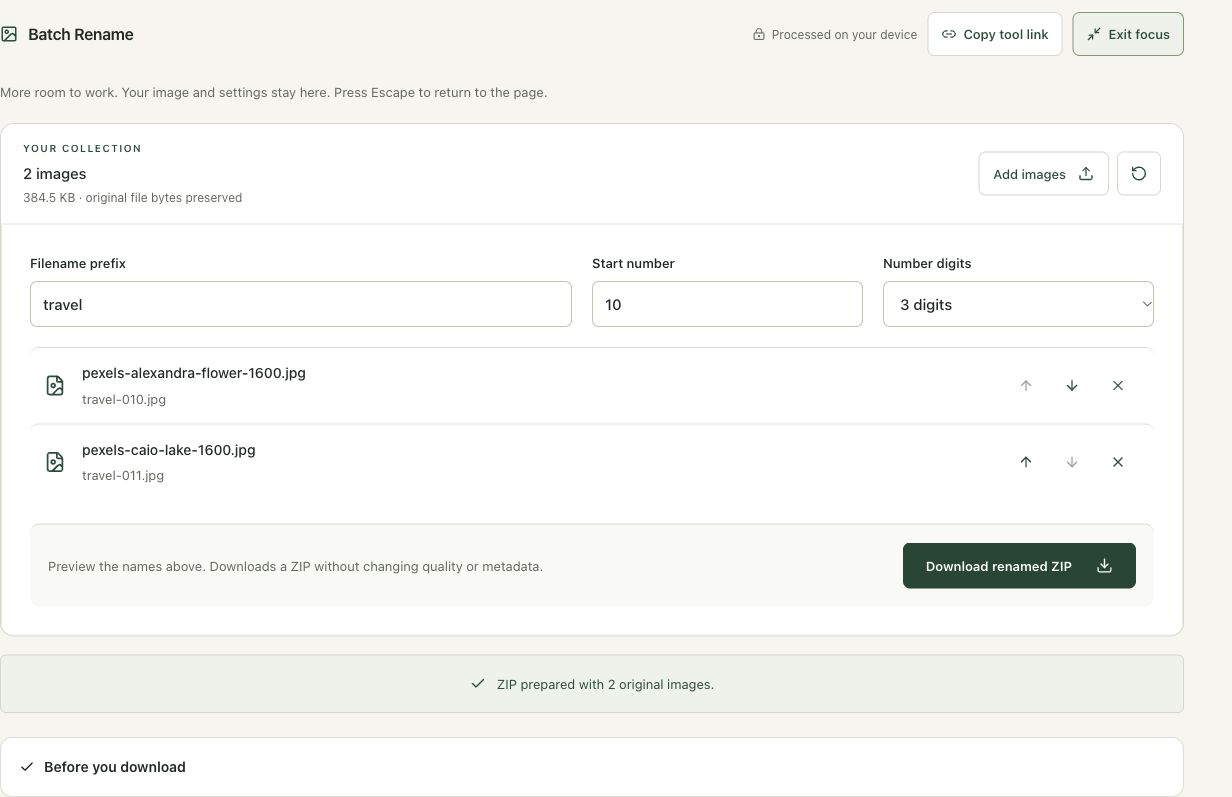
With prefix travel, start number 10 and three-digit numbering, the archive names became travel010.jpg and travel011.jpg. Moving the flower first changed which photograph received each name; the original file bytes were preserved.
The screenshots were captured from our working tools on October 6, 2026. Focus workspace is used to give the controls and preview more room. Captures show either the full workspace or the relevant panel; they are not recreated interface illustrations. Sizes and outcomes describe this sample, not a promised result for every image.
Follow the worked example, step by step
Read the settings and the result together. Keep an untouched source when a file is edited, and check the finished output before using it in another application. Each numbered step below includes a real screenshot of the corresponding workspace state. Use the full-size link when a control label is too small on your screen.
Step 1: Open Batch Rename and choose a naming pattern
Open Batch Rename when the problem is inconsistent filenames rather than image quality. Decide on a prefix, starting number and digit width before adding the collection. A stable naming pattern can help sort deliverables, but it does not describe the image content automatically. Keep a mapping to the originals if meaningful camera or source filenames need to remain traceable.
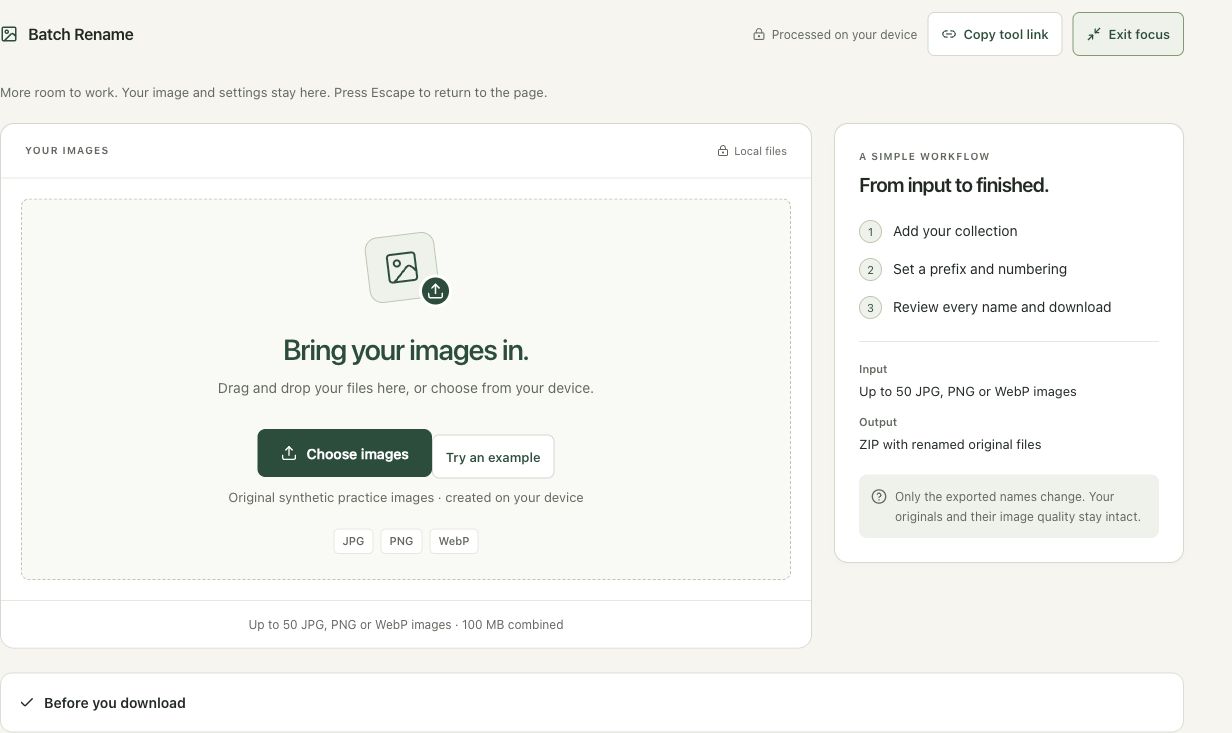
Step 2: Load two photographs and inspect the initial preview
Add the lake and flower images. The preview lists both originals and the generated names. Read the extensions: a JPG remains a JPG because this tool preserves original file bytes. This is also why hidden metadata can remain in a renamed copy. Use a separate metadata-cleaning workflow when privacy, rather than naming consistency, is the requirement.
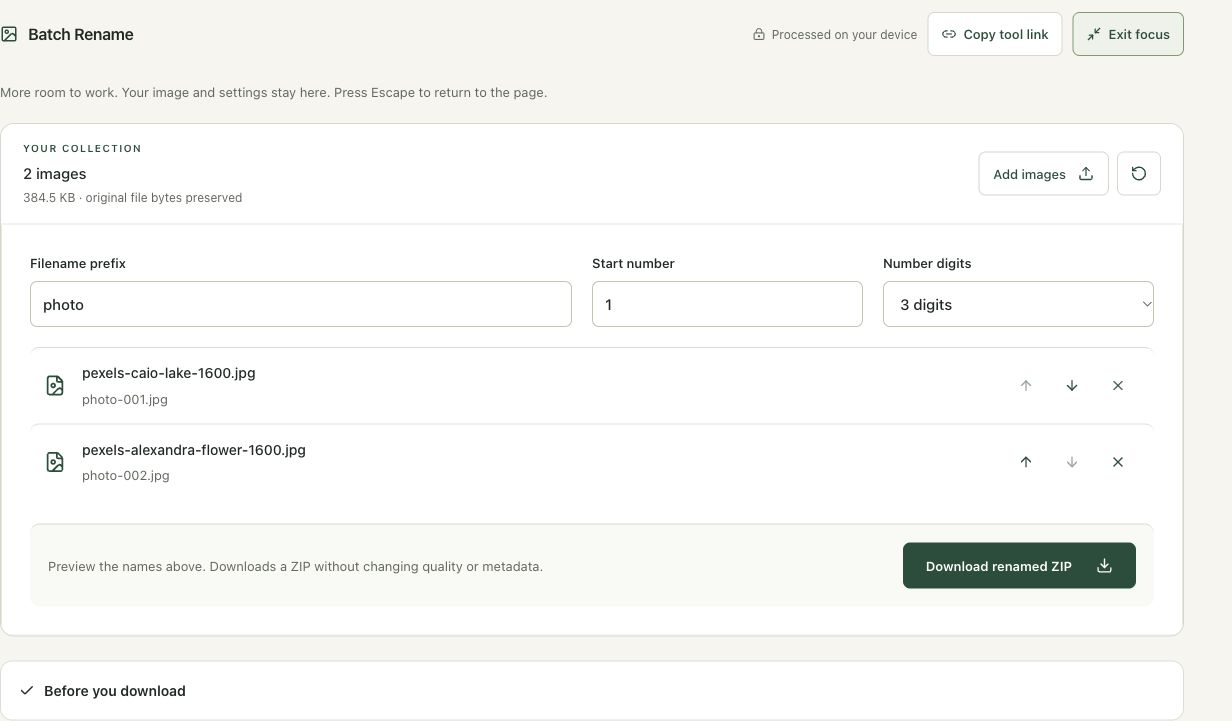
Step 3: Set travel, start number 10 and three-digit numbering
Enter travel as the prefix, 10 as the starting number and 3 as the digit width. The preview shows travel010.jpg and travel011.jpg. Read the proposed names before exporting. Increasing the digit width pads the numeric part with zeroes; it does not add extra images. Choose enough digits that a future larger collection still sorts naturally.
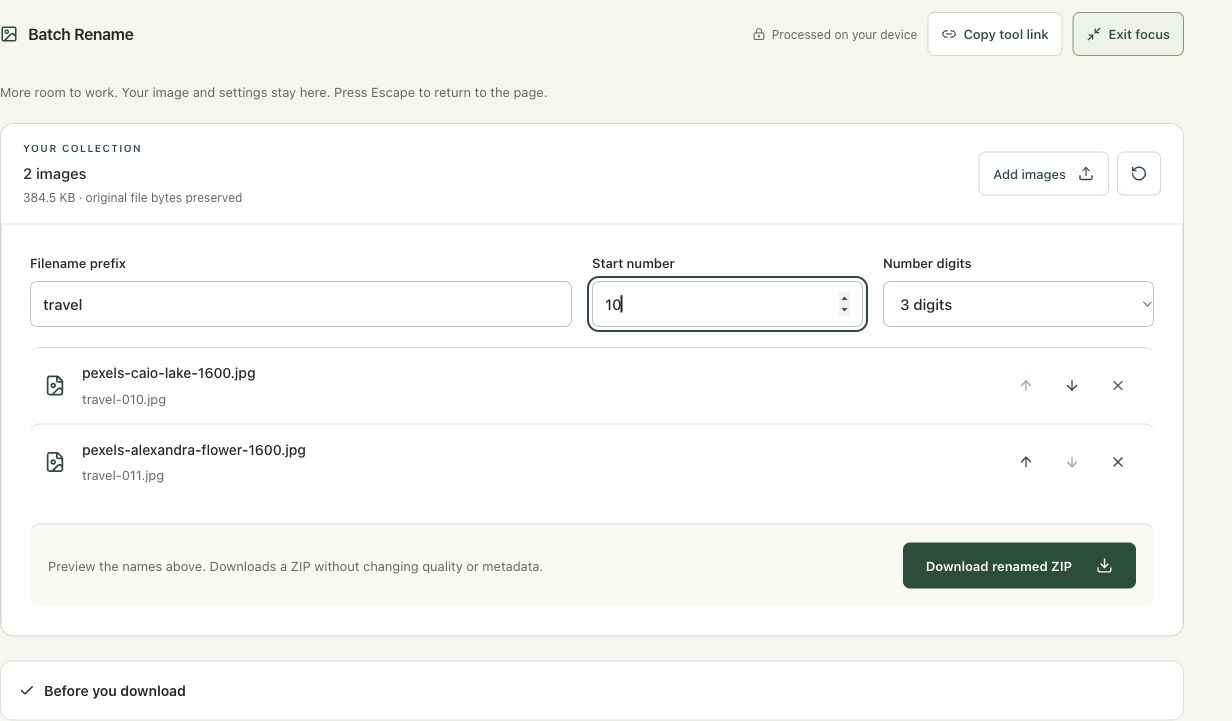
Step 4: Move the flower first and export the renamed ZIP
Move the flower above the lake before choosing Download renamed ZIP. The first visible file now receives travel010.jpg and the second travel011.jpg. Review the completed status and extract the archive into a separate folder. Open representative images to confirm the mapping. The tool prepares renamed copies, so the source photographs remain available under their original names.
Check the result before using it
Inspect the archive’s filenames, order and extensions. Renaming does not convert formats or strip metadata. Keep the original collection until the naming scheme has been checked in the application that will receive it.
If the result is not what you expected
Numbering follows the visible list order. Use a safe short prefix and enough digits for the collection. If files with existing names are already in a destination folder, extract the ZIP into a separate folder to avoid accidental replacement.
Background and practical details
Choose a naming rule before importing
A useful filename identifies the collection and makes its order clear. For example, a set of studio product photographs might use the prefix studio followed by a three-digit sequence. Choose a prefix that is meaningful outside the current folder too. Avoid a name so broad that every future collection will use the same filenames.
Decide whether the sequence represents page order, a shot list or a presentation. Numbering records the order you choose in the workspace; it does not infer when photographs were taken or read their camera dates. If capture order matters, verify it from your own source records before exporting.
The workspace accepts up to 50 images and 100 MB combined. It packages renamed copies rather than renaming files in your existing folders. Your originals remain available on your device. Keep them until you have checked the archive and tested the new names in the destination workflow.
Use number padding for predictable sorting
With three digits and a start number of 1, the sequence begins 001, 002 and 003. Padding gives small numbers the same minimum length. Without padding, a simple alphabetical file list can place 10 before 2. Check the destination’s sorting behavior if a precise display order matters.
The tool allows one to six padding digits and a starting integer from 0 to 999,999. Digits are a minimum width rather than a cutoff. A three-digit sequence starting at 998 continues 998, 999 and 1000; it does not truncate the last number or wrap back to 000. Choose enough digits for the collection you intend to produce.
Review sanitized names
The prefix uses safe letters, numbers, hyphens and underscores. Spaces and unsupported characters are replaced or removed, so a proposed name may differ from exactly what you typed. Preview the actual output list, especially if the original prefix contains non-Latin characters or punctuation. The names shown before download are the names to review.
Extensions are based on the supported file format. A JPG remains JPG, a PNG remains PNG and a WebP remains WebP. Renaming is not conversion: changing a text label or suffix cannot change how the image bytes are encoded. Use Convert Image separately when a destination requires a different format.
Understand what is preserved
This workflow puts the original image bytes into a ZIP under new names. It does not resize, re-encode, remove camera data or strip location metadata. The MDN File reference describes the file objects available to browser applications; a file’s name and its stored image content are separate properties.
If the goal is a private sharing set, prepare suitable copies before renaming them. Remove EXIF is a separate re-encoding workflow, with its own quality and metadata limits. Read the metadata guide before assuming a renamed photograph has been cleaned.
Check the archive in its destination
Extract the ZIP and confirm the number of files, their extensions and the planned sequence. Open representative images to verify that the correct originals were included. Upload or import the actual extracted files when the receiving application expects images; the ZIP itself may not be accepted.
Separate exports can reuse the same names if you reuse a prefix and starting number. Use a different collection prefix or continue the numbering before merging folders. Renaming also leaves duplicate content intact. Use Duplicate Finder for an exact-file duplicate check when the collection contains repeated copies, and inspect the selected keepers before downloading.
Keep your original files and check the actual download. If an instruction no longer matches the workspace, send us the page URL and a description. Our editorial policy explains how we document examples and limitations.
Example sources and screenshot notes
The example uses resized copies of Lake surrounded by green mountains by Caio and Close-up shot of orange flower by Alexandra Diniz.
These photographs are used under the Pexels license. They are licensed images, not claimed as public domain. The photographer links identify the original sources; resizing and example processing were performed for this tutorial.
The controls shown are from the version tested for this guide. A later interface update or a different source can change a result. Compare the displayed format, dimensions and status with the instructions, and report a mismatch with the article URL and the setting involved. Our editorial policy explains how examples and corrections are reviewed.
Find the right tool for your image.
Explore the free workspaces, read their methods and inspect your result before sharing.
Explore image tools