A collage combines layout decisions with image decisions. Choose the canvas and grid first, then inspect how each photograph fits rather than judging only whether the overall rectangle looks balanced.
- The tested example
- Step 1: Open Collage Maker and plan the canvas
- Step 2: Add the lake and flower and inspect the default layout
- Step 3: Set a 1,200 × 900 canvas and preserve the whole photos
- Step 4: Move the flower first and export the finished JPG
- Check the result
- Troubleshooting
- Background and practical details
- Example sources
TESTED WORKED EXAMPLE
What this session produced
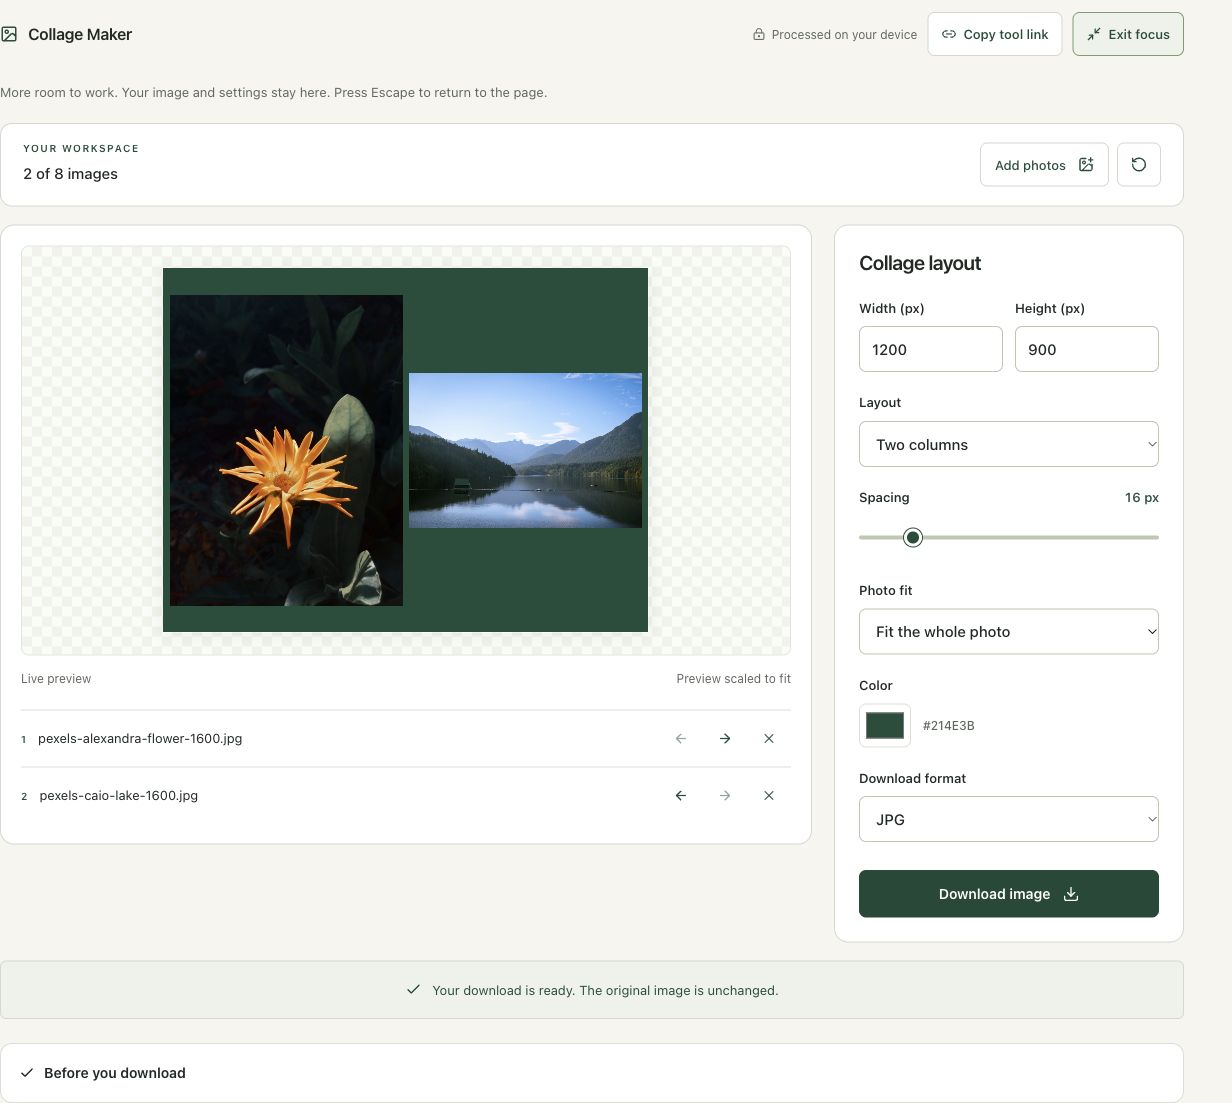
Two differently oriented photos were arranged on a 1,200 × 900 canvas using two columns, 16-pixel spacing and Fit the whole photo. The flower was moved first, and the result was exported as JPG.
The screenshots were captured from our working tools on October 6, 2026. Focus workspace is used to give the controls and preview more room. Captures show either the full workspace or the relevant panel; they are not recreated interface illustrations. Sizes and outcomes describe this sample, not a promised result for every image.
Follow the worked example, step by step
Read the settings and the result together. Keep an untouched source when a file is edited, and check the finished output before using it in another application. Each numbered step below includes a real screenshot of the corresponding workspace state. Use the full-size link when a control label is too small on your screen.
Step 1: Open Collage Maker and plan the canvas
Open Collage Maker. Choose the intended outer dimensions and the number of columns before judging individual photo crops. A collage distributes one canvas among several images, with gaps and outer spacing. Keep the separate originals for future layouts. This example combines one landscape and one portrait to show why a fit choice matters.
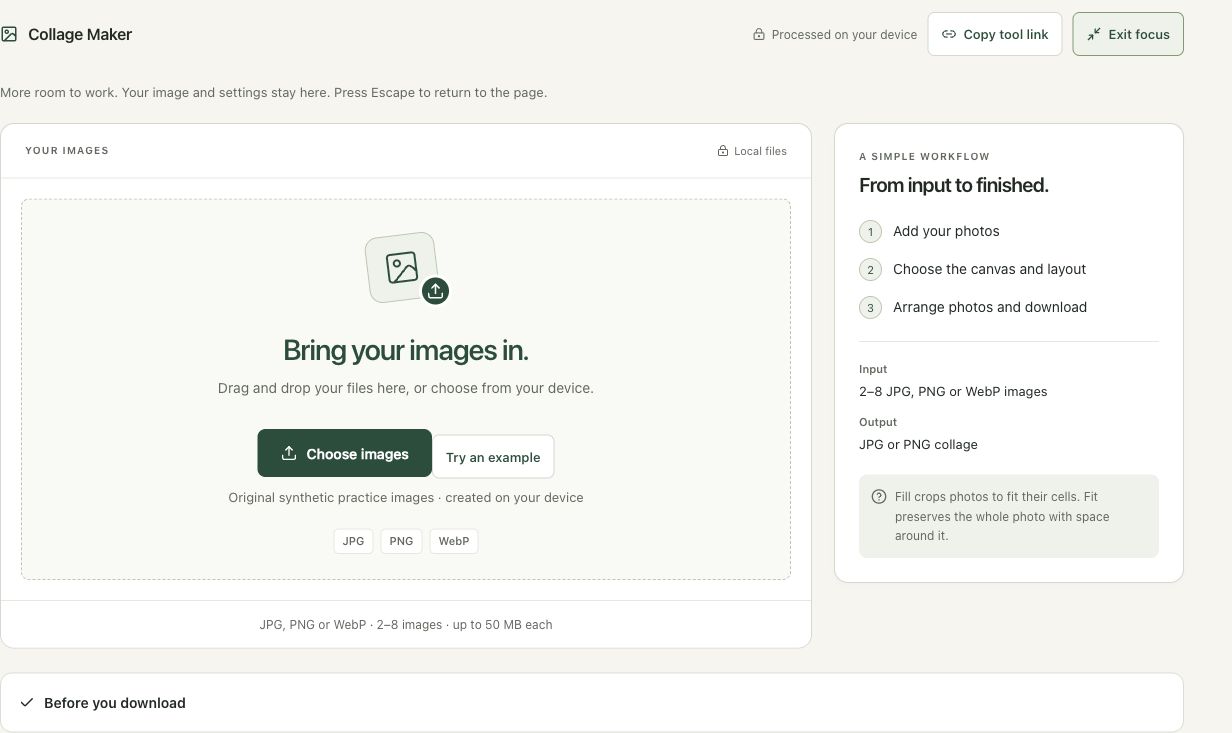
Step 2: Add the lake and flower and inspect the default layout
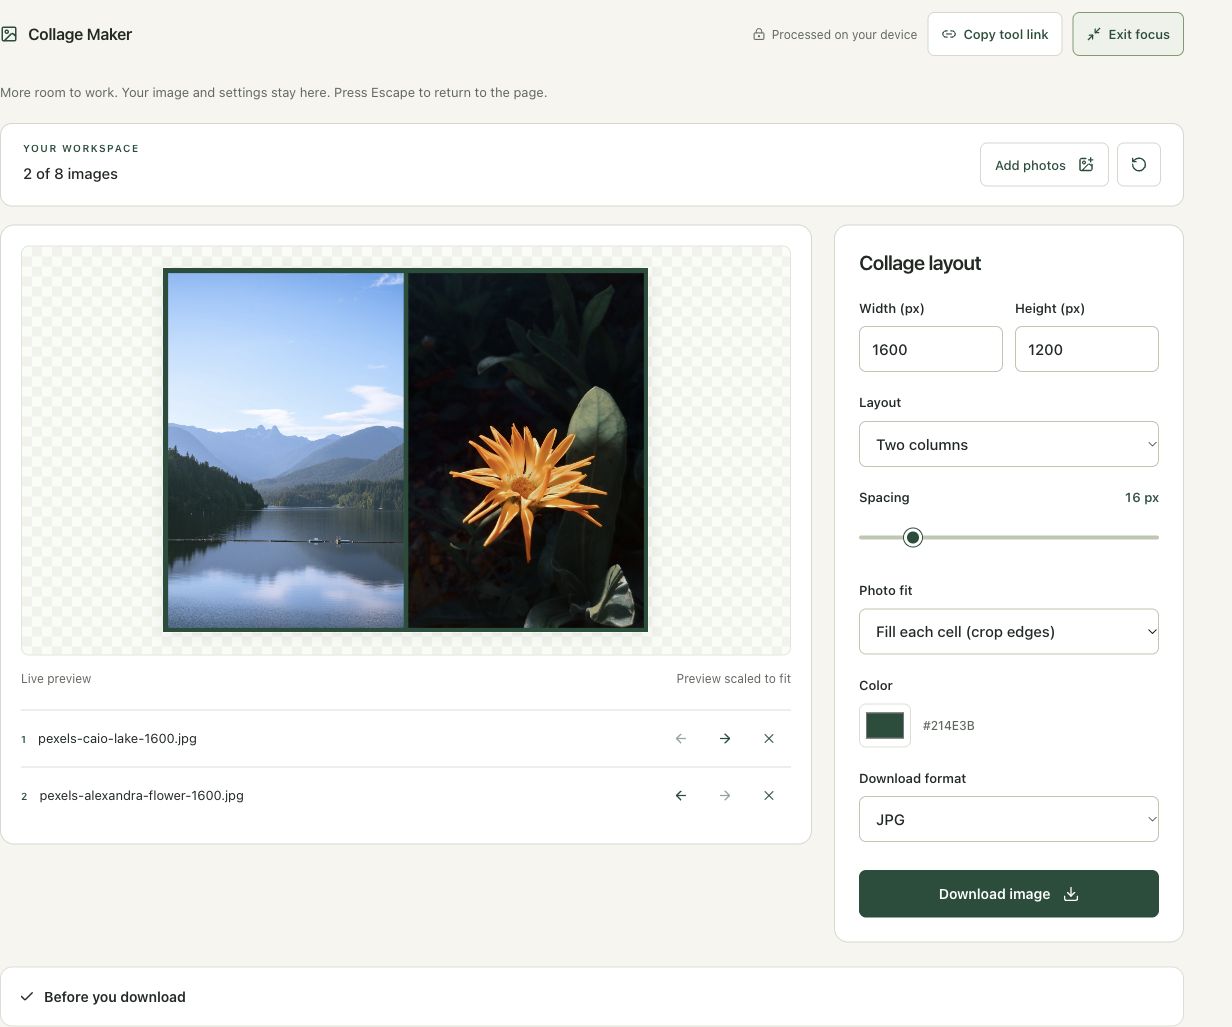
Add the lake first and flower second. The default 1,600 × 1,200 layout uses two columns and Fill each cell. Review which parts of each source are cropped. The numbered list controls order, and the preview shows the composition. A photo that looks good alone may need different framing once it occupies a narrow cell.
Step 3: Set a 1,200 × 900 canvas and preserve the whole photos
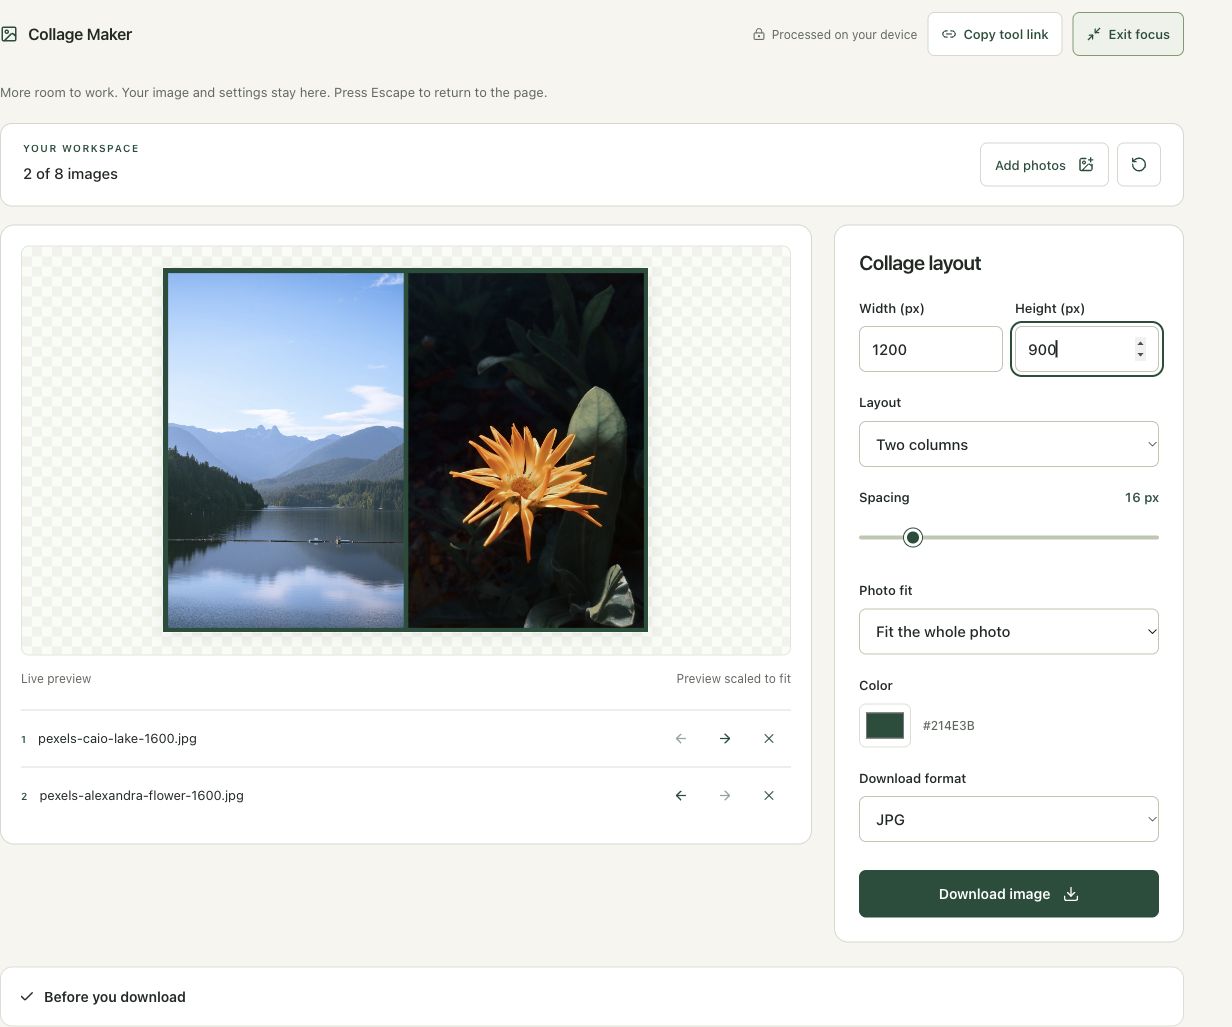
Enter 1,200 for Width and 900 for Height. Keep two columns and 16-pixel spacing, then select Fit the whole photo. This retains complete source content with background space where proportions do not match the cells. Check both images, since fitting a landscape and a portrait into equal cells creates different amounts of unused space.
Step 4: Move the flower first and export the finished JPG
Move photo 2 earlier so the flower occupies the first cell. Choose Download image with JPG selected and wait for completion. Inspect the exported 1,200 × 900 composition for order, gaps and readability. If important content is too small, change the layout or canvas rather than assuming that a higher JPG quality setting will solve the cell geometry.
Check the result before using it
Check photo order, spacing, the visible backing color and whether the whole subject remains visible in every cell. A canvas dimension does not describe the usable area inside each cell; margins and gaps consume space.
If the result is not what you expected
Fill crops to match each cell, while Fit leaves unused space. Mixed portrait and landscape sources can require different framing decisions. A high-resolution source in one cell does not make a low-resolution neighbor equally detailed.
Background and practical details
Choose a canvas for its destination
Decide the final width, height and intended display size before adding text or choosing tiny details. A landscape comparison, a portrait announcement and a square collection have different layout needs. A visually balanced canvas can still fail an upload’s exact dimension requirements, so use the receiving destination’s specification.
Open Collage Maker with two to eight JPG, PNG or WebP images. The combined decoded input limit is 64 megapixels. Browser memory depends on decoded pixels as well as compressed file sizes. Resize working copies when the original photographs are much larger than their intended cells.
The image order runs across the row before moving to the next one. Reorder the files with the list controls so the sequence reads naturally. For a before-and-after pair, keep a consistent left-to-right order and ensure both pictures show the intended area.
Calculate the available cell size
For a 1,000 × 600 canvas with two columns, one row and 20 pixels of spacing, the cell width is (1,000 − 3 × 20) / 2 = 470 pixels. The cell height is 600 − 2 × 20 = 560 pixels. The three horizontal gaps include both outside margins and the middle gap.
More columns reduce the width of each cell, and extra rows reduce the height. Very large spacing leaves less room for the subjects. The renderer limits spacing to what the grid can support. Check the preview after changing dimensions rather than assuming the requested gap fits every possible layout.
Choose fill or fit for a reason
Fill each cell crops edges to occupy the cell. It creates an even grid but can remove a face, a label or a product detail. Fit the whole photo preserves the full frame inside the cell and uses the background color for unused space. Neither method stretches the photograph to an unrelated ratio.
If one crop is unacceptable, prepare that photo separately with Crop Image or use whole-photo fit for the layout. The collage does not offer a separate advanced positioning editor for every cell. A suitable source composition is easier to use than repeatedly guessing at the final cut.
Review incomplete rows and backgrounds
Five images in a three-column layout need two rows and leave an unused cell. That cell uses the selected background. Decide whether that empty region belongs in the design or whether another column count would communicate the collection more clearly. Do not assume an empty cell will disappear automatically.
The collage canvas has a selected background color. Even transparent source logos are composed into that layout. PNG preserves the decoded rendered collage pixels; JPG uses a lossy encoding. For small text or diagrams, compare a PNG first, then inspect any JPG alternative at the intended size.
Check the downloaded composition
The output supports up to 8,192 pixels per side and 32 megapixels total, with a minimum canvas side of 64 pixels. The file is one finished image, not a set of independently editable photo layers. Keep the sources and chosen layout settings for another version.
MDN describes canvas image drawing and source rectangles. For this workspace, the fit controls determine how those rectangles become cells. Use Split Image for the opposite task of turning one finished image into separate tiles.
Keep an untouched source and inspect the downloaded result. If an instruction differs from the workspace, send the page URL and the setting involved. Our editorial policy explains how we review examples and limitations.
Example sources and screenshot notes
The example uses resized copies of Lake surrounded by green mountains by Caio and Close-up shot of orange flower by Alexandra Diniz.
These photographs are used under the Pexels license. They are licensed images, not claimed as public domain. The photographer links identify the original sources; resizing and example processing were performed for this tutorial.
The controls shown are from the version tested for this guide. A later interface update or a different source can change a result. Compare the displayed format, dimensions and status with the instructions, and report a mismatch with the article URL and the setting involved. Our editorial policy explains how examples and corrections are reviewed.
Find the right tool for your image.
Explore the free workspaces, read their methods and inspect your result before sharing.
Explore image tools