OCR turns the appearance of printed words into editable text. It can save typing, but a plausible-looking result can still contain mistakes. Preparation and a focused proofreading pass make the output more useful.
TESTED WORKED EXAMPLE
What this session produced
The 640 × 480 practice document produced editable English text with a displayed confidence of 95%. The recognized order number was 2048 and the total was 125.00. The document is fictional and contains no private account information.
The screenshots were captured from our working tools on October 6, 2026. Focus workspace is used to give the controls and preview more room. Captures show either the full workspace or the relevant panel; they are not recreated interface illustrations. Sizes and outcomes describe this sample, not a promised result for every image.
Follow the worked example, step by step
Read the settings and the result together. Keep an untouched source when a file is edited, and check the finished output before using it in another application. Each numbered step below includes a real screenshot of the corresponding workspace state. Use the full-size link when a control label is too small on your screen.
Step 1: Open OCR with a readable source in mind
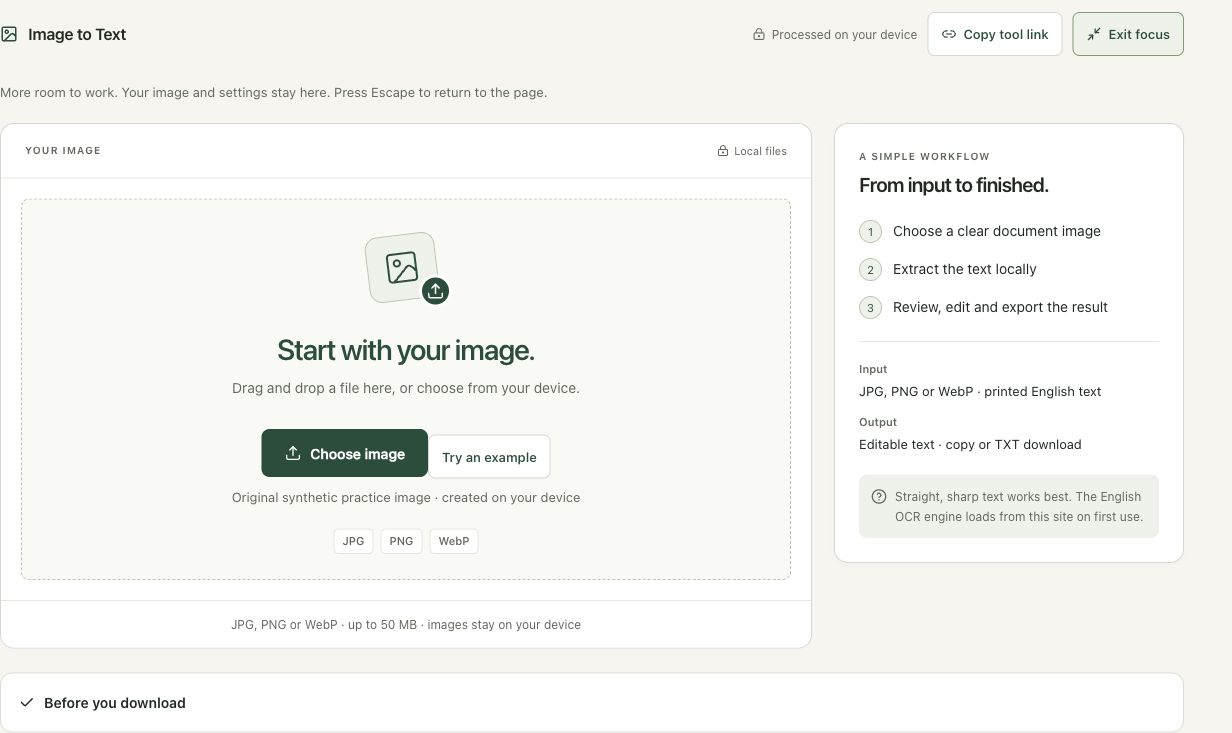
Open Image to Text. A straight, sharp document image is a better source than a distant sign or compressed chat thumbnail. Keep the original so the recognized words can be checked afterward. This workspace reads printed English locally, and the engine resources load from the site on first use. It does not verify whether a document is accurate or genuine.
Step 2: Load the fictional practice document
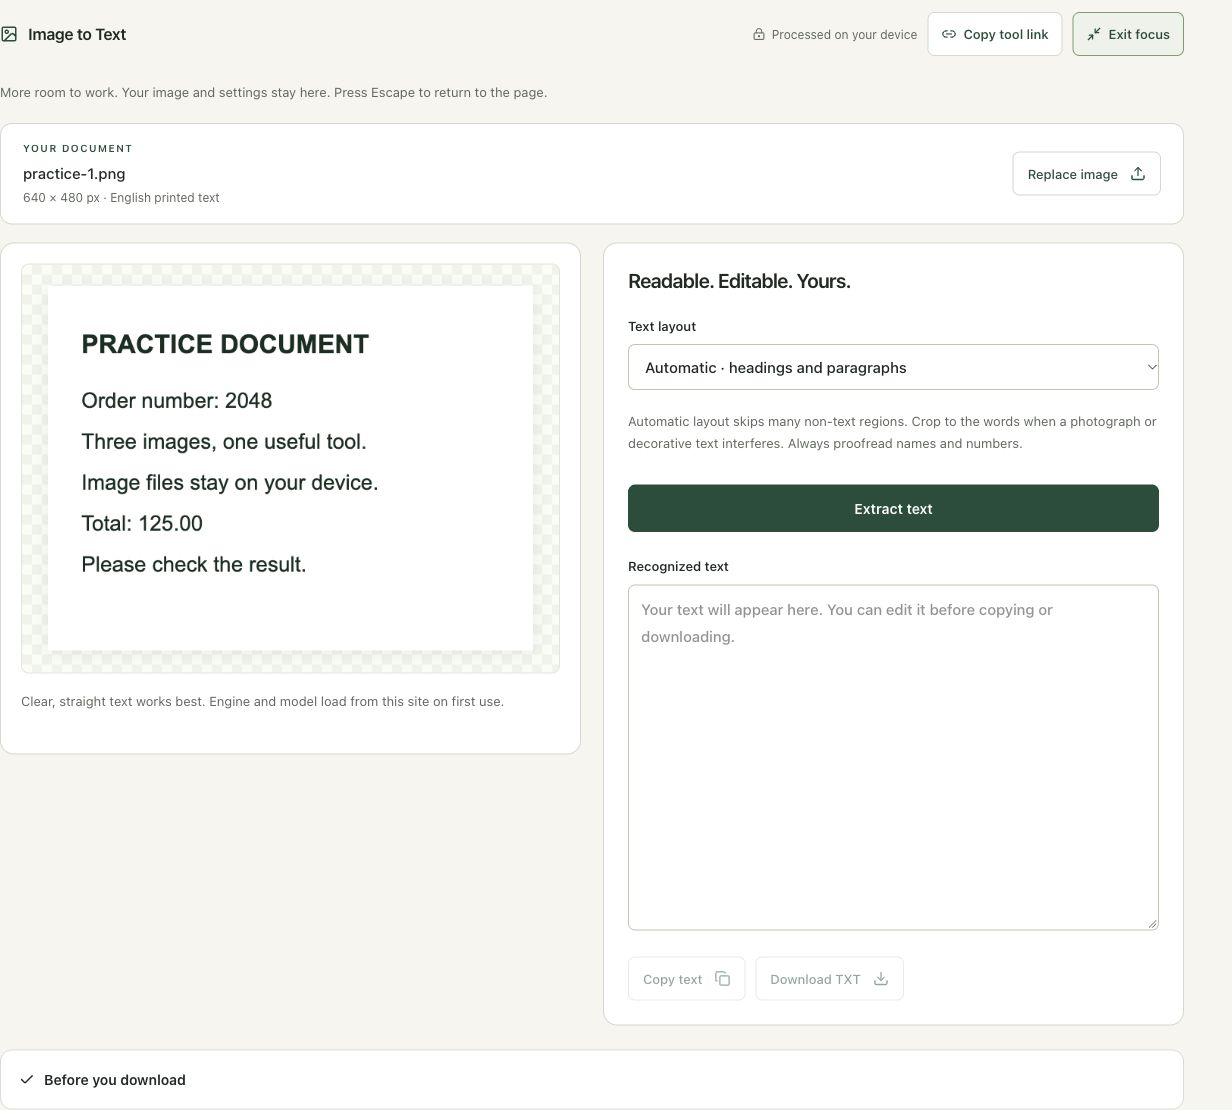
Choose Try an example. The 640 × 480 graphic contains deliberately readable text, an order number and a total. It is a fictional document created by the site. Check the source in the preview before starting recognition so you know what the output should contain. For a real document, rotate or crop it first if lines are tilted or too small.
Step 3: Choose the layout and start recognition
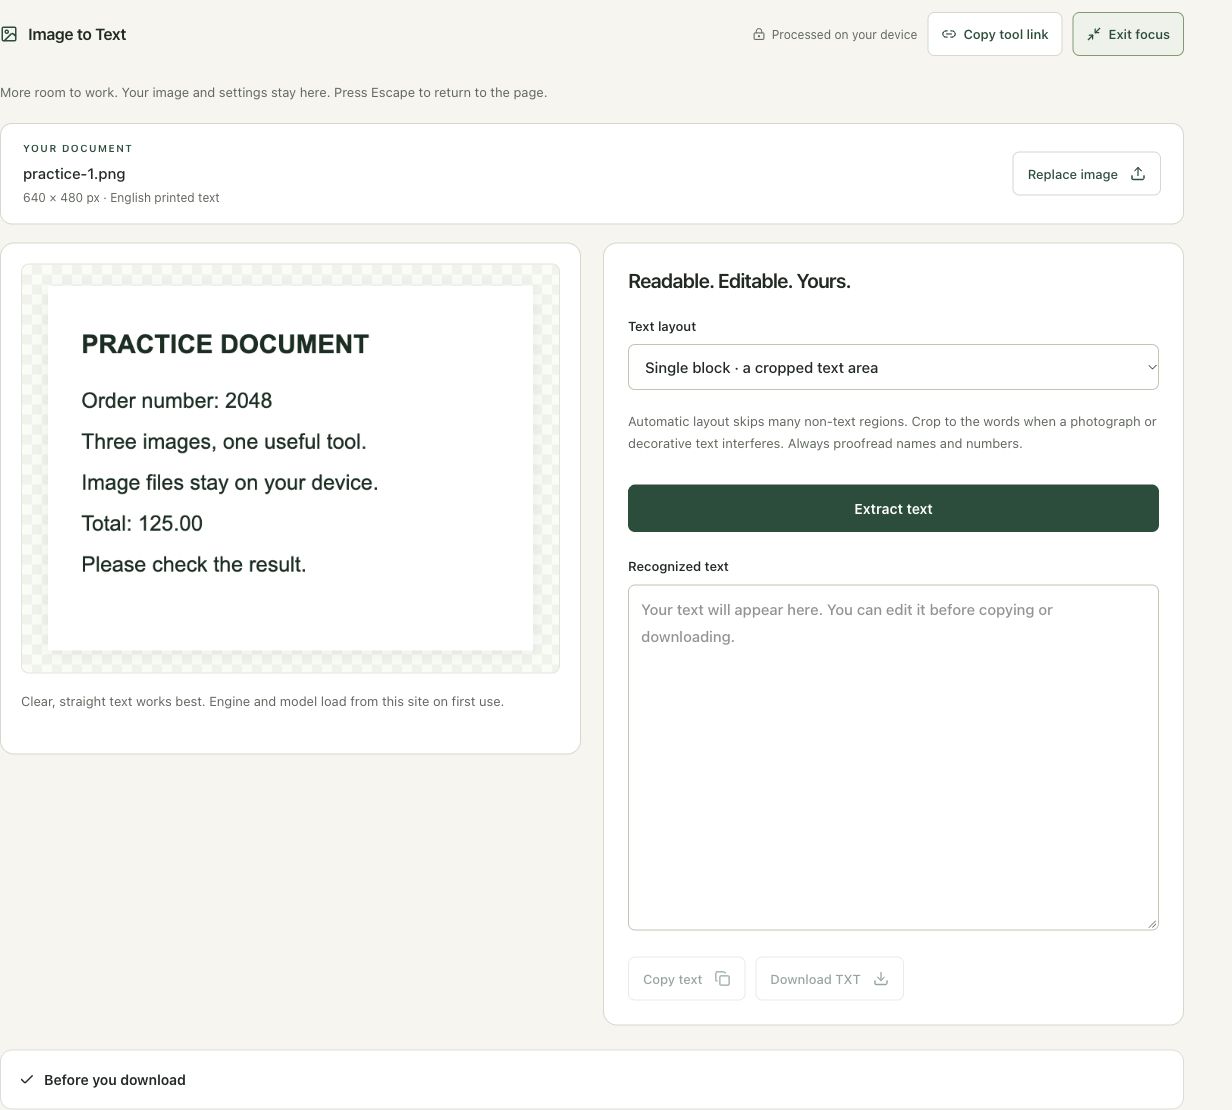
Select Single block for this compact text example, then choose Extract text. Automatic suits headings and paragraphs, while Scattered text is intended for sparse labels. These options guide layout analysis; they are not language selectors. Keep the tab open while the engine loads and recognition runs. Changing the layout clears the old result so it cannot be mistaken for a new attempt.
Step 4: Proofread the recognized words before exporting
The finished result shows editable text and 95% confidence. Check PRACTICE DOCUMENT, order number 2048 and total 125.00 against the source. Correct any mistakes in Recognized text, then copy the result or choose Download TXT. Review line breaks when pasting elsewhere. A plain-text export does not retain the original fonts, table cells or visual document layout.
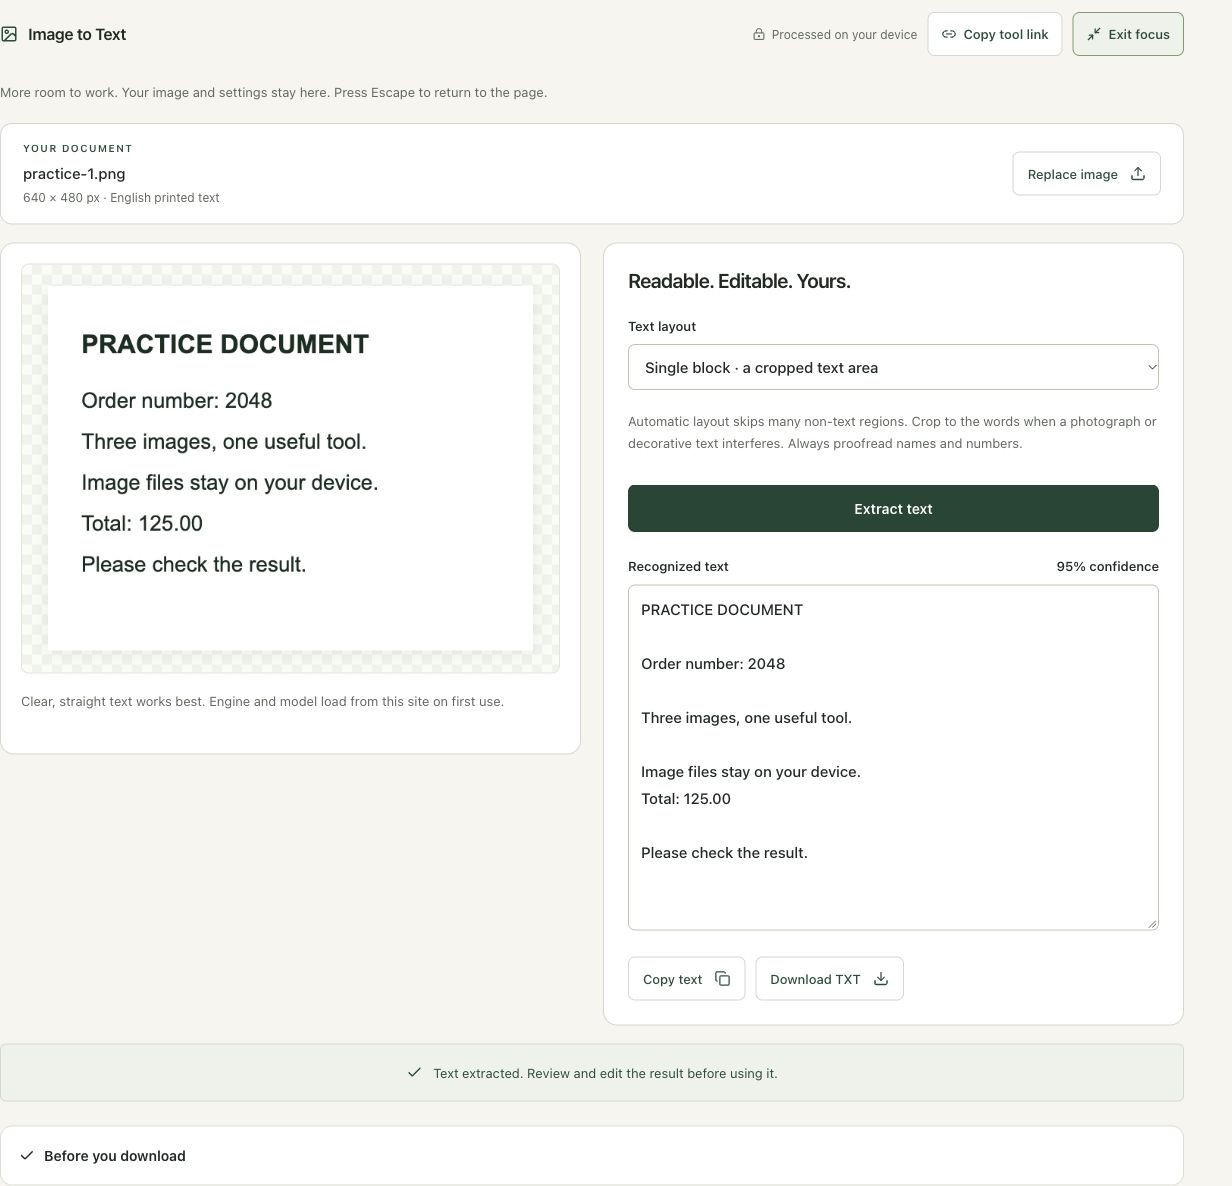
Check the result before using it
Read the source and output together, especially names, decimal points and identifiers. Confidence is an engine estimate, not a correctness guarantee. The output is plain text rather than a reconstruction of the document’s original typography.
If the result is not what you expected
Crop to sharp, straight words when a photograph contains decorative text or distracting imagery. Choose the layout that suits the region. The workspace uses an English model; non-English text, handwriting and complex layouts can need a different OCR tool or manual transcription.
Background and practical details
Start with a readable source
Use the original screenshot or photo when possible. A screenshot of a screenshot can lose small characters. For a photographed page, hold the camera square to the page, avoid glare and keep the printed lines in focus. A bright reflection can erase strokes that no recognition setting will recover.
Crop out unrelated surroundings while leaving the full text region. If the picture is sideways, rotate it before recognition. Use Crop Image for those preparation steps. Keep the original so you can compare a prepared version with the source. Cropping can help isolate a passage, but cutting off ascenders, descenders or punctuation can introduce new errors.
The Tesseract quality guide discusses factors such as skew, noise and segmentation. Those factors explain why a clear, straight passage is a better starting point than a curved label or a crowded page. Preparation improves the input; it does not guarantee correct recognition.
Know the supported scope
Smart Image Tools’s Image to Text workspace reads printed English text in JPG, PNG and WebP images. It does not accept PDF pages directly and does not offer a language selector for other language models. Handwriting, unusual typefaces, curved text and complex layouts can produce poor results.
The browser loads the OCR engine and English model from this website on first use. Recognition runs on your device. That initial download is still network activity; local recognition does not mean the page works without first loading its resources. A slow first attempt can be model preparation rather than a problem with the image.
If no text is recognized, try a sharper image or a single clear passage. Repeating the same input without changing anything is unlikely to fix missing character detail. Avoid assuming that enlarging a blurred picture creates the strokes needed to distinguish similar letters.
Give numbers a separate pass
Similar characters can produce an output that still reads naturally. Compare the letter O with zero, and uppercase I or lowercase l with one. Inspect decimal points, minus signs, units and dates. A single changed digit can matter more than several obvious spelling mistakes.
For a table, verify which value belongs to which row or column. Plain recognized text may reorder nearby blocks or lose alignment. Do not paste it into a spreadsheet and assume that spacing reconstructs the source structure. Names and specialized vocabulary deserve their own review because a plausible substitute may not stand out during ordinary reading.
Interpret confidence carefully
The displayed confidence comes from the recognition engine. It is an estimate about its output, not a verified statement that the same percentage of your document is correct. A high value does not replace checking an important number, and a lower value can still include usable text. Compare the result with the visible source.
The TXT export contains plain text. It does not preserve the original typeface, page layout, figures or a searchable PDF layer. If you need a picture-based PDF, use Image to PDF separately; that tool does not automatically attach this recognized text to the pages.
Share only the intended passage
Review the corrected text for material you did not intend to include, such as a name in a header or a private note in the margin. Recognition being local does not make a later copy into another service private. Keep a corrected working copy when you need to return to the passage, and identify the original source when attribution is appropriate.
Keep your original files and check the actual download. If an instruction no longer matches the workspace, send us the page URL and a description. Our editorial policy explains how we document examples and limitations.
Example sources and screenshot notes
This example uses an original synthetic document with fictional text, order number 2048 and total 125.00. It contains no private account information.
The controls shown are from the version tested for this guide. A later interface update or a different source can change a result. Compare the displayed format, dimensions and status with the instructions, and report a mismatch with the article URL and the setting involved. Our editorial policy explains how examples and corrections are reviewed.
Find the right tool for your image.
Explore the free workspaces, read their methods and inspect your result before sharing.
Explore image tools