A detailed logo may look excellent at 512 pixels and become an unreadable mark in a browser tab. Build the icon around its smallest use, then install and test the different files as a complete set.
- The tested example
- Step 1: Open Favicon Generator with suitable original artwork
- Step 2: Load the practice graphic and compare small previews
- Step 3: Name the practice site and adjust safe padding
- Step 4: Download the package and install its files deliberately
- Check the result
- Troubleshooting
- Background and practical details
- Example sources
TESTED WORKED EXAMPLE
What this session produced
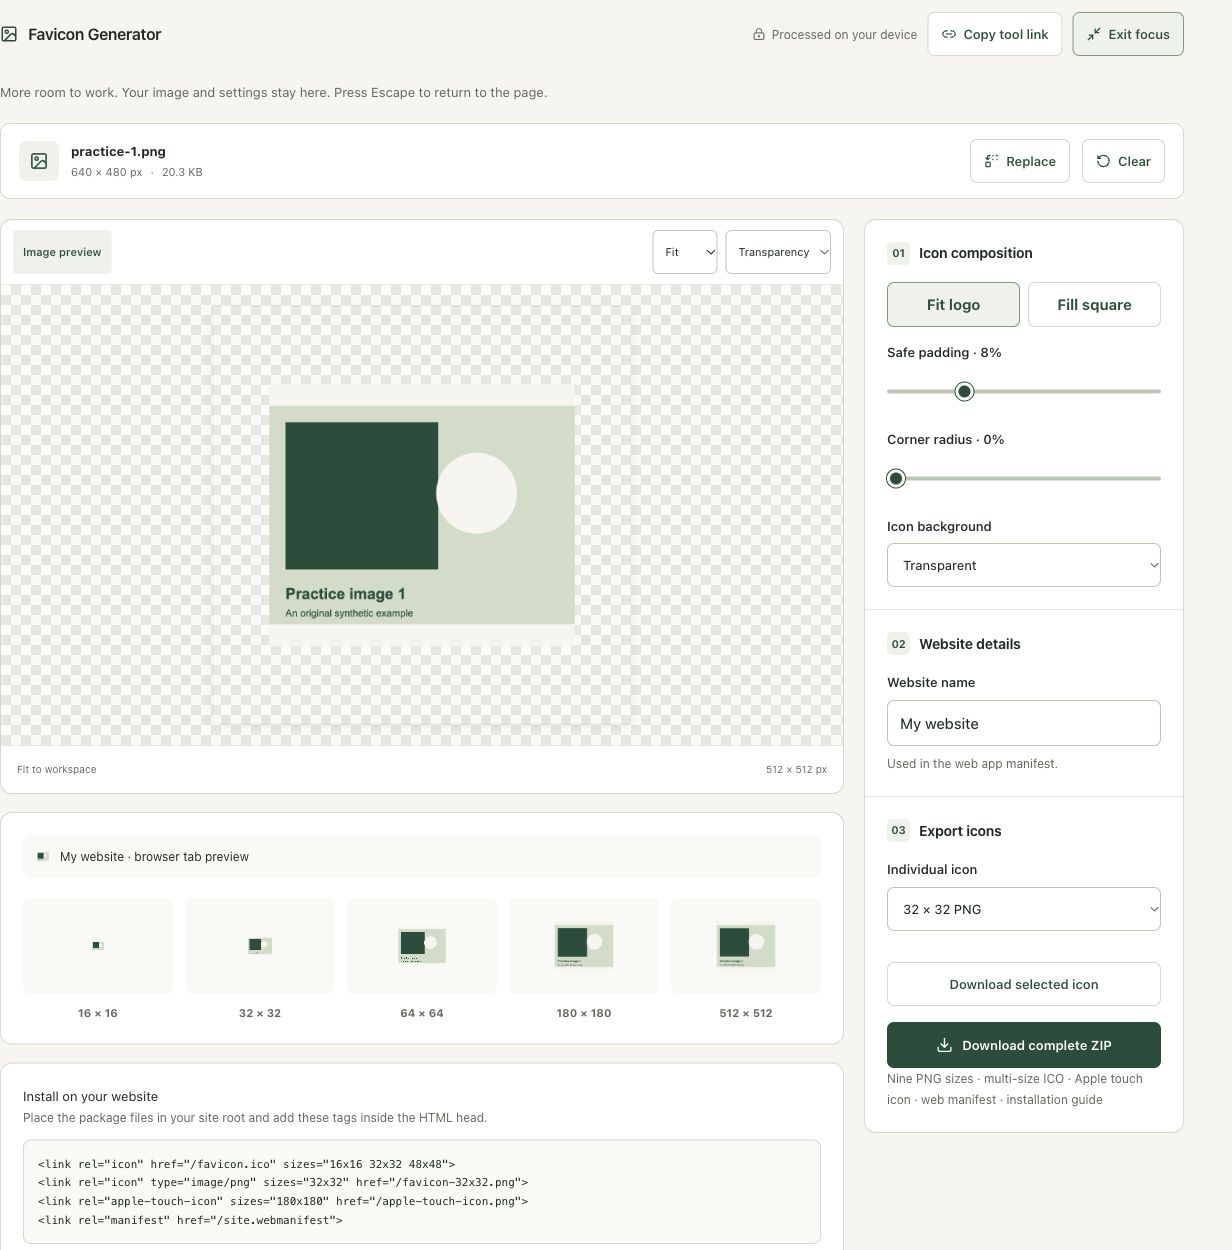
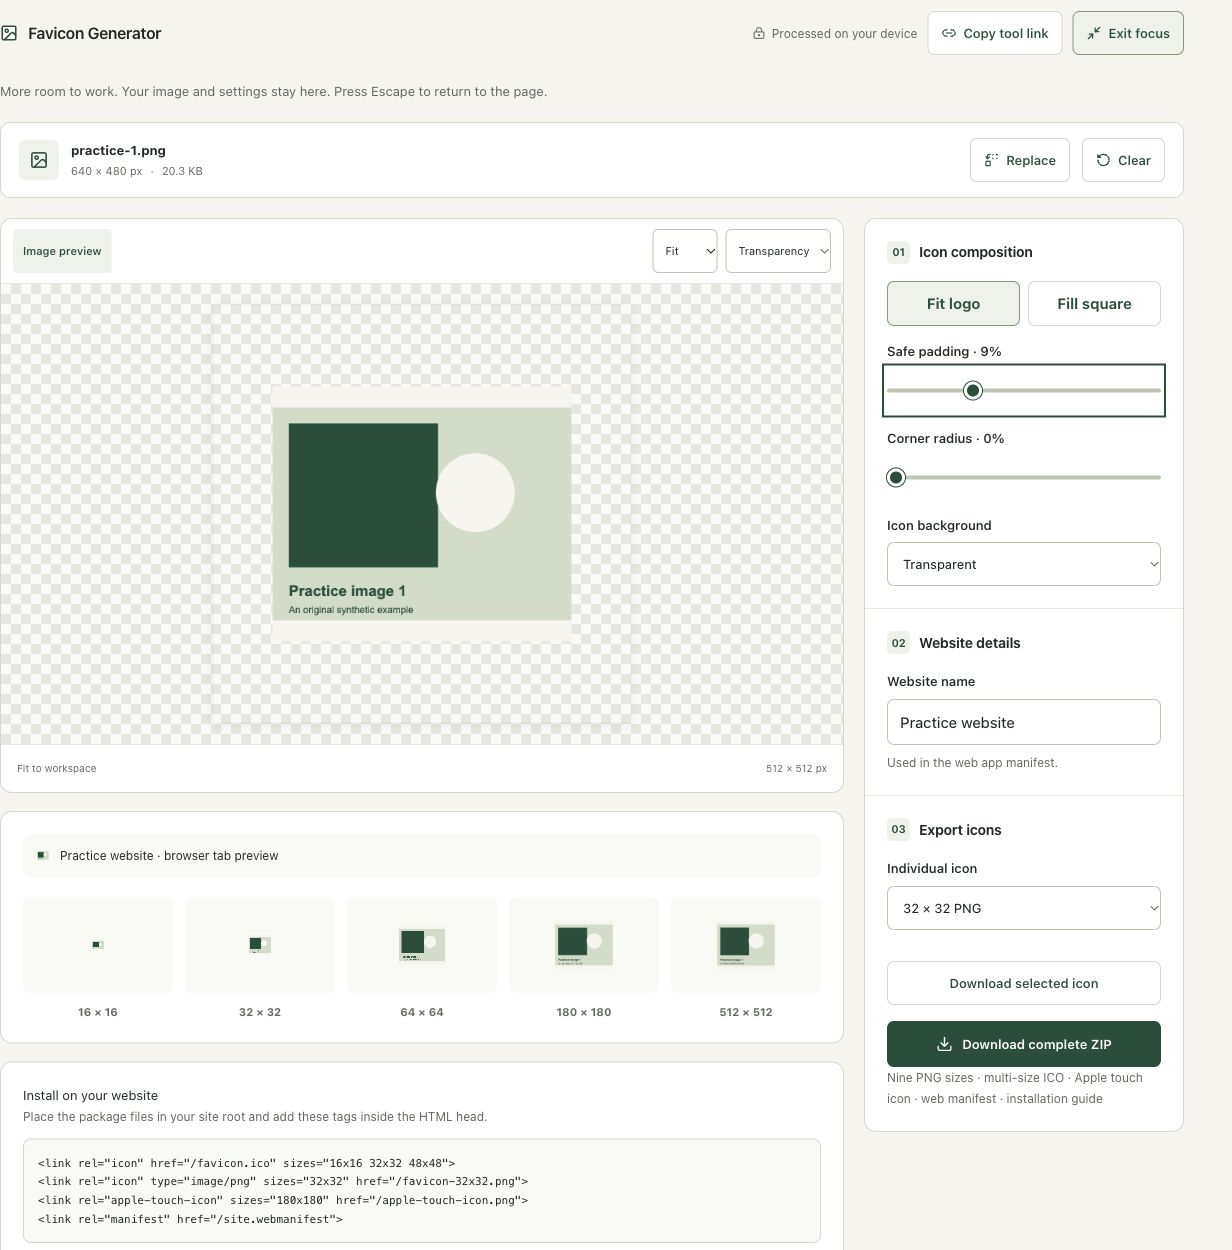
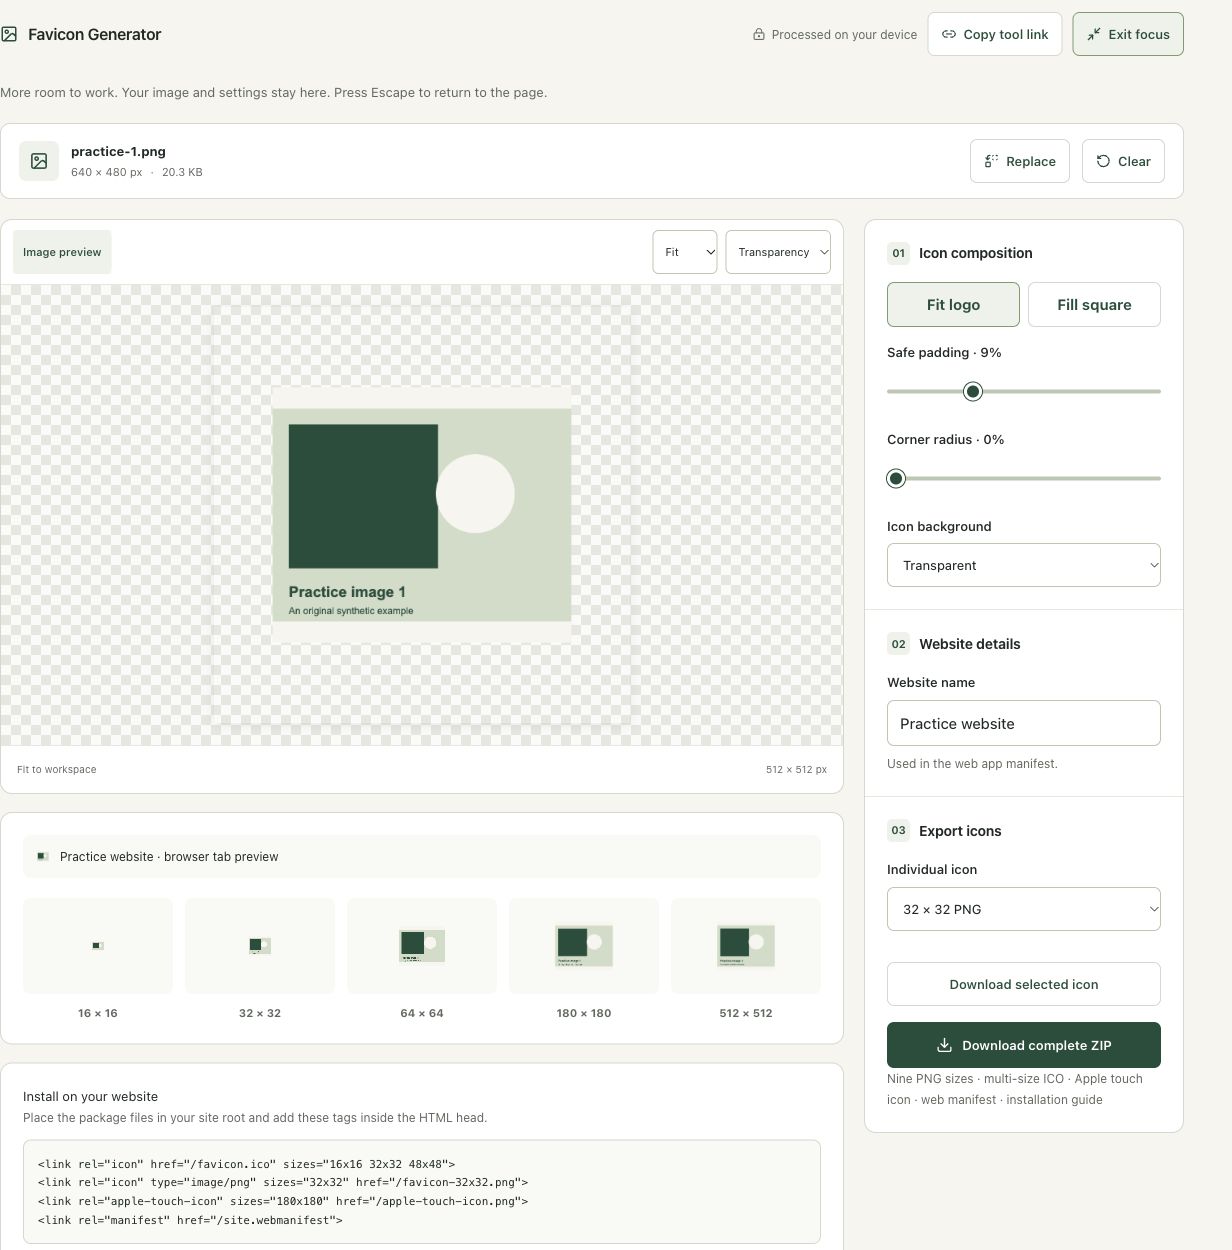
The original practice graphic was composed using Fit logo and 9% safe padding, with Practice website as the manifest name. The complete ZIP includes nine PNG sizes, a multi-size ICO, an Apple touch icon, a manifest and installation guidance.
The screenshots were captured from our working tools on October 6, 2026. Focus workspace is used to give the controls and preview more room. Captures show either the full workspace or the relevant panel; they are not recreated interface illustrations. Sizes and outcomes describe this sample, not a promised result for every image.
Follow the worked example, step by step
Read the settings and the result together. Keep an untouched source when a file is edited, and check the finished output before using it in another application. Each numbered step below includes a real screenshot of the corresponding workspace state. Use the full-size link when a control label is too small on your screen.
Step 1: Open Favicon Generator with suitable original artwork
Open Favicon Generator. Use a simple permitted logo or symbol with enough source resolution. A detailed photograph or long wordmark is usually hard to recognize at 16 pixels. This tutorial uses original synthetic practice artwork and makes no ownership claim over a stock photograph. Keep the editable brand source for future icon revisions.
Step 2: Load the practice graphic and compare small previews
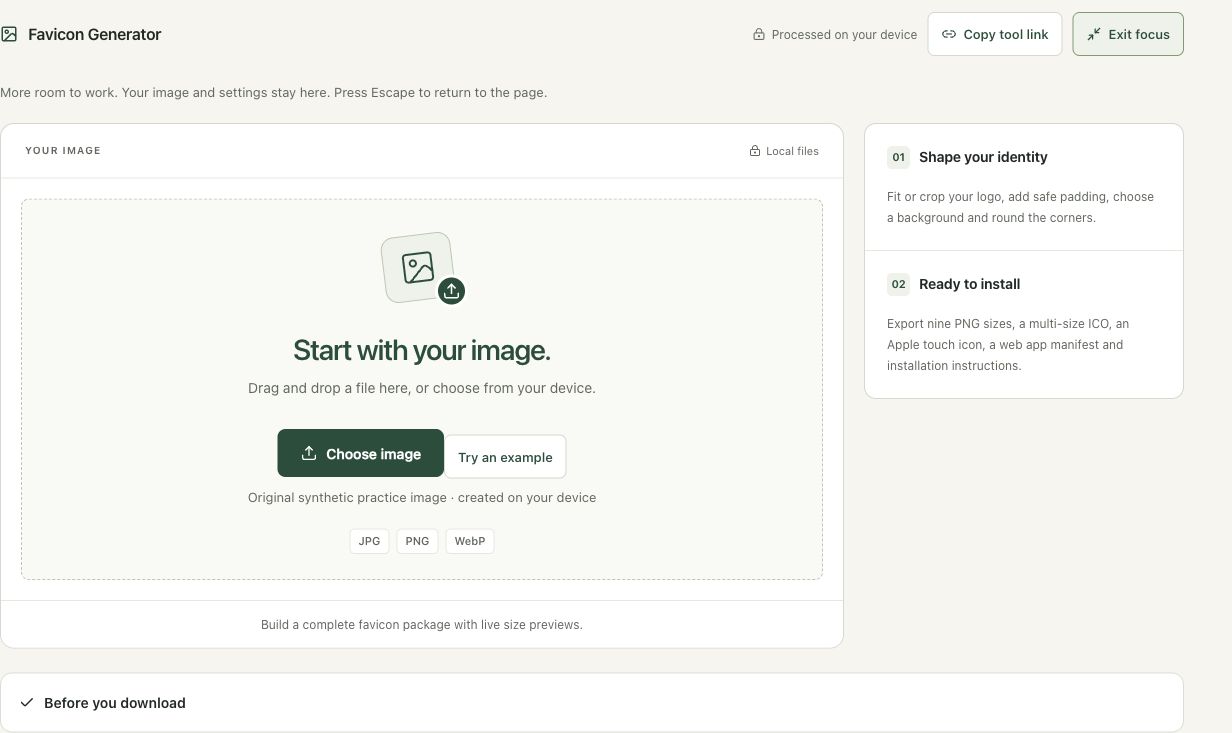
Choose Try an example. Inspect the browser-tab preview and the 16, 32, 64, 180 and 512-pixel samples. A readable large square can still become an indistinct mark in a browser tab. Fit logo retains the full source with space where its proportions differ from the square; Fill square can crop source content.
Step 3: Name the practice site and adjust safe padding
Enter Practice website in Website name and set safe padding to 9%. Keep Fit logo and the transparent background for this example. The website name is used in the manifest, while padding changes the composition of the icon images. Review the smallest previews again after changing it: excessive padding can make the symbol too small to recognize.
Step 4: Download the package and install its files deliberately
Choose Download complete ZIP. Extract the files and follow the installation snippet shown in the workspace, adjusting paths for your site. Review the supplied manifest and installation guide before adding them. Confirm that the icon URLs load publicly and that the browser actually requests the updated files. Generating the archive does not install it or make a site an app automatically.
Check the result before using it
Inspect the 16- and 32-pixel previews before judging the large icon. Install paths must match the files on the actual site. The package is an asset set, not an automatically installed website configuration or a complete progressive web app.
If the result is not what you expected
Thin lines and long text can disappear at tab-icon size. Browser favicon caching can hide an update; check the requested file and a fresh page context. Use your own permitted logo, not a Pexels photograph as a trademark or business logo.
Background and practical details
Simplify before exporting
Start with a recognizable symbol, a bold initial or a simplified part of your identity. A full wordmark often has too many small details for a tab icon. Thin lines, pale outlines and tiny internal gaps can disappear after resizing. Keep the full logo for larger uses and create an icon composition that remains recognizable at a glance.
Use an original graphic you have rights to use. A high-resolution PNG is a practical input when the design needs transparency. JPG is suitable for an opaque source, but it cannot contain transparent areas. If your source is SVG, first use SVG to PNG at a suitable square size and check the raster result.
Corner radius changes the exported artwork. It is not a promise that every platform will display that exact silhouette. Fit, padding and background interact: a wide logo with generous padding can become very small inside the square. Inspect the 16 and 32 pixel previews after each substantial change.
Understand the package
The complete ZIP contains nine PNG sizes: 16, 32, 48, 64, 128, 180, 192, 256 and 512 pixels. The 180 pixel file is named apple-touch-icon.png. It also includes a multi-size favicon.ico containing 16, 32 and 48 pixel entries, a site.webmanifest and installation instructions. Individual exports are available if you only need one file.
The MDN manifest icons reference explains how icon paths, types and sizes describe available assets. The manifest’s icons support installed-app contexts. A manifest and icon files alone do not make a complete offline application, and this package is not a dedicated maskable-icon design workflow.
Install with the correct paths
Extract the ZIP before installing it. The workspace’s snippet assumes the package files are at the website root. Copy the files to that location and add the supplied link tags to the HTML head, or adapt both the tags and the manifest icon paths to your actual asset folder. Uploading only the ZIP will not make the contained icons available at those paths.
If your site already declares icons, review the existing tags before adding another set. Conflicting paths can make debugging confusing. A site served from a subdirectory may also need changes to the generated manifest’s start URL. Review the manifest as a starting configuration for your site rather than blindly replacing an established application manifest.
Test the actual deployed files
Open each declared icon URL directly and confirm it returns the intended image. Confirm that site.webmanifest is accessible and its icon paths resolve. Check the browser tab and a mobile home-screen shortcut where supported. Inspect a light and dark interface if your icon uses transparency; a pale mark can disappear on a pale surface.
Browsers can retain older icon files in their caches. Before assuming the new design failed, verify the URL and compare the downloaded asset with the current preview. An updated filename can help distinguish versions when your site’s deployment process supports it. Keep the previous package until the new paths and appearance have been checked.
Keep your original files and check the actual download. If an instruction no longer matches the workspace, send us the page URL and a description. Our editorial policy explains how we document examples and limitations.
Example sources and screenshot notes
This example uses original practice artwork. It does not use a stock photograph as a trademark or business logo.
The controls shown are from the version tested for this guide. A later interface update or a different source can change a result. Compare the displayed format, dimensions and status with the instructions, and report a mismatch with the article URL and the setting involved. Our editorial policy explains how examples and corrections are reviewed.
Find the right tool for your image.
Explore the free workspaces, read their methods and inspect your result before sharing.
Explore image tools