A border gives an image breathing room by enlarging its canvas. Because padding is added on both sides of each dimension, a small border can change the final width and height more than expected.
- The tested example
- Step 1: Open Add Border and calculate the intended outer size
- Step 2: Load the photo and inspect the initial colored border
- Step 3: Choose 40 pixels and enable transparent padding
- Step 4: Export the PNG and review it on another background
- Check the result
- Troubleshooting
- Background and practical details
- Example sources
TESTED WORKED EXAMPLE
What this session produced
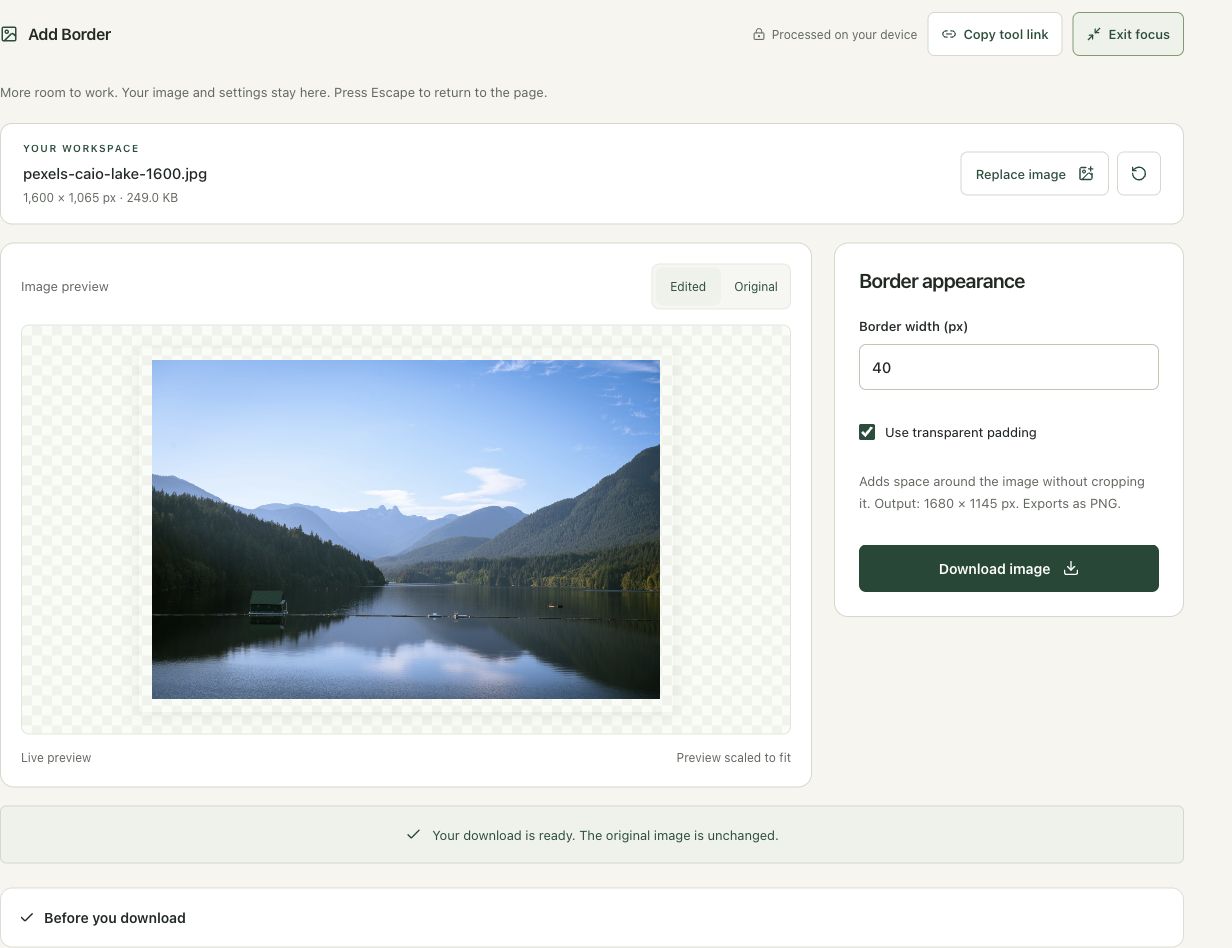
A 40-pixel transparent border around the 1,600 × 1,065 photograph produced a 1,680 × 1,145 PNG. Each dimension increases by twice the border width because space is added on both sides.
The screenshots were captured from our working tools on October 6, 2026. Focus workspace is used to give the controls and preview more room. Captures show either the full workspace or the relevant panel; they are not recreated interface illustrations. Sizes and outcomes describe this sample, not a promised result for every image.
Follow the worked example, step by step
Read the settings and the result together. Keep an untouched source when a file is edited, and check the finished output before using it in another application. Each numbered step below includes a real screenshot of the corresponding workspace state. Use the full-size link when a control label is too small on your screen.
Step 1: Open Add Border and calculate the intended outer size
Open Add Border when you need space around an image. Identify whether that space should be a visible color or transparent padding. Adding 40 pixels to every edge adds 80 to both width and height. This workflow expands the canvas rather than drawing over the source edges or cropping the photograph.
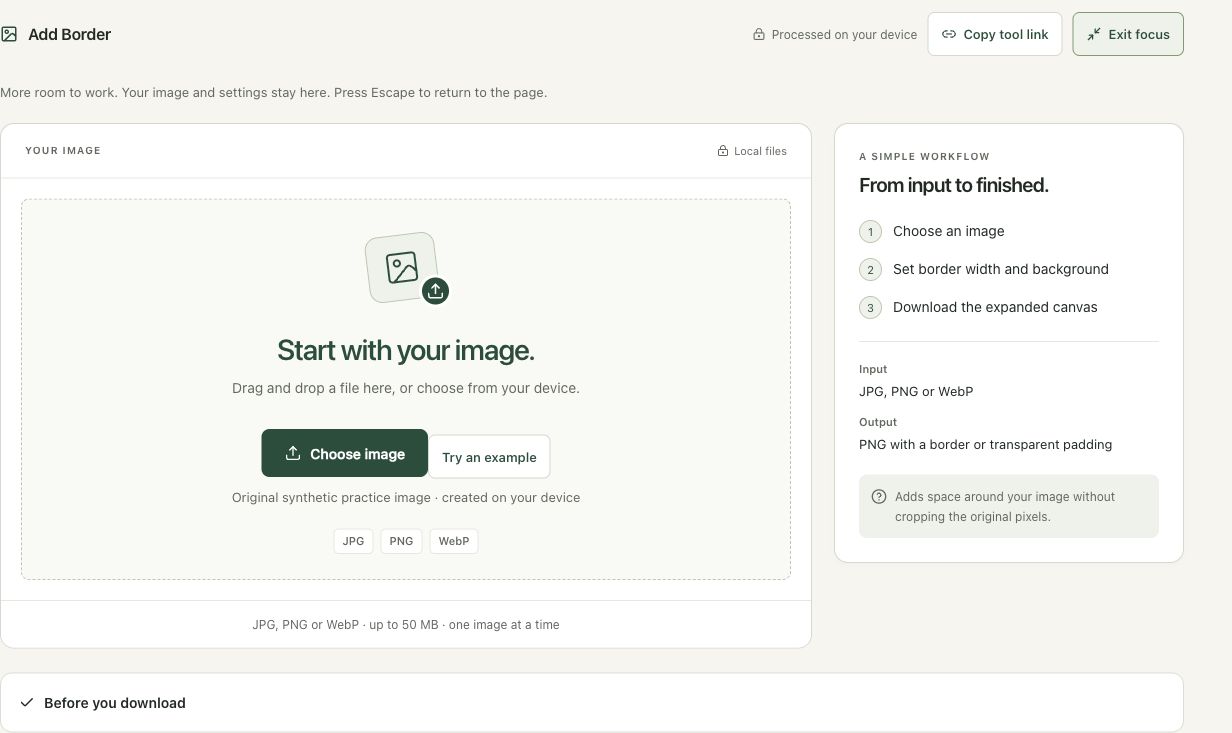
Step 2: Load the photo and inspect the initial colored border
Choose the lake image. At the initial 32-pixel border, the workspace reports 1,664 × 1,129. Compare this with the original 1,600 × 1,065 dimensions. The visible backing color helps show where the additional canvas begins. Check whether the original composition remains intact before selecting your intended padding style.
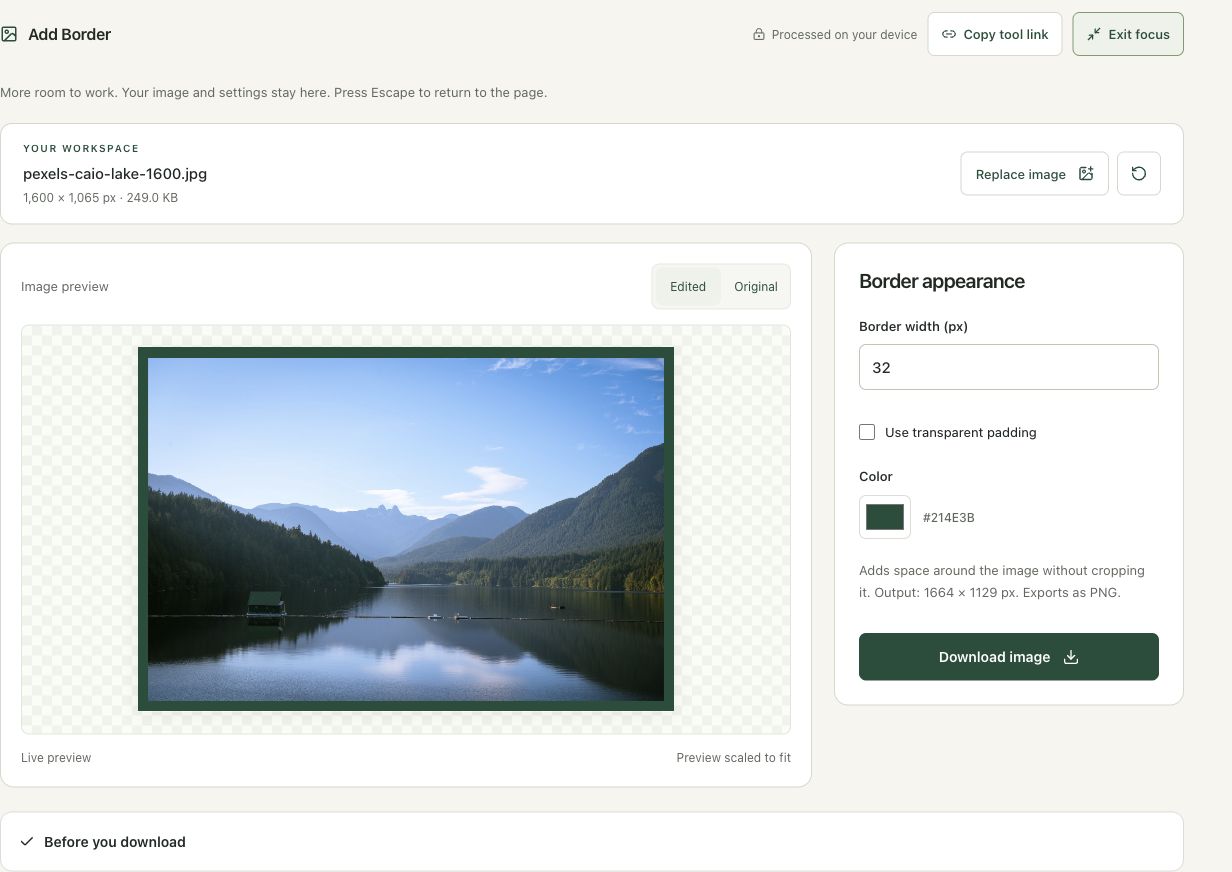
Step 3: Choose 40 pixels and enable transparent padding
Enter 40 in Border width and select Use transparent padding. The reported output becomes 1,680 × 1,145. The color picker no longer controls the transparent region. Read the dimensions before exporting, especially when a design system expects a fixed outer size. A border width is a source-pixel value, not the thickness shown in the fitted preview.
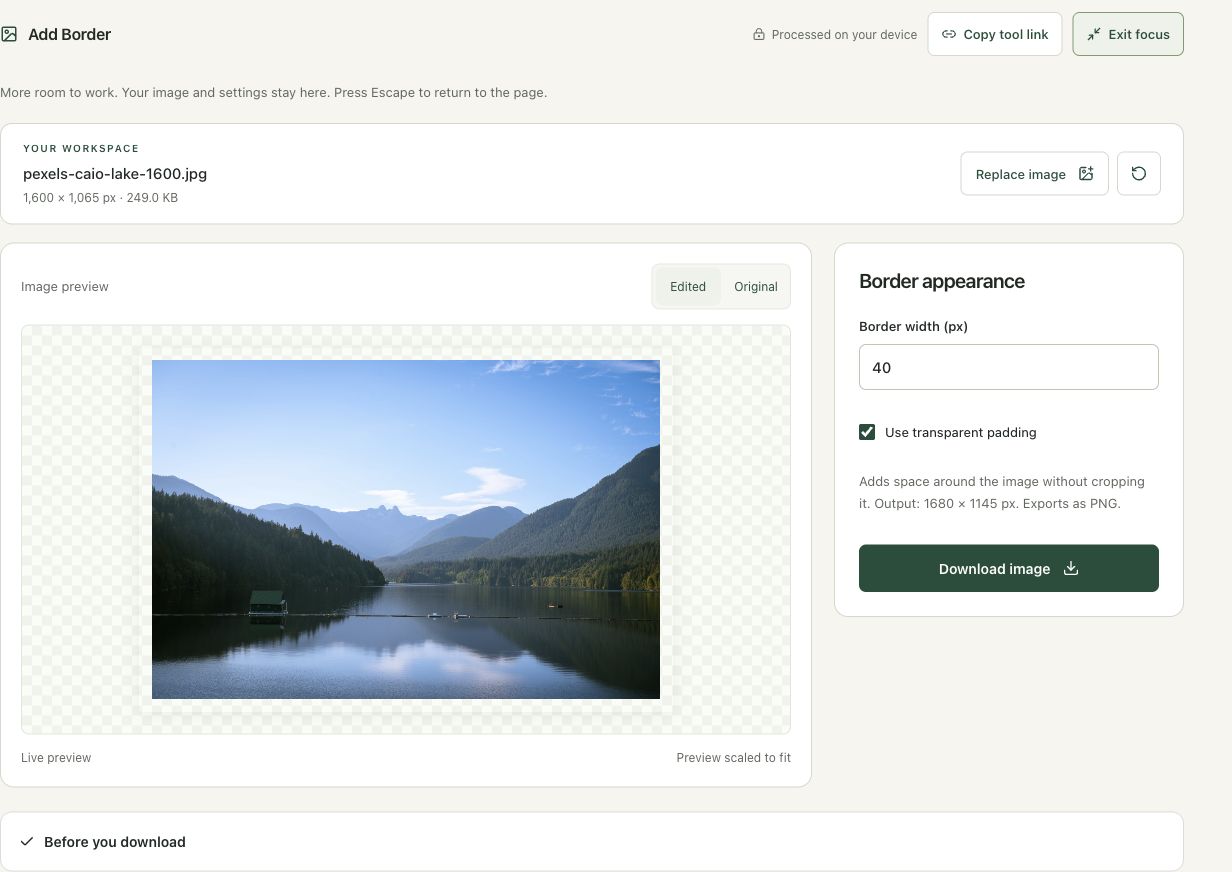
Step 4: Export the PNG and review it on another background
Choose Download image and wait for the ready status. Open the PNG on a contrasting background and verify all four sides. Transparency may appear white in an ordinary viewer, so use the alpha checker if needed. Keep the original JPG when a future design needs a different border or a smaller photographic delivery file.
Check the result before using it
Check the final dimensions, border opacity and the unchanged composition of the original region. Padding increases the canvas; it does not reduce the source to fit inside the old dimensions. PNG is required to retain transparent added space.
If the result is not what you expected
An upload limit may be affected by the larger canvas and PNG encoding. A solid border and transparent padding look different on a destination background. If exact outer dimensions are required, calculate the border before exporting.
Background and practical details
Decide whether you need outside space
A border can separate a photo from a page background, give a logo room or create a simple frame. Transparent padding gives the same extra space without painting a visible frame. Both enlarge the image canvas rather than cropping the original or squeezing it into a smaller rectangle.
Open Add Border with a JPG, PNG or WebP. If the receiving form demands an exact final width and height, calculate the padded size before exporting. A correctly framed picture can still be rejected because its new dimensions exceed that requirement.
Calculate the new dimensions
A border of b pixels adds b on the left and b on the right, and the same on the top and bottom. Final width is original width + 2b; final height is original height + 2b. An 800 × 600 image with a 20-pixel border becomes 840 × 640.
The source remains centered inside that larger canvas. The outer aspect ratio changes unless the original was square or the border was zero. In the example, 800:600 is 4:3, while 840:640 simplifies to 21:16. That can matter when a destination validates the outer shape as well as the dimensions.
A dark or white frame is useful only if it fits the intended composition. Compare it with the destination background. A white border can blend into a white document, while transparent padding simply reveals that document underneath. The two can look similar on one surface and different on another.
Interpret transparent areas correctly
The checkerboard preview indicates transparent regions in the editor. It is not meant to become a printed checkerboard in the PNG. Place the result on another color to test it, or inspect it with Transparency Checker when an import appears to show an unexpected rectangle.
Adding a solid border does not automatically flatten transparent areas inside the source. The tool paints the outside frame and retains the original’s decoded transparency in the central region. Choose a separate composition or conversion workflow if your goal is a uniform solid background behind the entire image.
Keep the size within export limits
The border range is 0 to 1,000 whole pixels, but the completed canvas must also fit the image renderer’s limits: up to 8,192 pixels per side and 32 megapixels total. A source already close to a limit may not have room for a large frame. Reduce the requested border or prepare an appropriately smaller working copy.
PNG export retains the rendered pixel grid. MDN’s drawImage reference describes drawing an image into a destination canvas. Here the destination is larger, and the source is placed with the chosen outside offset rather than scaled to fit.
Check the purpose of the padding
Open the downloaded file and verify that every original edge remains present. Check the final dimensions against the receiving requirement and inspect transparency where relevant. Use Resize Image if you instead need the same composition at smaller dimensions. Use Social Image Formatter when the goal is a particular canvas shape with fitted content rather than equal padding on all sides.
Keep an untouched source and inspect the downloaded result. If an instruction differs from the workspace, send the page URL and the setting involved. Our editorial policy explains how we review examples and limitations.
Example sources and screenshot notes
The example uses a resized 1,600 × 1,065 copy of Lake surrounded by green mountains by Caio.
These photographs are used under the Pexels license. They are licensed images, not claimed as public domain. The photographer links identify the original sources; resizing and example processing were performed for this tutorial.
The controls shown are from the version tested for this guide. A later interface update or a different source can change a result. Compare the displayed format, dimensions and status with the instructions, and report a mismatch with the article URL and the setting involved. Our editorial policy explains how examples and corrections are reviewed.
Find the right tool for your image.
Explore the free workspaces, read their methods and inspect your result before sharing.
Explore image tools