A vector logo can look sharp at many sizes, but a PNG contains a fixed grid of pixels. Choose the output for its intended use and review both the artwork and its background before exporting.
- The tested example
- Step 1: Open the SVG converter and read its supported scope
- Step 2: Load the original vector practice graphic
- Step 3: Set a 960-pixel width and keep transparency
- Step 4: Download and inspect the completed PNG
- Check the result
- Troubleshooting
- Background and practical details
- Example sources
TESTED WORKED EXAMPLE
What this session produced
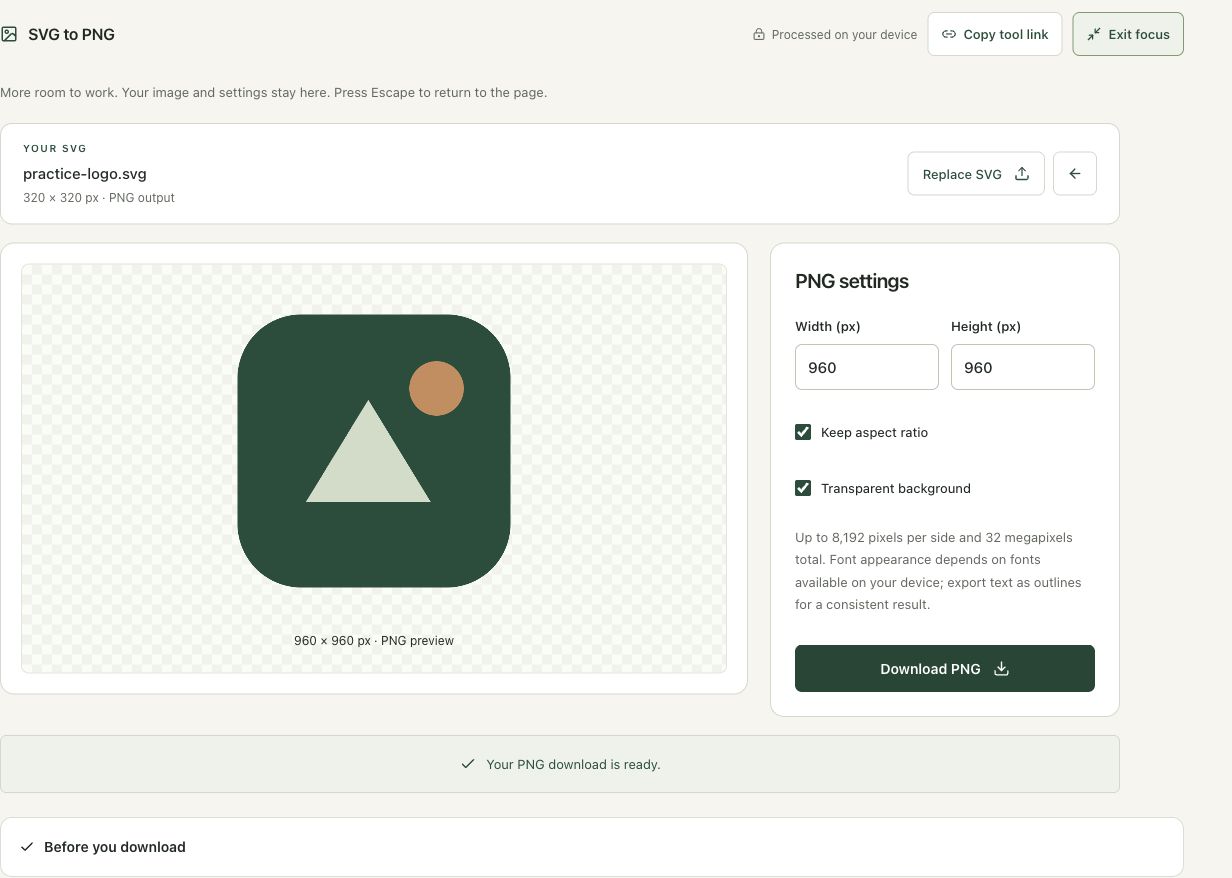
The original self-contained practice SVG was 320 × 320. With proportions locked and a width of 960, the PNG output preview and downloaded export were 960 × 960 with transparency enabled.
The screenshots were captured from our working tools on October 6, 2026. Focus workspace is used to give the controls and preview more room. Captures show either the full workspace or the relevant panel; they are not recreated interface illustrations. Sizes and outcomes describe this sample, not a promised result for every image.
Follow the worked example, step by step
Read the settings and the result together. Keep an untouched source when a file is edited, and check the finished output before using it in another application. Each numbered step below includes a real screenshot of the corresponding workspace state. Use the full-size link when a control label is too small on your screen.
Step 1: Open the SVG converter and read its supported scope
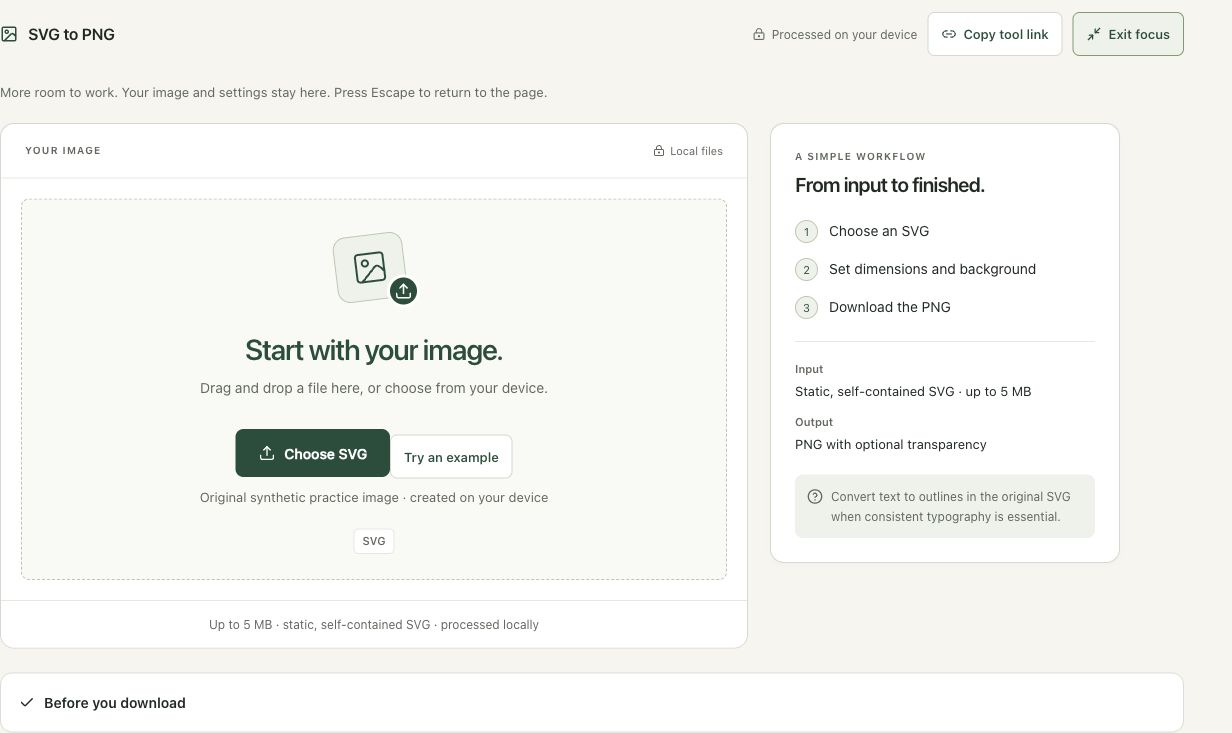
Open SVG to PNG. Use a static, self-contained SVG rather than a webpage or a graphic that depends on remote fonts and images. This converter creates a raster delivery file; it does not edit the original drawing. Keep the source so you can make future design changes without trying to trace them from the PNG.
Step 2: Load the original vector practice graphic
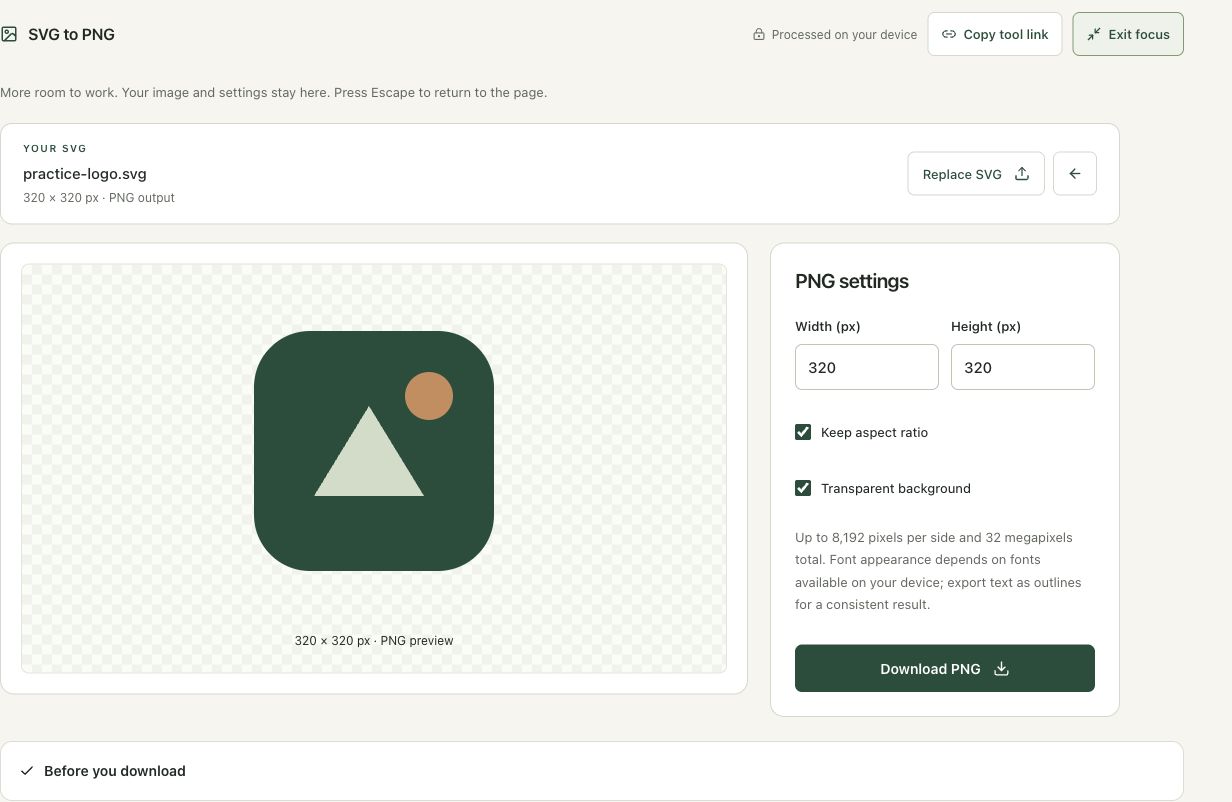
Choose Try an example to open the site’s 320 × 320 practice SVG. It is original synthetic artwork. Check the preview for expected proportions and margins. A vector document can contain a larger internal coordinate rectangle than the visible artwork, so a square viewport does not prove that the drawing fills every pixel of the eventual PNG.
Step 3: Set a 960-pixel width and keep transparency
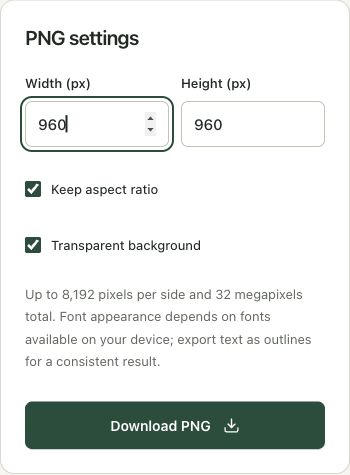
Enter 960 in Width and keep Keep aspect ratio checked. The matching height becomes 960 for this square source. Leave Transparent background checked. These values describe the exported raster grid, not the eventual display size on a website. For another source, choose useful dimensions rather than exporting the largest image allowed by the converter.
Step 4: Download and inspect the completed PNG
Choose Download PNG and wait for Your PNG download is ready. Inspect the downloaded file at its intended display size as well as actual size. Thin strokes can look different after downscaling in a destination. Confirm that transparency survives where you place the asset; a white viewer background can conceal alpha without removing it from the file.
Check the result before using it
Inspect text, thin strokes, blank margins and transparent corners in the PNG. Keep the SVG as the editable source. A larger raster export cannot improve a blurry photograph embedded inside an SVG.
If the result is not what you expected
External resources, scripts and unsupported SVG features are rejected. Use a static self-contained export. If lettering changes between devices, outline the text in the design application. Per-side and total-pixel limits both apply.
Background and practical details
Choose dimensions before downloading
Suppose a logo will occupy a 300 × 150 area on a web page. A 600 × 300 PNG provides twice that pixel density in each direction when displayed at the intended size. That is a useful option for a sharper raster asset, not a guarantee that every device or website will use it correctly. The destination’s layout still controls how large the image appears.
Do not export the largest possible image automatically. More pixels can increase file size and browser memory use. Choose dimensions that fit the actual task. Keep the SVG as the editable source and make separate PNG copies for destinations that require a raster file.
Use a self-contained source
Open SVG to PNG and choose the SVG. The workspace accepts static, self-contained SVG files up to 5 MB. It rejects scripts, animation, embedded HTML, document entities and external resources. A rejection does not necessarily mean your original design is broken; it means that the file uses features outside this converter’s supported scope.
Return to the design application and export a simpler copy. Include the artwork in the SVG instead of linking to a remote image. Avoid external font imports. Supported embedded PNG, JPEG or WebP data can be part of the source, but those embedded pictures remain raster images. Increasing the SVG’s output dimensions cannot recover missing detail from them.
The converter allows up to 8,192 pixels per side and 32 megapixels in total. Both conditions apply. For example, 8,000 × 8,000 is below the per-side limit but contains 64 million pixels, so it exceeds the total. Reduce the dimensions if the workspace reports that the requested image is too large.
SVG dimensions can be expressed separately from its internal drawing coordinates. The MDN viewBox reference explains how the drawing’s coordinate rectangle maps to the viewport. Check the preview for unexpected blank margins or clipping rather than assuming that the SVG’s width tells you the exact artwork bounds.
Resolve font differences at the source
Live SVG text depends on fonts available to the rendering device. A replacement font can change letter widths, line breaks and spacing. For a logo where exact letter shapes matter, export the text as outlines from your design application. Keep an editable version with the original text separately so future wording changes remain possible.
Outlining is a design-source operation. The PNG converter does not fetch missing fonts or reconstruct the intended typography. Compare the exported result with the design application, especially around small labels and symbols. A PNG also has no selectable text layer, even when the picture contains words.
Check the final background and edges
A transparent PNG can appear white because its viewer uses a white surface. Use Transparency Checker to inspect the alpha channel when the background is uncertain. Preview the graphic on its actual destination, including a dark background if that is where it will be used.
Do not assume that a PNG is automatically smaller than the SVG. Compare the downloaded bytes and use Compress Image if lossless optimization is helpful. Conversion changes the delivery format; it does not turn a raster picture embedded in the vector source into new vector detail.
Keep your original files and check the actual download. If an instruction no longer matches the workspace, send us the page URL and a description. Our editorial policy explains how we document examples and limitations.
Example sources and screenshot notes
This example uses the original self-contained practice SVG supplied by the tool. Its square drawing is a controlled vector-to-raster example.
The controls shown are from the version tested for this guide. A later interface update or a different source can change a result. Compare the displayed format, dimensions and status with the instructions, and report a mismatch with the article URL and the setting involved. Our editorial policy explains how examples and corrections are reviewed.
Find the right tool for your image.
Explore the free workspaces, read their methods and inspect your result before sharing.
Explore image tools