A contact sheet gives a collection a readable overview. It is useful when a photographer, client or seller needs to identify selections by filename rather than describe one thumbnail in a crowded folder. Plan the paper and labels before building the PDF.
TESTED WORKED EXAMPLE
What this session produced
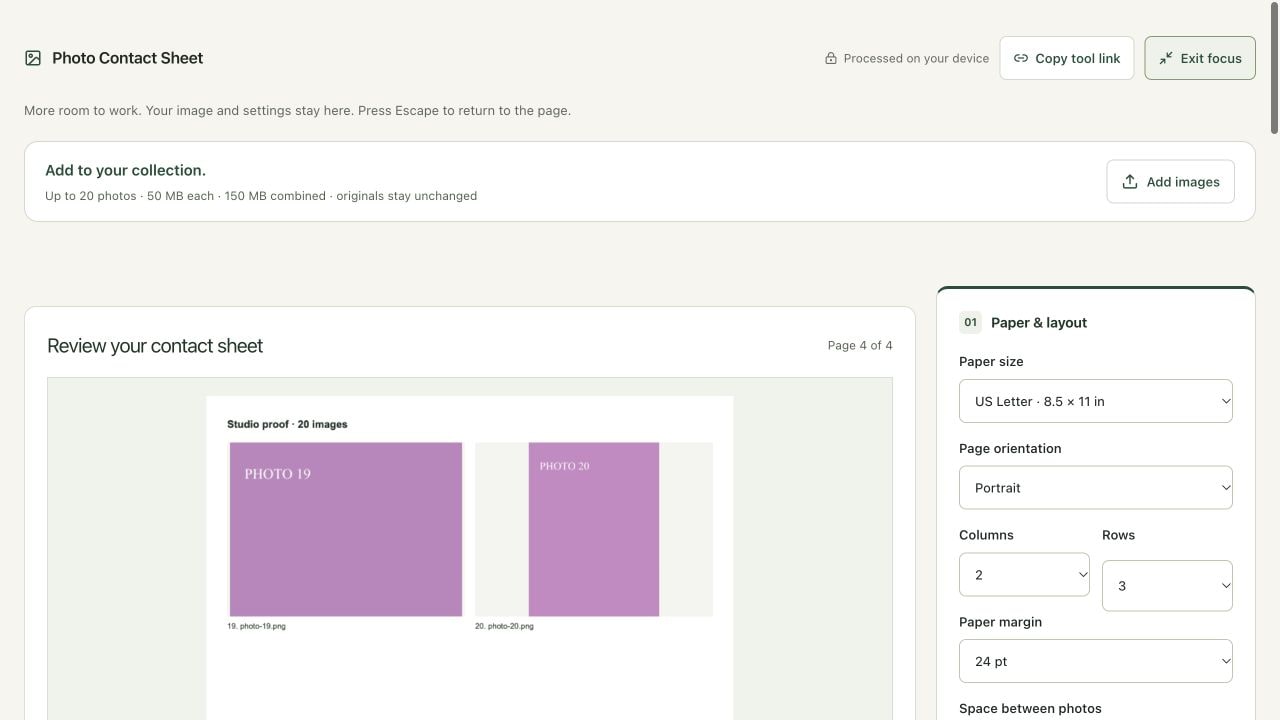
Twenty numbered synthetic PNG images, alternating 640 × 480 and 480 × 640 pixels, produced four US Letter portrait pages in a two-column, three-row grid. The first three pages contain six images each; page four contains images 19 and 20. Filename labels stayed in the displayed order, and complete frames fitted without cropping.
The screenshots were captured from the working local tools on October 7, 2026. Focus workspace gives the controls and preview more room. Each image shows the relevant visible workspace state; these are real captures, not recreated interface illustrations. Results describe these samples and settings rather than a promised outcome for every file.
Follow the worked example
Step 1: Open Contact Sheet and identify the paper requirement
Open Photo Contact Sheet and use Focus workspace if you want a larger editing area. Decide whether the recipient will print on US Letter or A4. This session uses US Letter portrait. The workspace accepts a collection of supported JPG, PNG and WebP images, rather than a finished PDF. Keep the source files in their original folder and use only the images needed for the review. Try an example supplies three practice images if you want a smaller first run.
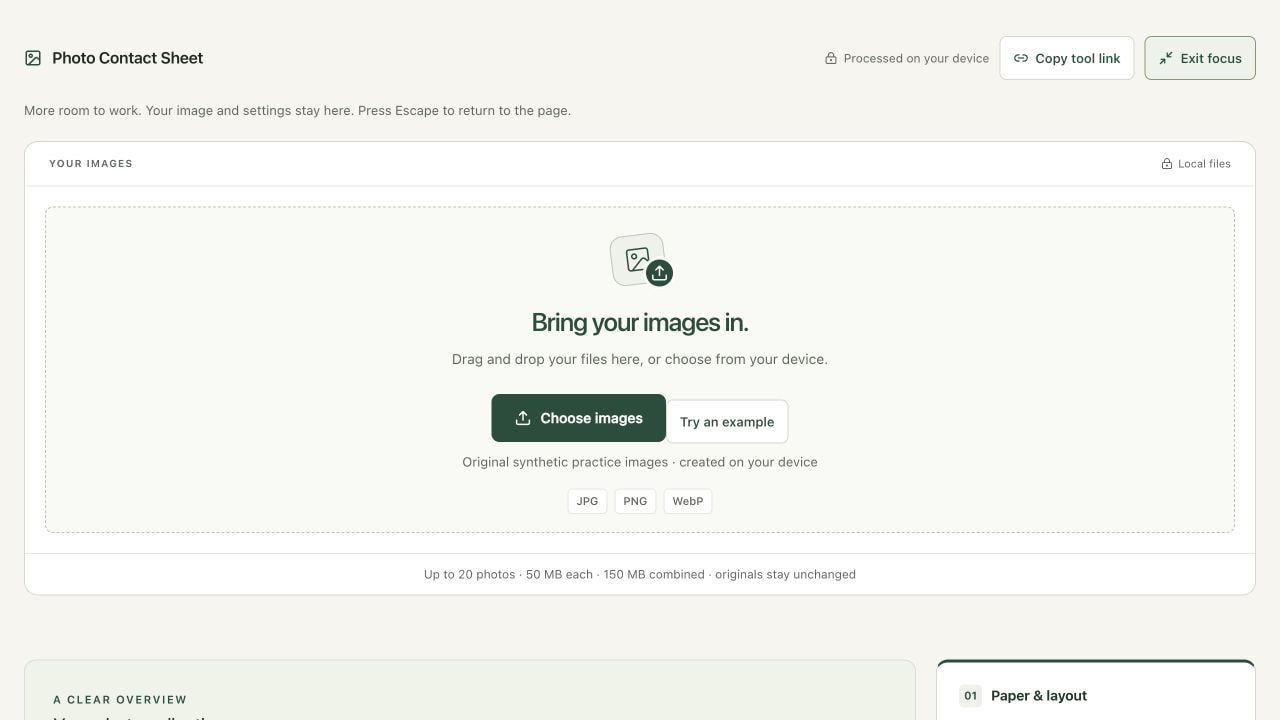
Step 2: Load the collection and check its sequence
Download the twenty-image practice ZIP from Example sources below, extract it, and add its numbered PNGs to the workspace. You can also follow the method with your own collection. Read the displayed list. Landscape and portrait fixtures alternate; filenames run from photo-01.png to photo-20.png. Before changing the grid, the default three-column, four-row layout plans two pages. Use the earlier/later controls if the sequence differs from your intended order, and remove unintended inputs before creating the PDF. The collection bar changes to Add images once files are loaded.
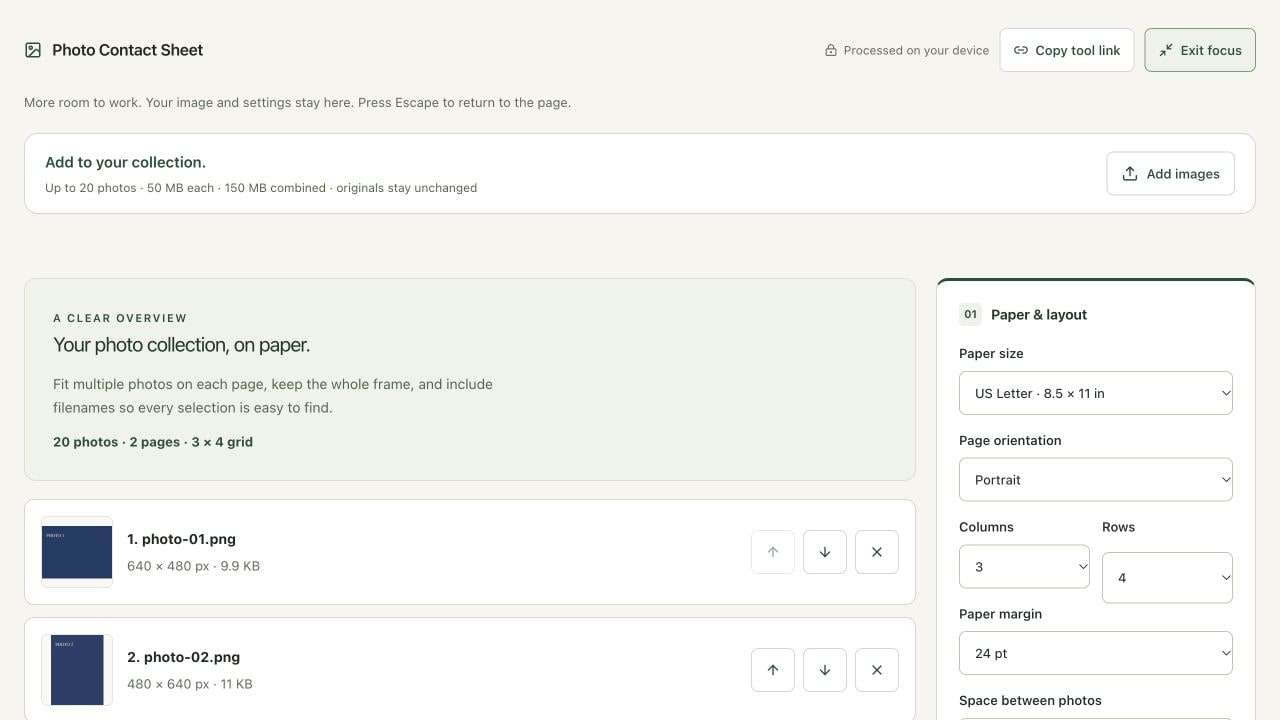
Step 3: Set a two-column, three-row labeled layout
Keep US Letter and Portrait, set Columns to 2 and Rows to 3, and keep the 24 pt paper margin and 12 pt space between photos. Enter Studio proof · 20 images as Sheet title. Leave Include numbers and filenames checked, and use 150 PPI for this example. A six-cell page means twenty images require four pages. Read the updated plan before starting: the layout and filename labels determine whether each selection will be easy to identify.
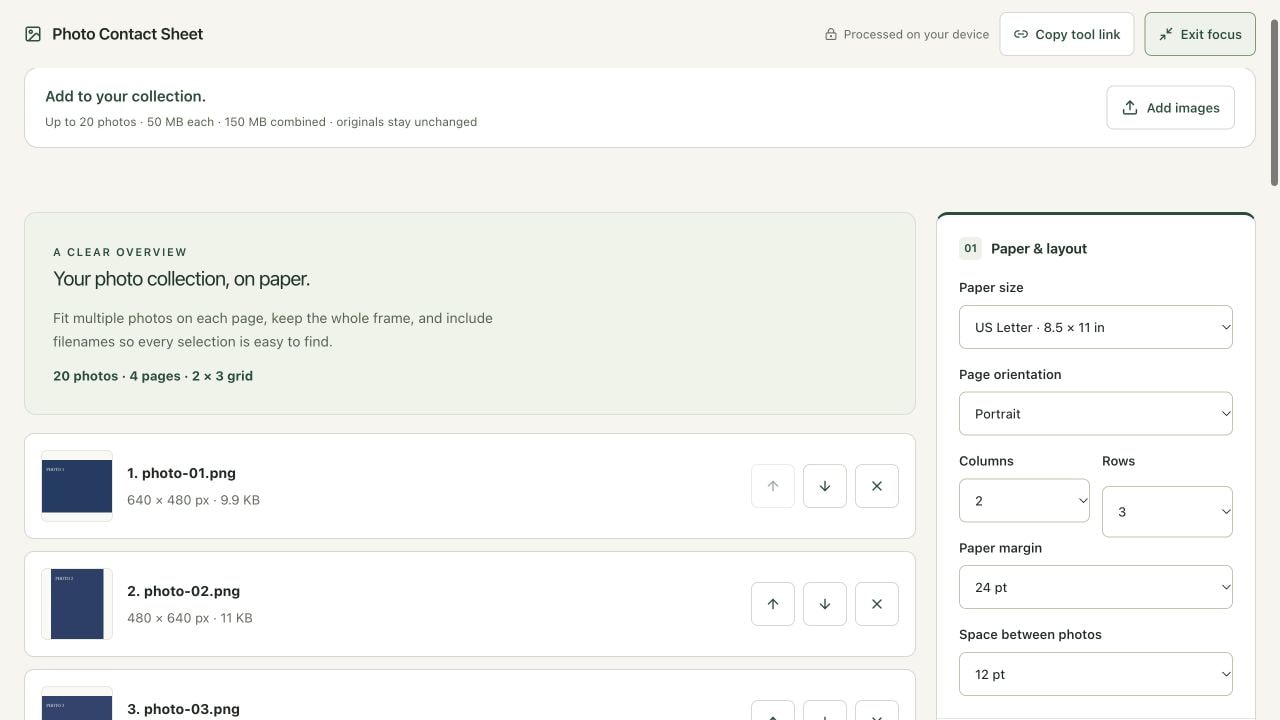
Step 4: Create the PDF and inspect the final page
Choose Create contact sheet and wait for the ready status. Use Next page to inspect pages two, three and four. The final preview shows photo-19.png and photo-20.png with their numbers; unused cells remain empty. Review every earlier page as well, then choose Download PDF in Create & download. Changing the order or layout clears the previous result, so create it again after a revision. Downloading a PDF does not replace the original image files.
Check the result before using it
Open the downloaded PDF and confirm four pages, US Letter portrait, the intended title, and the complete filename order. Check that page four contains only images 19 and 20. Inspect a landscape and a portrait thumbnail for missing edges. Print a test at actual size on matching paper when physical dimensions matter; do not judge print readability only from the reduced browser preview.
If the result is not what you expected
If filenames are too small or shortened, use fewer rows or columns and make the names more concise. If a grid leaves no useful image area, reduce margins or spacing or select fewer cells. If the download is disabled after a change, create the revised sheet again. For a slow or oversized job, try 150 PPI or fewer images. Cancellation keeps the images and layout available for another attempt.
Background and practical details
Choose the right kind of overview
A contact sheet places several labeled thumbnails on each page. It helps people agree on which files to use, but it is not a delivery of the original high-resolution photographs. Use Image to PDF when each image needs its own page. Use Collage Maker for a single designed composition. These outputs solve different problems, even when they start from the same folder.
Adobe Bridge’s contact-sheet documentation describes grids, spacing and filename labels as parts of PDF proof layout. Our workflow uses those familiar ideas with the controls available in this browser workspace. It does not require Bridge and does not reproduce all of Bridge’s output options.
Balance page capacity against readable detail
Columns multiplied by rows gives the number of cells on a full page. Two columns and three rows provide six cells, so twenty images need four pages. Three columns and four rows provide twelve cells, so the same collection needs two pages. This arithmetic does not establish which layout is better: smaller thumbnails may hide the subject detail needed for a selection.
Leave enough room for labels. Increasing paper margins or the space between photos reduces the remaining cell area. The interface supports one through six rows and columns, but it rejects layouts with insufficient useful space. A smaller grid can make a selection sheet easier to review than a dense page with tiny filenames. Test the paper version when someone will mark choices by hand.
Keep complete frames and consistent references
Images fit proportionally within their cells without cropping. Portrait and landscape sources therefore occupy different amounts of the available rectangle. The empty space is intentional: it prevents a reviewer from approving a thumbnail whose important edge detail was removed by a cover crop. If the source itself needs cropping, prepare a separate copy in Crop Image first and use an identifiable filename.
The optional labels include the sequence number and filename. Long names are shortened to fit the available width; Unicode names are drawn into the rendered page. A shortened label may still be ambiguous when several files have the same beginning. Use Batch Rename to create deliberate review copies when that helps, then preserve a mapping to the original collection. Review the displayed order after every addition or removal.
Choose page resolution without promising new detail
The export renders each complete page at 150 or 300 pixels per inch, then embeds the page image in the PDF using PNG encoding. Higher page resolution can give finer printed labels and thumbnail rendering, but it can also increase processing time and file size. It cannot recover detail absent from a low-resolution source. A 300 PPI sheet does not make every thumbnail a 300 PPI original photograph.
As a separate local check, an A4 landscape sheet at 300 PPI rendered a 3,508 × 2,480 page image with the correct A4 PDF dimensions. That check is separate from the four-page US Letter example in these screenshots. Use Pixels to Print when planning physical image sizes. Remember that printer settings such as Fit to page can change the physical scale of an otherwise correctly sized PDF.
Review labels, transparency and the actual PDF
The page has a white background. Transparent source pixels appear against that background rather than a checkerboard. A white subject with transparent surroundings can therefore need extra visual care. Check its silhouette in the source before using the proof to approve an edit. This sheet is a rendered visual overview; it does not add editable photo layers, selectable filename text or a tagged accessibility structure.
The tool accepts up to twenty images, fifty megabytes per file and one hundred fifty megabytes combined. Each decoded input is also limited to thirty-two megapixels and an 8,192-pixel maximum side. Pages are rendered one at a time to limit retained canvas memory, but a browser can still run short of resources. A created PDF must still fit the recipient’s upload rules. Check the downloaded document, not just the ready status.
For a client review, send the proof sheet together with an explicit request to return filenames or numbers. A reply such as “the blue one” can become ambiguous after a reorder. Keep the approved sheet and the original collection long enough to resolve that reference. Read our editorial policy for how worked examples are checked and corrected.
Example sources and screenshot notes
The twenty inputs are original synthetic fixtures created by Smart Image Tools. The PHOTO labels and alternating orientations make order and fit easy to verify. They are not a client collection, stock photographs or a photographic print-quality benchmark.
Download the twenty-image practice collection (ZIP). Extract the archive before selecting the PNGs. These original synthetic fixtures may be used to follow this tutorial.
Keep an untouched source and verify the actual downloaded result. If a control or result differs from this guide, send the article URL and the setting involved. Our editorial policy explains how corrections are reviewed.
Find the right tool for your image.
Explore the free workspaces, read their methods and inspect your result before sharing.
Explore image tools